#12 Bevelled mirror with ornate frame

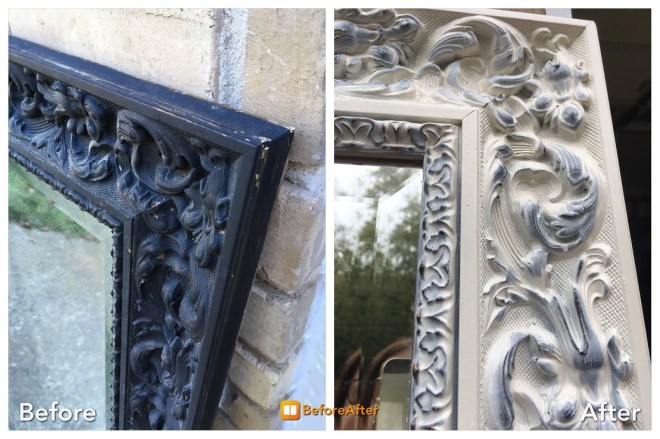
Transformation cost: $7.93

When a friend was discarding this mirror I initially resisted the urge to bring it home. However, I couldn’t stop thinking about the potential of this piece. With a weakened resolve I went back the next day to lift it from her driveway. This mirror originally had a gilded frame that had been painted matte black, perfect for adding depth and layering to the finish!

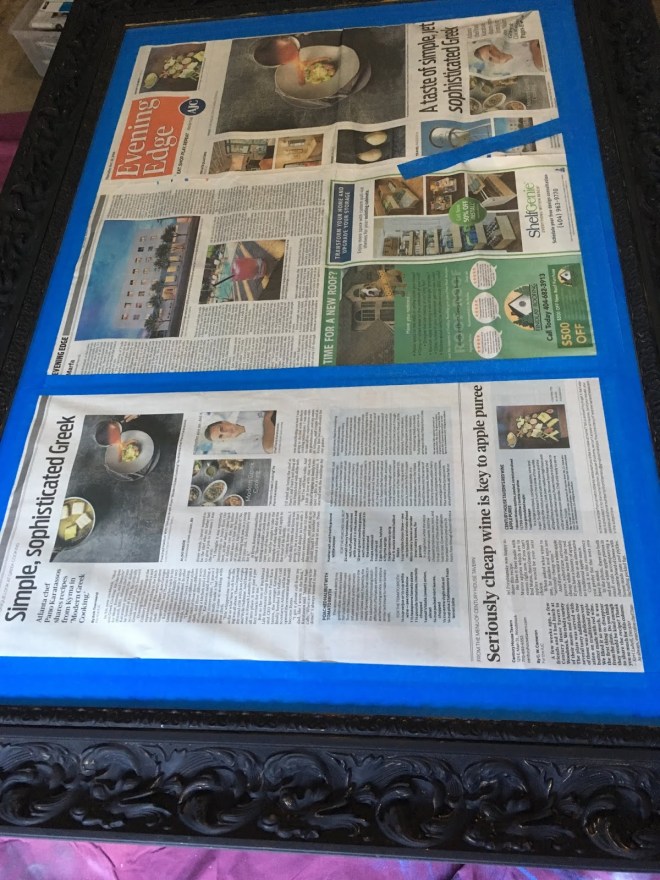
After a thorough cleaning (a toothbrush was a real necessity for this piece) I protected the mirror glass with newspaper

Once clean the first coat I applied was Rust-Oleum Metallic Silver specialty metallic paint

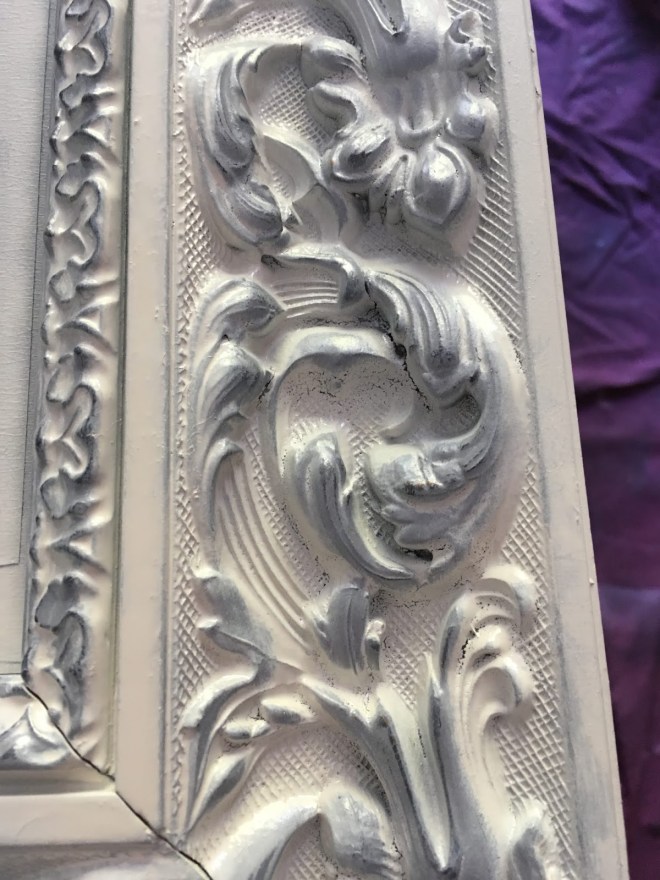
Following the Metallic Silver I began adding coats of Rust-Oleum 2X Ultra Cover in Heirloom White satin finish.
After spraying each coat I used a rag to wipe the paint off the raised parts of the frame.

After 3 coats of Heirloom White (each one followed with wiping) I had the look I wanted: A varied, layered look that (in places) goes all the way down to the original gilded finish.
The finishing touch was to apply some clear wax which I then buffed with a clean, dry rag to give some sheen.

#7 Sash window mirrored organizer

Transformation cost: $24.11

I’ve been dying to experiment with mirror paint so when a neighbor was discarding her old sash windows I knew this was my chance. I also chose this project to see if crackle medium works with spray paints.

First I removed hardware, metal stripping, and one of the two panes of glass. I then gave everything a good clean and, with the remaining glass protected, a light sanding.

I filled screw holes with wood putty and primed the exposed wood. When putty and primer had dried I applied a coat of Rust-Oleum Metallic gold paint to the front of the frame. I then added a piece of pegboard in the empty opening and secured it with some 1/4 square doweling.

Now for my crackle medium/spray paint experiment. I applied crackle medium over the gold paint and let it dry for 1.5 hours. When the top coat of Krylon Chalky Finish in Bonnet Pink went on – Nothing. Zip. Didn’t work. Note to self: Crackling doesn’t work when the top coat is a spray paint. Instead, after a couple of days, I lightly sanded the top coat to expose the gold paint underneath and give it a more aged look. I then gave everything a couple of coats of clear gloss enamel. I know some of you will be thinking “Why put gloss enamel over a chalky finish. Doesn’t that defeat the purpose?” Well, since my purpose was to use up this pink paint more than to have a chalky finish, it’s all good!

Now for my next experiment: My first encounter with mirror paint. Fortunately I read the can before starting or it could have been a disaster. The mirror paint is applied to the BACK of the piece of glass. In all honesty both sides ended up almost equally reflective but it’s obvious to me now that you don’t want the paint on the front where you’re going to clean!

I finished the piece with a sheet of hardboard on the back, to protect the mirror finish,
and a couple of multiple tool rack pegs.

#6 Gold frame

Transformation cost: $20

Sometimes the hardest thing to do is nothing but almost nothing is just what this piece needed. I had endless ideas for how to refinish this frame and what to put in it (chalkboard, cork-board, dry erase board, pegboard etc. etc.) but every time I went back to it I kept thinking the same thing: “It looks great the way it is and whatever I do to it might only make it worse”. In the end I came to the inevitable conclusion that all it needed was a good clean and some mirror glass.

More detail of the frame

#2 Plant pot

Transformation cost: $23.99

It took several passes before I could envision this pot as anything but gaudy. When I did finally pick it up in my truck (this sucker weighs 37 lbs – I was not about to carry it the half a block to my house) it rolled over and spilled dirt all over my truck bed.  However, knowing the value of a heavy, clay pot like this I decided it was worth giving it a second chance.

After a good scrub and a light sanding I applied the base coat of Behr “Outdoor Cafe” in semi-gloss.

I then applied crackle medium to everywhere but the rope detail

I let the crackle medium dry for about 1.5 hours (don’t wait more than 4 hours) before applying the top coat of Behr “Anime” in semi-gloss. This was my first attempt at a crackle finish and I had some reservations after reading accounts of failed attempts. It turned out well though. I think the secret is to apply the top coat as quickly as you can (try to not brush over any one spot more than once. That means loading the brush with quite a lot of paint) then walk away and let the magic happen!

At this point the top coat color I chose was paler and more yellow than I wanted so I applied some Sepia “Tint It” which gave it a slightly darker and more aged look.

I finished the piece with a couple of coats of Krylon Crystal Clear Enamel

Overflowing with a garden mum in Nov 2018

#1 Chandelier

Transformation cost: $15.95

Having admired a chandelier hanging from a tree on a recent garden tour, I didn’t hesitate to snatch up this piece. Apart from a fairly decent layer of grime it was in good shape and didn’t need a lot of work.

I started by discarding the shades, bulbs and shafts that were sheathing the bulb holders.

These bulb holders were supposed to unscrew nicely but the little buggers wouldn’t budge.

Sometimes you just need more WD40 and the help of a friend even more stubborn than yourself.

I have to admit pulling out all the wiring “guts” was oddly satisfying.

Removing the grime and adding candles was the finishing touch