#5 Safari chair

Transformation cost: About $18

Just a day after my last post it snowed, and some of that snow still has not melted; it hasn’t exactly been ideal weather for painting and there’s been little to no progress on any transformations! Fortunately I have this little ace up my sleeve. I do feel slightly like I’m cheating with this post since this transformation took place in May 2015, more than 2 years before I started this blog. However, it is an old favorite of mine and it does meet all the criteria to count towards my goal. I picked up the chair from a neighbor’s trash and transformed it into an end-of-year teacher gift. My inspiration came from the fact that Africa was part of this teacher’s Social Studies curriculum. 

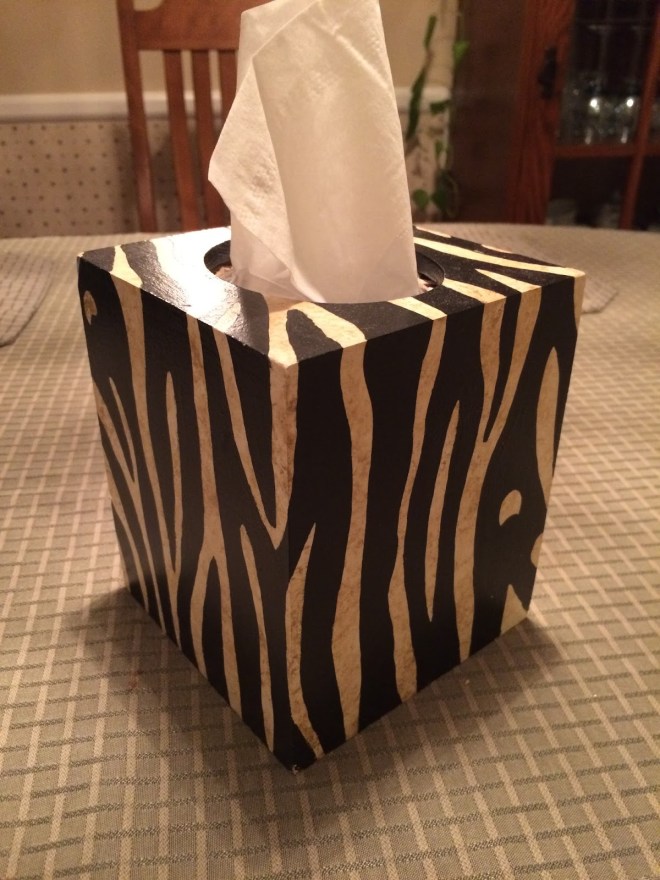
I had recently painted a zebra tissue box cover for my BFF in England
(and then one for myself) so I had some practice painting an animal print.

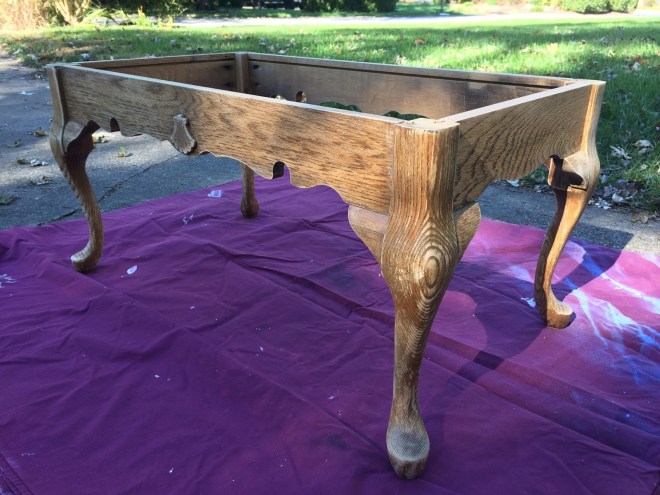
I started by cleaning the chair then lightly sanding it and applying primer.

The animal prints were painted with 4 or 5 different colors of acrylic craft paint.

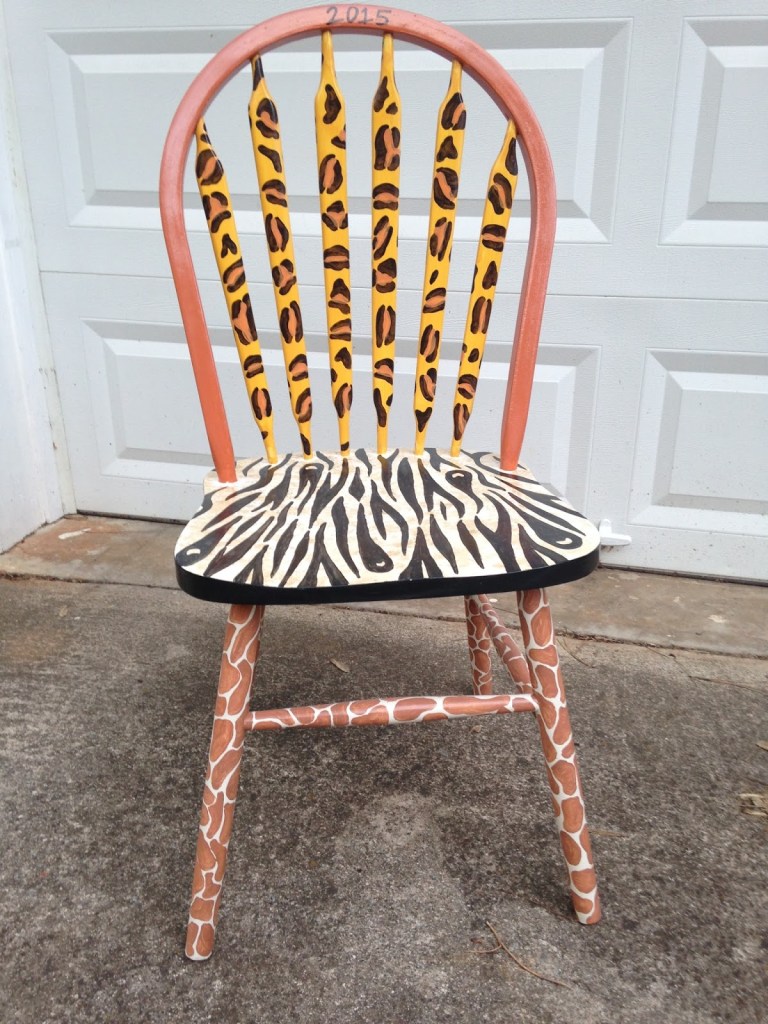
Two coats of polyurethane finished the job.

#4 Wicker/wood storage chest

Transformation cost: $39.10

I’m so glad I chose to make this piece my first bespoke project; I’m sure I would not have upholstered the lid of this trunk had my client not wanted to use it as a window seat as well as a storage chest. The lid of this piece is a non-standard size and shape. A made-to-order seat cushion would have been very expensive so upholstering the lid was an obvious, win-win solution.
The color scheme in her office (white furniture, pale blue walls and hints of grey) was the basis of our paint and fabric choices.

I began by separating the base from the lid. After a good clean I applied 3 coats of
Rust-Oleum 2X ultra cover in semi-gloss white.

For the non-standard shaped lid I cut a piece of 1″ foam to fit then wrapped the lid and foam in batting.

I then covered the lid with our chosen upholstery fabric. By a stroke of luck I found a fabric whose design almost perfectly matched the design of the wood carving on the base.

Since the fabric pattern matched the wood carving so beautifully, the finishing touch was to hand paint the wood carving in colors to match the fabric.

And finally top and bottom were re-united.
Before the wood carving pattern was easily overlooked; now it gets all the attention it deserves!

Doing double duty as a window seat & storage chest in my neighbor’s home office.

#3 Upholstered bench/coffee table

Transformation cost: $50.06

“What gorgeous legs!” was my thought when I saw these at the end of a neighbor’s driveway on trash day. The wood grain was so beautiful I knew I couldn’t bear for these to get tossed in a dump truck.

I began by cutting a piece of fiberboard to fit the shape of the base. I attached 8 pieces of 3/8″ square dowel that would keep it snugly in position.

I covered the fiberboard with 2.5″ thick foam followed by batting followed by my chosen upholstery fabric.

I debated with myself whether or not to paint the legs but, in the end, I chose a Minwax stain & polyurethane (PolyShades Honey in a satin finish) so as not to conceal the beautiful grain. I cleaned and lightly sanded to prepare the legs for 2 coats.

The finished color is a beautiful rich brown. All that was left was to secure the upholstered top using 4 L-brackets.

#2 Plant pot

Transformation cost: $23.99

It took several passes before I could envision this pot as anything but gaudy. When I did finally pick it up in my truck (this sucker weighs 37 lbs – I was not about to carry it the half a block to my house) it rolled over and spilled dirt all over my truck bed.  However, knowing the value of a heavy, clay pot like this I decided it was worth giving it a second chance.

After a good scrub and a light sanding I applied the base coat of Behr “Outdoor Cafe” in semi-gloss.

I then applied crackle medium to everywhere but the rope detail

I let the crackle medium dry for about 1.5 hours (don’t wait more than 4 hours) before applying the top coat of Behr “Anime” in semi-gloss. This was my first attempt at a crackle finish and I had some reservations after reading accounts of failed attempts. It turned out well though. I think the secret is to apply the top coat as quickly as you can (try to not brush over any one spot more than once. That means loading the brush with quite a lot of paint) then walk away and let the magic happen!

At this point the top coat color I chose was paler and more yellow than I wanted so I applied some Sepia “Tint It” which gave it a slightly darker and more aged look.

I finished the piece with a couple of coats of Krylon Crystal Clear Enamel

Overflowing with a garden mum in Nov 2018

#1 Chandelier

Transformation cost: $15.95

Having admired a chandelier hanging from a tree on a recent garden tour, I didn’t hesitate to snatch up this piece. Apart from a fairly decent layer of grime it was in good shape and didn’t need a lot of work.

I started by discarding the shades, bulbs and shafts that were sheathing the bulb holders.

These bulb holders were supposed to unscrew nicely but the little buggers wouldn’t budge.

Sometimes you just need more WD40 and the help of a friend even more stubborn than yourself.

I have to admit pulling out all the wiring “guts” was oddly satisfying.

Removing the grime and adding candles was the finishing touch