This was my second collaborative transformation, and the longest of any. I trash-picked this piece in May 2019, Nuria came on board the following year, and we started work in September 2020. It was finished on October 1, 2022! My coworker, Nuria, is a friend whose style has been honed by years of working for one of the most refined hotel chains in the world. Our combined skills were put to the test on this piece that needed a lot of TLC. The result is charming: a one-of-a-kind piece, loaded with designer touches.
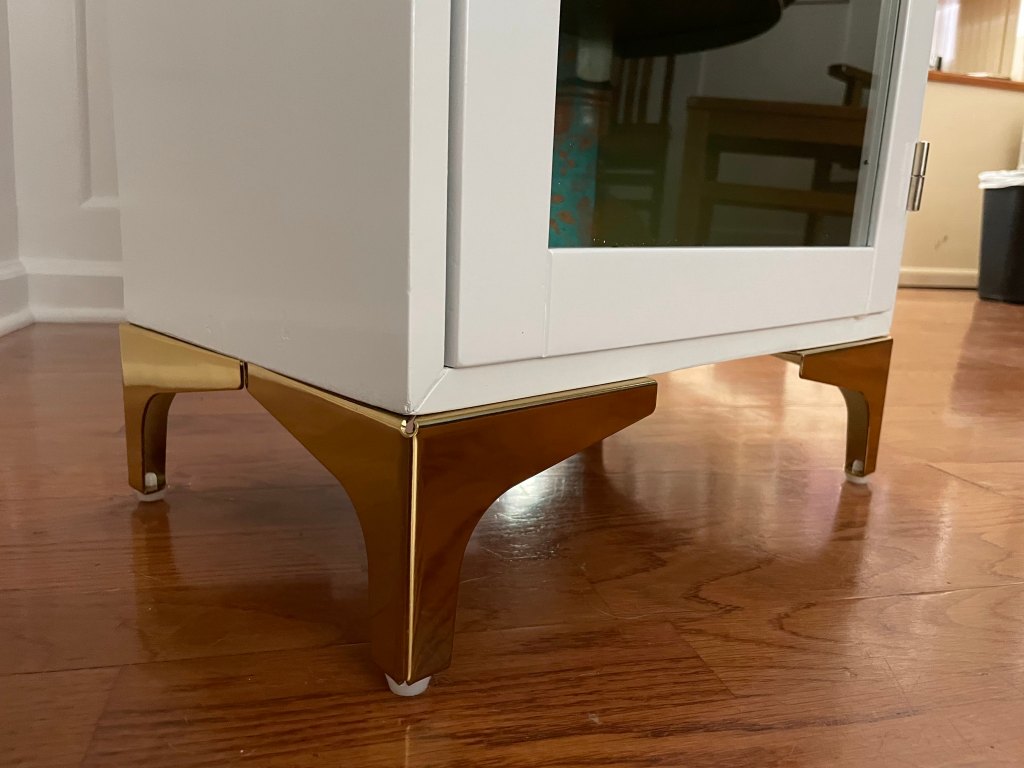
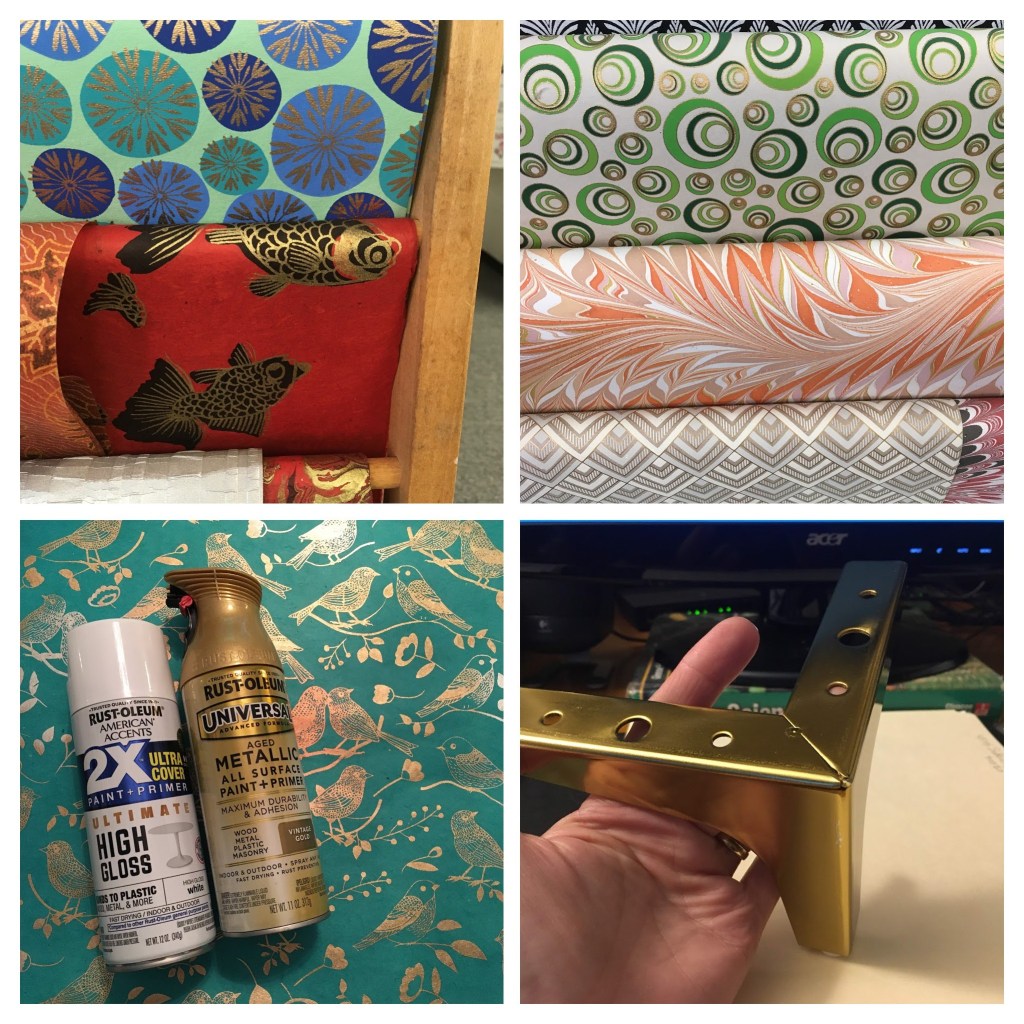
Materials used: Rust-Oleum 2X spray primer, Rust-Oleum 2X hight gloss white spray paint, Rust-Oleum Universal Aged Metallic Vintage Gold spray paint, decorative paper, gold finish furniture legs, glass, hardboard, bright brass decorative corners.

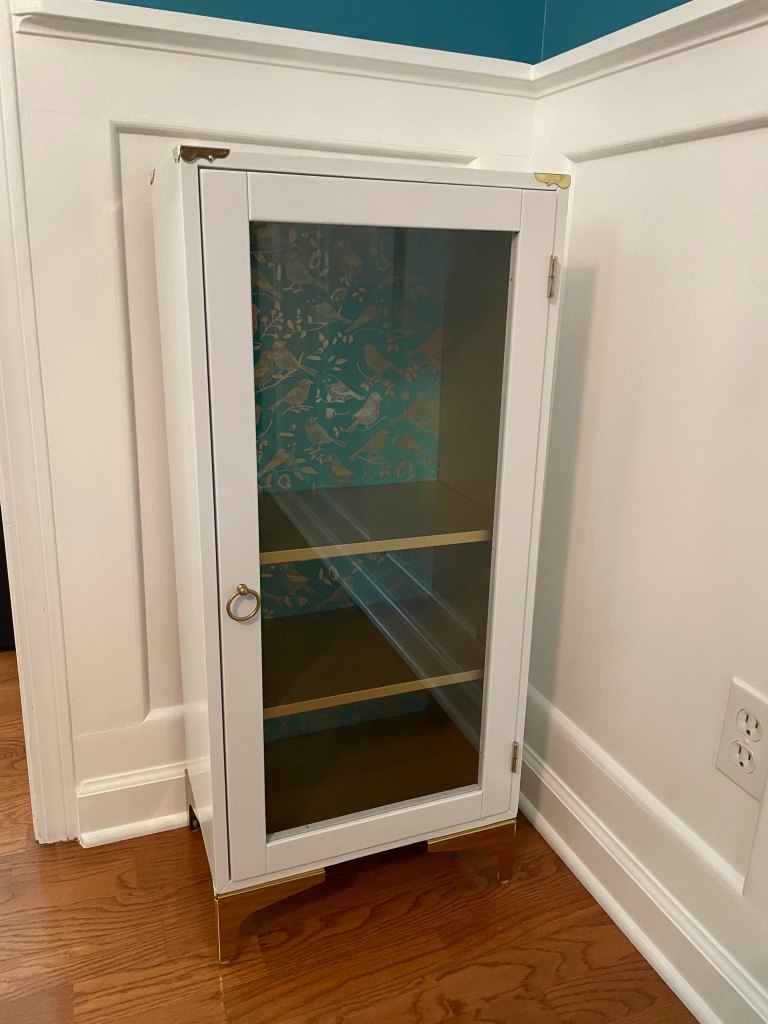
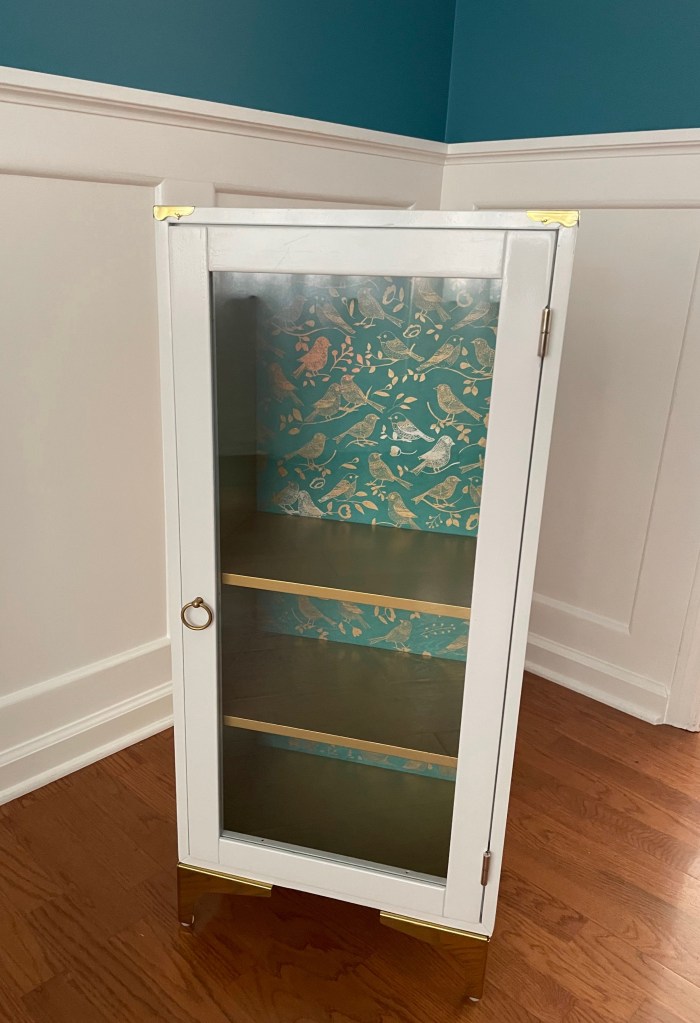
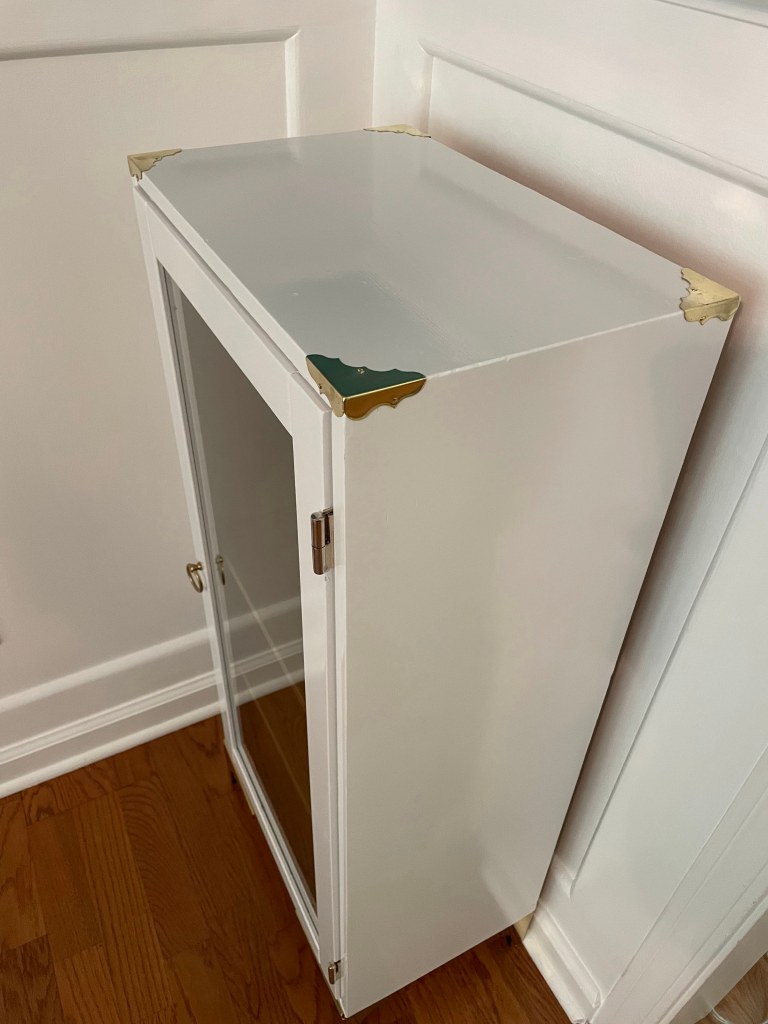
What first attracted me to this small cupboard was the leaded lattice glass. Sadly, a pane was missing and the leading was damaged so we ended up discarding it. We knew we also needed to replace the back panel and remove the peeling top coat. We got to work dismantling and sanding.
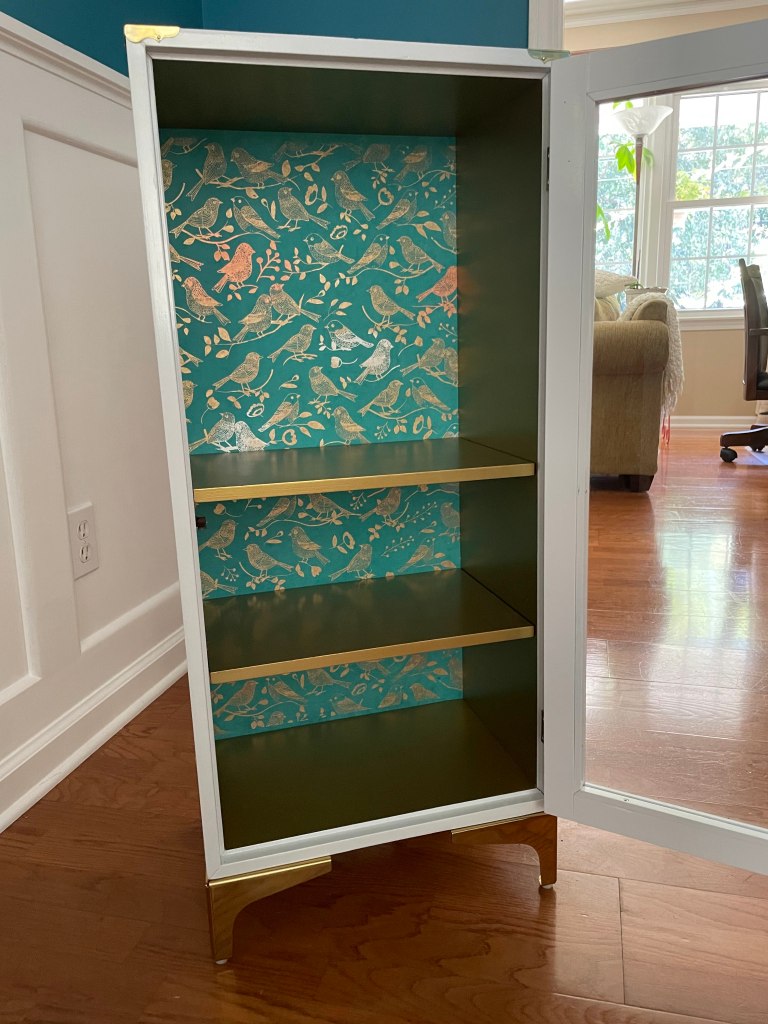
My two favorite parts of every transformation are the bookends—the initial design process, and the final coming-together of the vision. We started the design process with a trip to a scrap-booking store, where we found a beautiful turquoise paper printed with metallic birds. Replacement glass, some hardboard, gold finish furniture legs, and two different spray paints completed our supplies list.
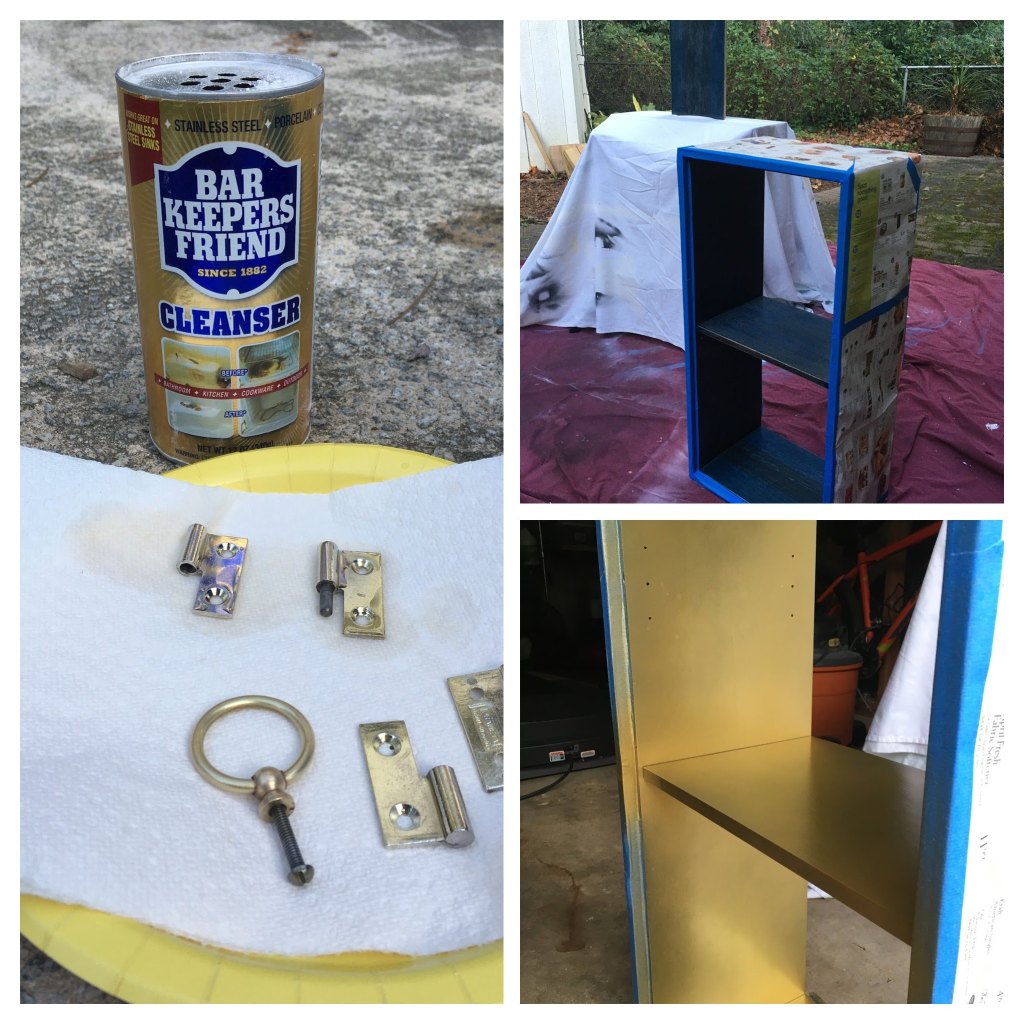
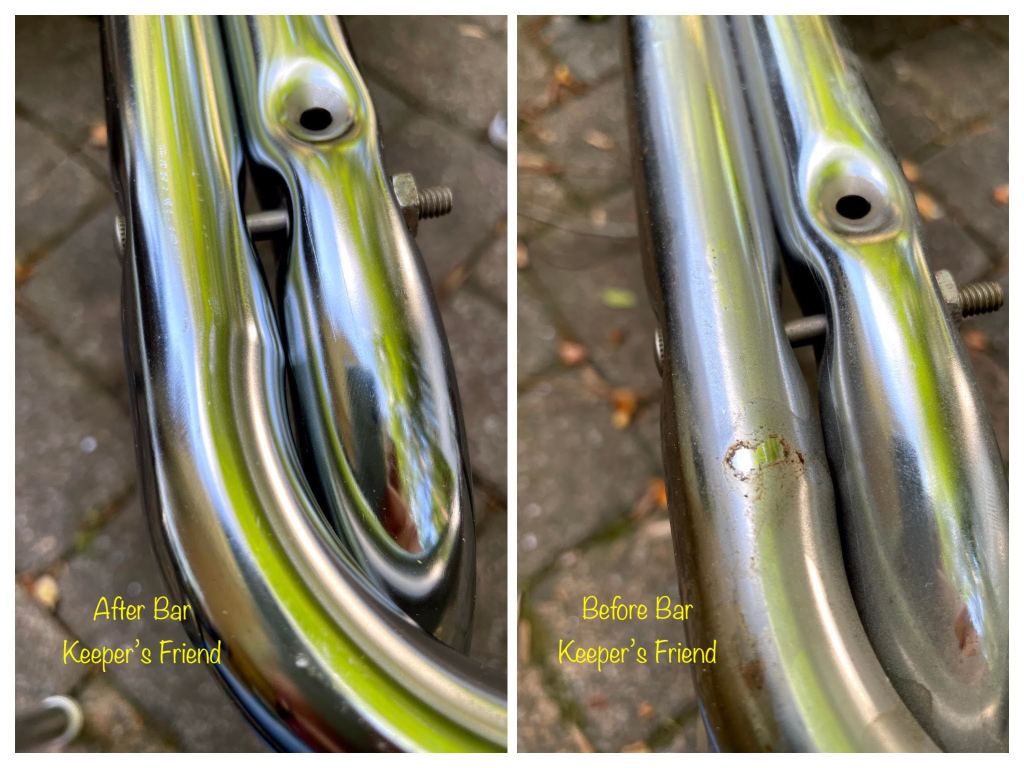
Painting started on the interior with 2 cans of Rust-Oleum metallic paint in Vintage Gold. The original hardware was cleaned with Bar Keepers Friend.
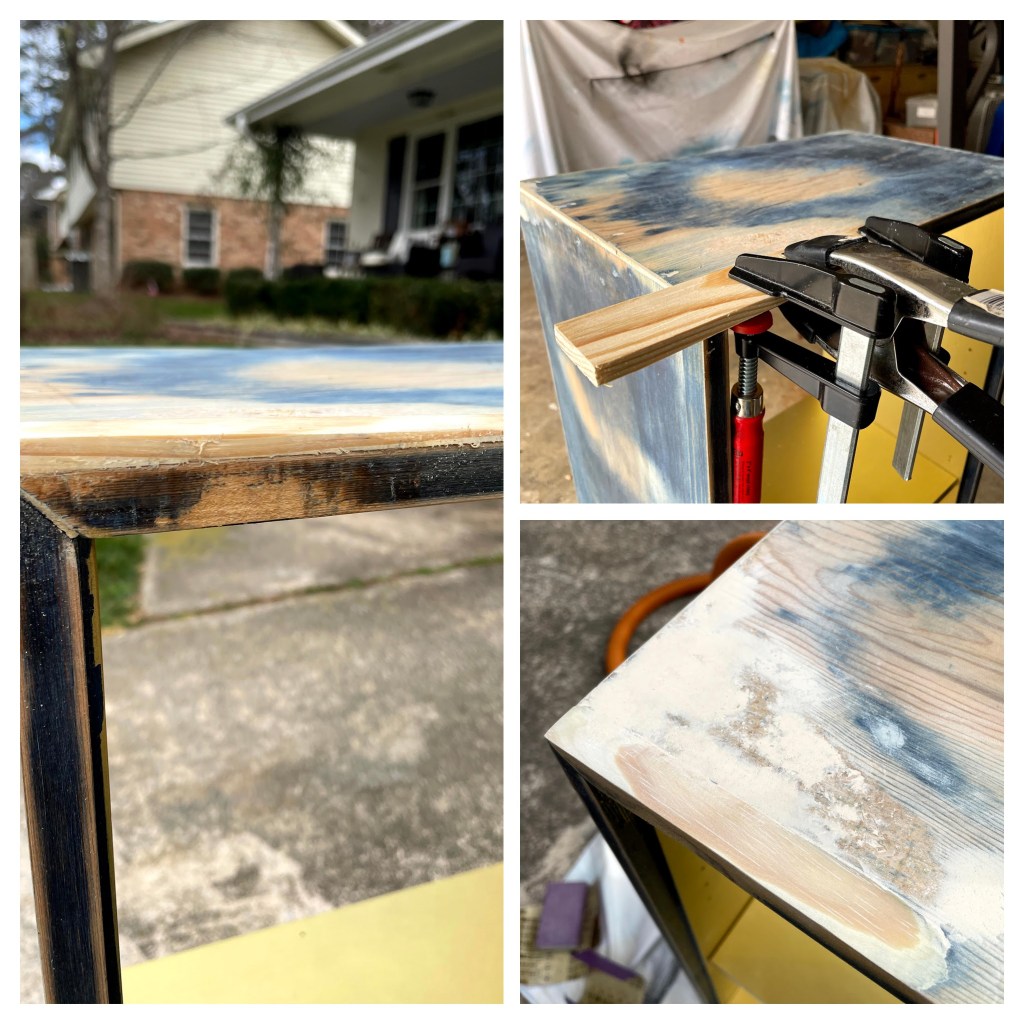
Next, we needed to level out the uneven base. Simply sanding it meant going through the veneer to chipboard so instead we glued a shim to the corner then trimmed and sanded it.
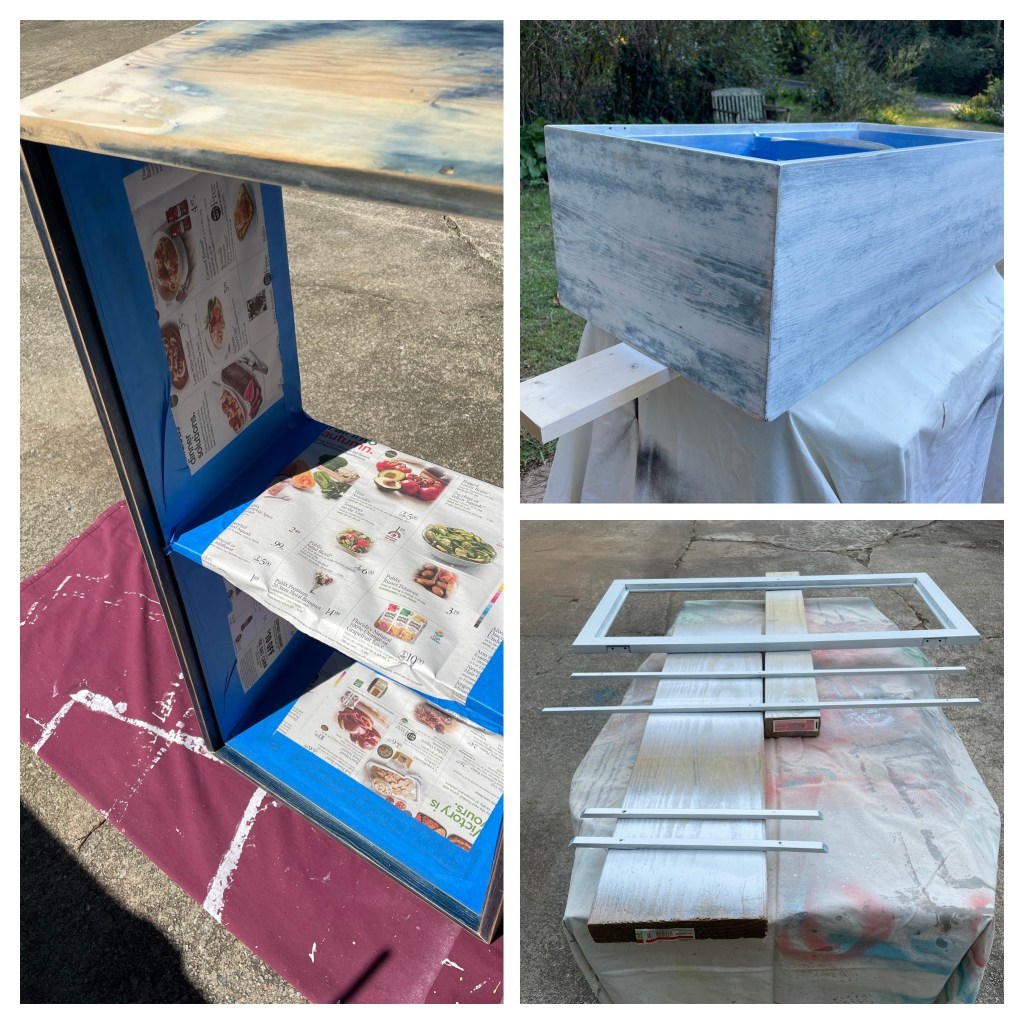
With the gold-painted interior carefully masked, it was time to start painting the outside and the door with Rust-Oleum 2X white gloss paint.
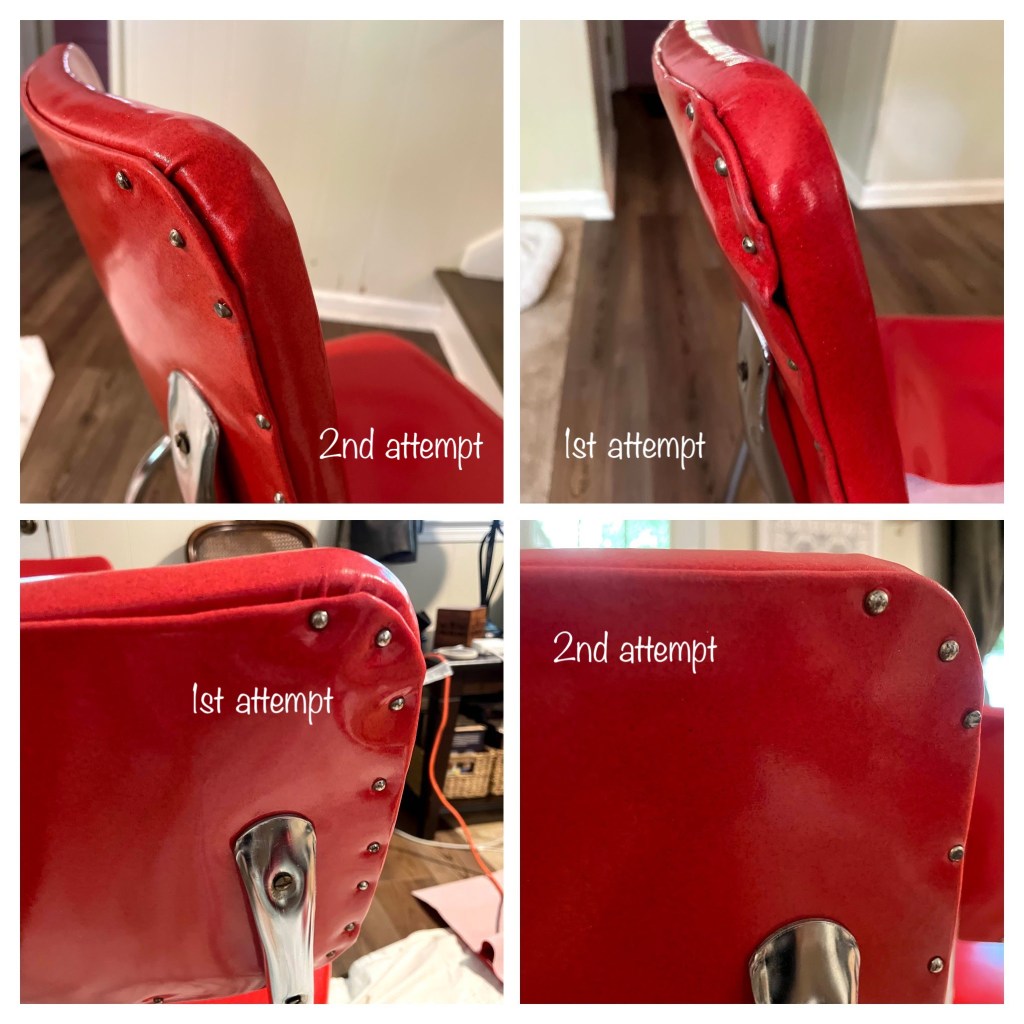
As has happened on two previous projects, certain areas of the paintwork “wrinkled”. I still don’t understand why this sometimes happens but I can say it is a pain when it does. The only solution was to go back and sand the problem areas, apply primer, and then paint again.

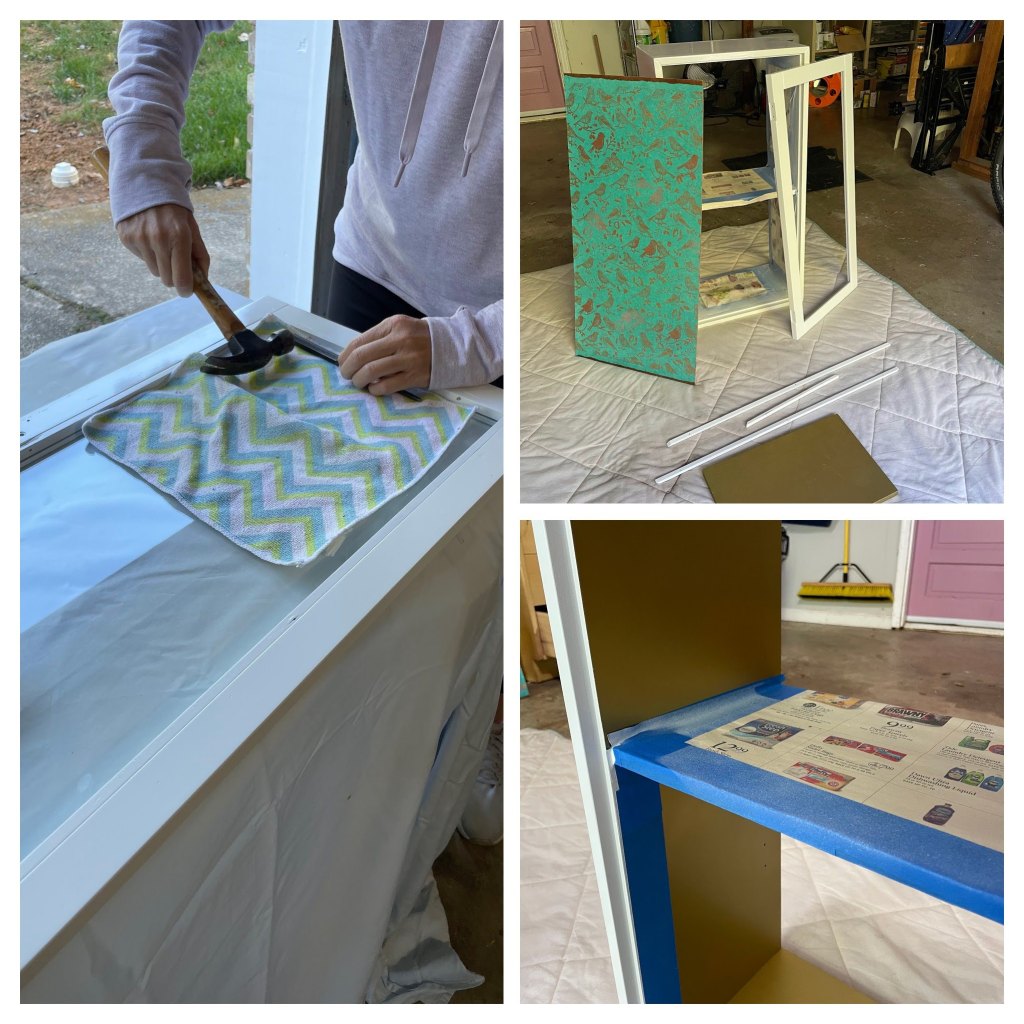
Many weeks later…when all the paint flaws had been ironed out, all that remained was to put the pieces together. We installed a new pane of glass in the door, attached the new, papered hardboard back panel, re-installed the original hardware, added bright brass decorative corners to the top, and attached the new feet.