Transformation expenses – $55.46
This circa 1910 dressing table was put to the curb just yards from my house! Its beautiful, long legs drew my attention immediately. Despite being disguised in paisley fabric I knew it could look amazing just because of its fine lines.

I secretly liked the fabric-covered look but it had been very badly done and was falling off in places. A lot of it just peeled away and the rest came off after a little dampening.

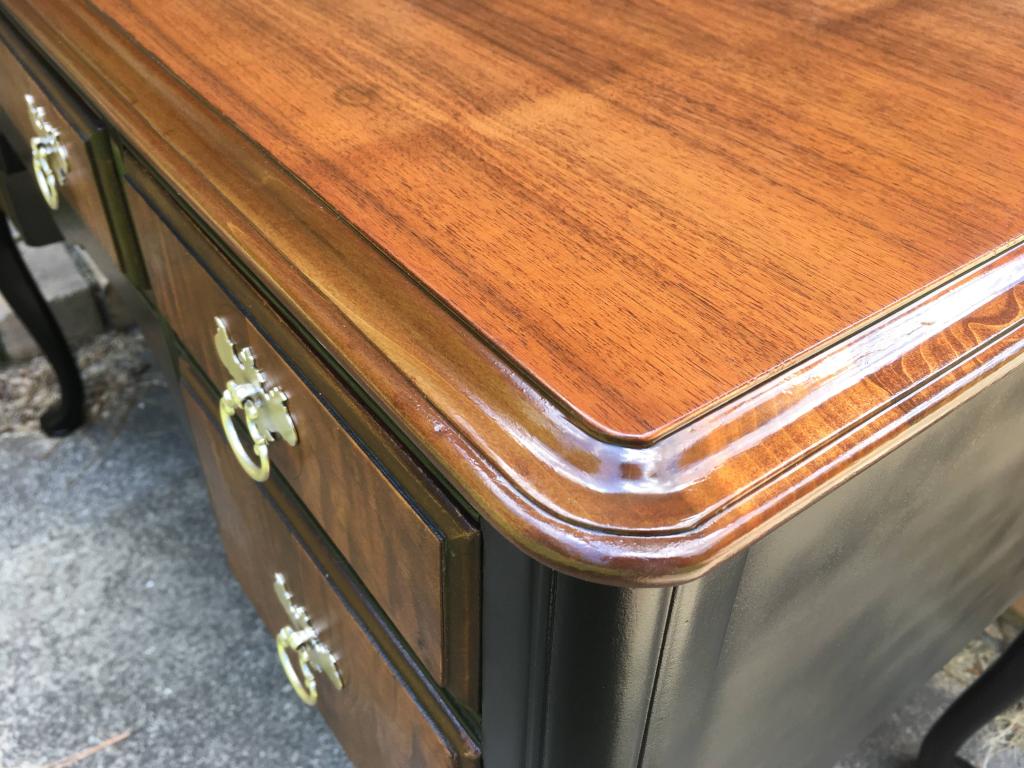
I was delighted to find the top and drawer fronts in pretty good condition, but other parts of the piece were seriously damaged, including a leg that had obviously been broken and shoddily repaired.

After much research and deliberation I realized it would not be worth attempting a full restoration so I decided on a combined restore & refinish approach. I started by restoring the drawer fronts, which have a beautiful tiger maple veneer. Fortunately the fabric adhesive came off with a dilute soap solution and did not require any solvent. Once they were cleaned, I used Howard Restor-A-Finish in walnut followed by Howard Feed-n-Wax oil-based wood conditioner.
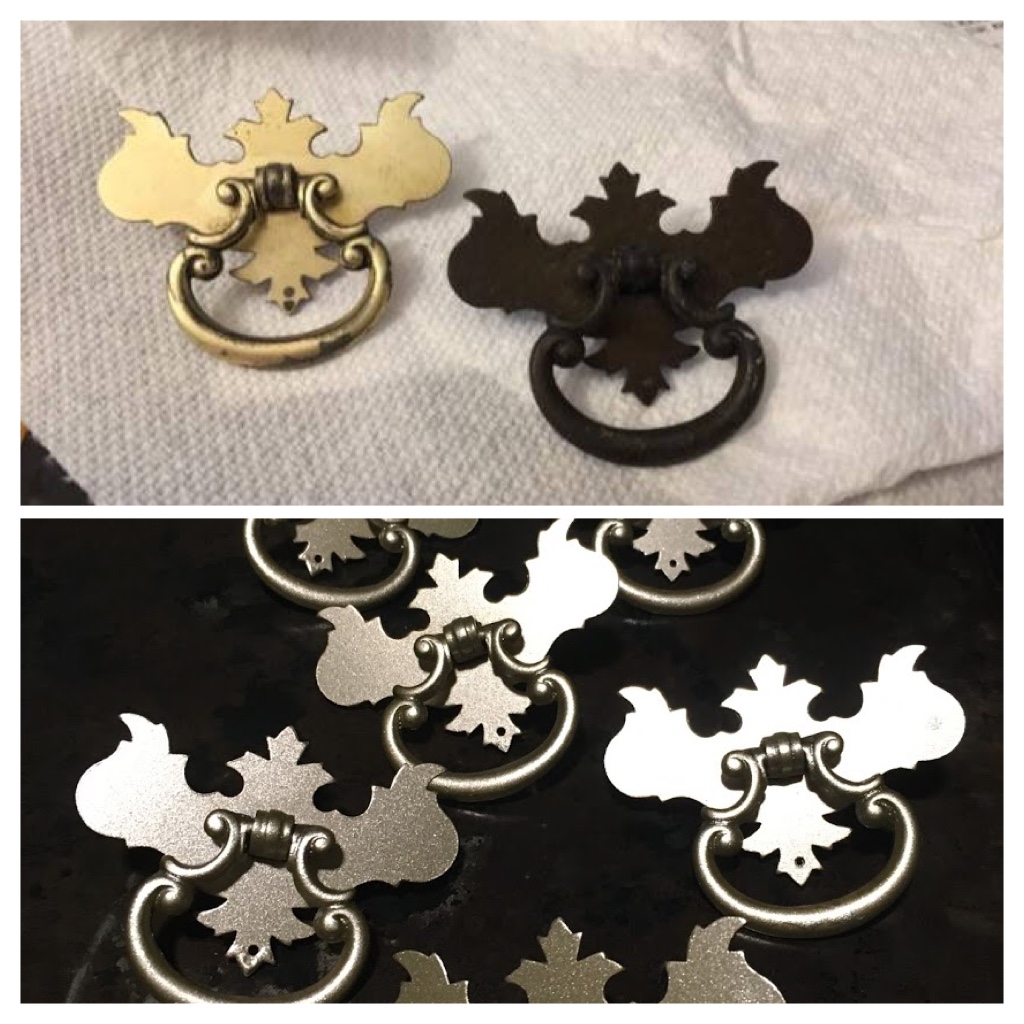
The Chippendale-style drawer pulls were so tarnished they were nearly black (top right). I considered leaving them that way but realized they would complement the restored drawer fronts more if they were refreshed. I set about polishing them, only to find they are brass plated, not solid brass. The Bar Keeper’s Friend I was using removed some of the brass plating (top left) but all other gentler approaches I tried were ineffective. I decided to go ahead and polish them all then touch them up with Rust-Oleum’s Metallic in gilded brass (bottom).

When it came to the table top, allowing myself to refinish rather than restore had a couple of advantages: For one thing it would have been impossible to remove the adhesive without damaging the old finish and for another I could now use a more modern, durable ,and practical polyurethane. I got back to the bare wood using stripper and sandpaper. I then applied Rust-Oleum wood stain in American Walnut, followed by 3 coats of Varathane polyurethane in semi-gloss. The color perfectly complements the drawer fronts.
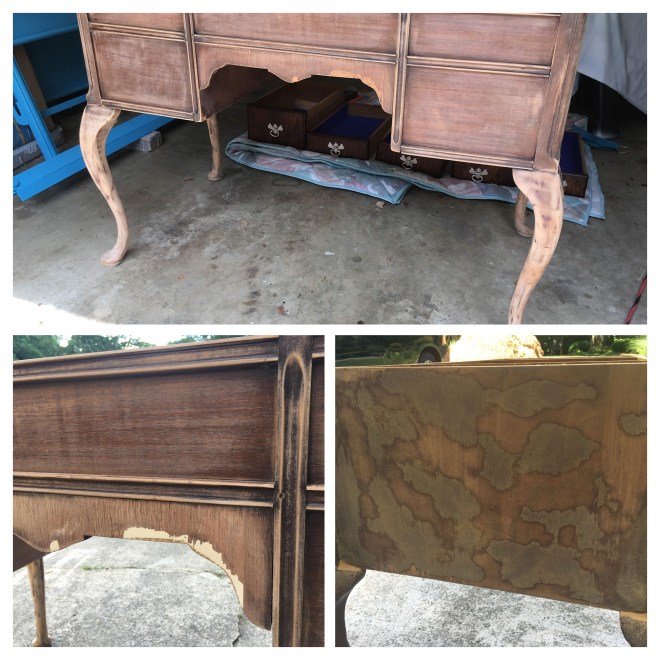
Finally it was time to tackle the frame and legs. The biggest challenge of this piece was the adhesive used to attach the old fabric covering. It behaved differently on every different surface. Some mineral spirits thinned it out in places but would not remove it completely. In the end there was nothing for it but to sand it off. Using 150, then 220, then 400 grit sandpaper I eventually removed all traces of adhesive. I used professional wood filler to repair some dings, cracks, and damaged veneer.

Once all the cavities were masked off ,I applied primer followed by two coats of Rust-Oleum Canyon Black in satin finish. The piece was then ready to reassemble.