#21 Hekman coffee table

Transformation cost: $20.50

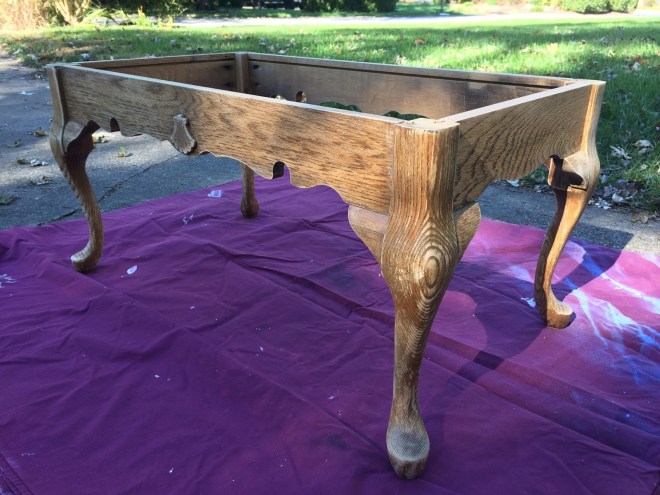
When a neighbor was discarding this table I almost didn’t take it because it is large and heavy and I was short on storage space. I’m glad I changed my mind because it is going to be perfect for the large living room my son will have in his shared apartment. Also, it’s incredibly robust so will hopefully withstand the wear and tear from four 19-year old boys.

Markings on the underside of the table quickly revealed its distinguished heritage. Despite knowing the manufacturer and serial number, my internet searches for more information have been fruitless. However, I will rest with the knowledge that a similar Hekman coffee table would today cost upwards of $500, and that “Now, almost a century old, Hekman is widely recognized as one of America’s premier furniture suppliers.” (excerpt from http://www.hekman.com/our_history)

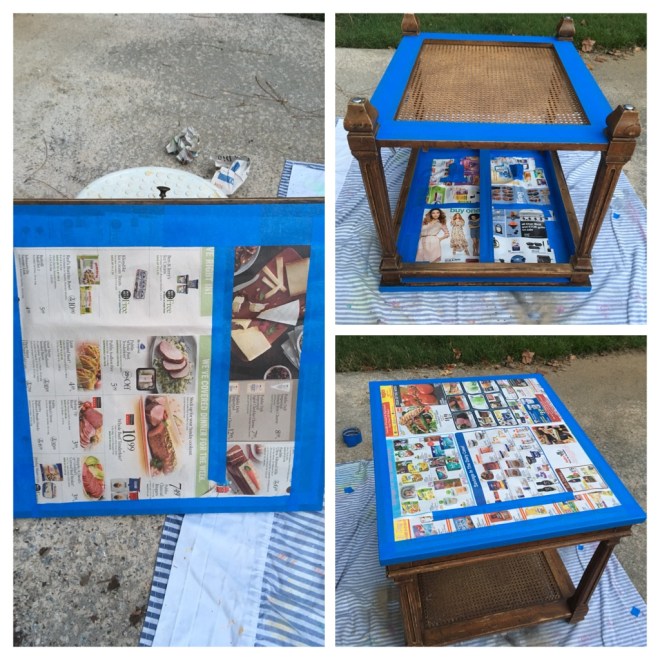
Removing the worn and damaged finish on the table top was my first priority. Once I had also cleaned the legs with a mild soap solution, the piece was ready for its new finishes.

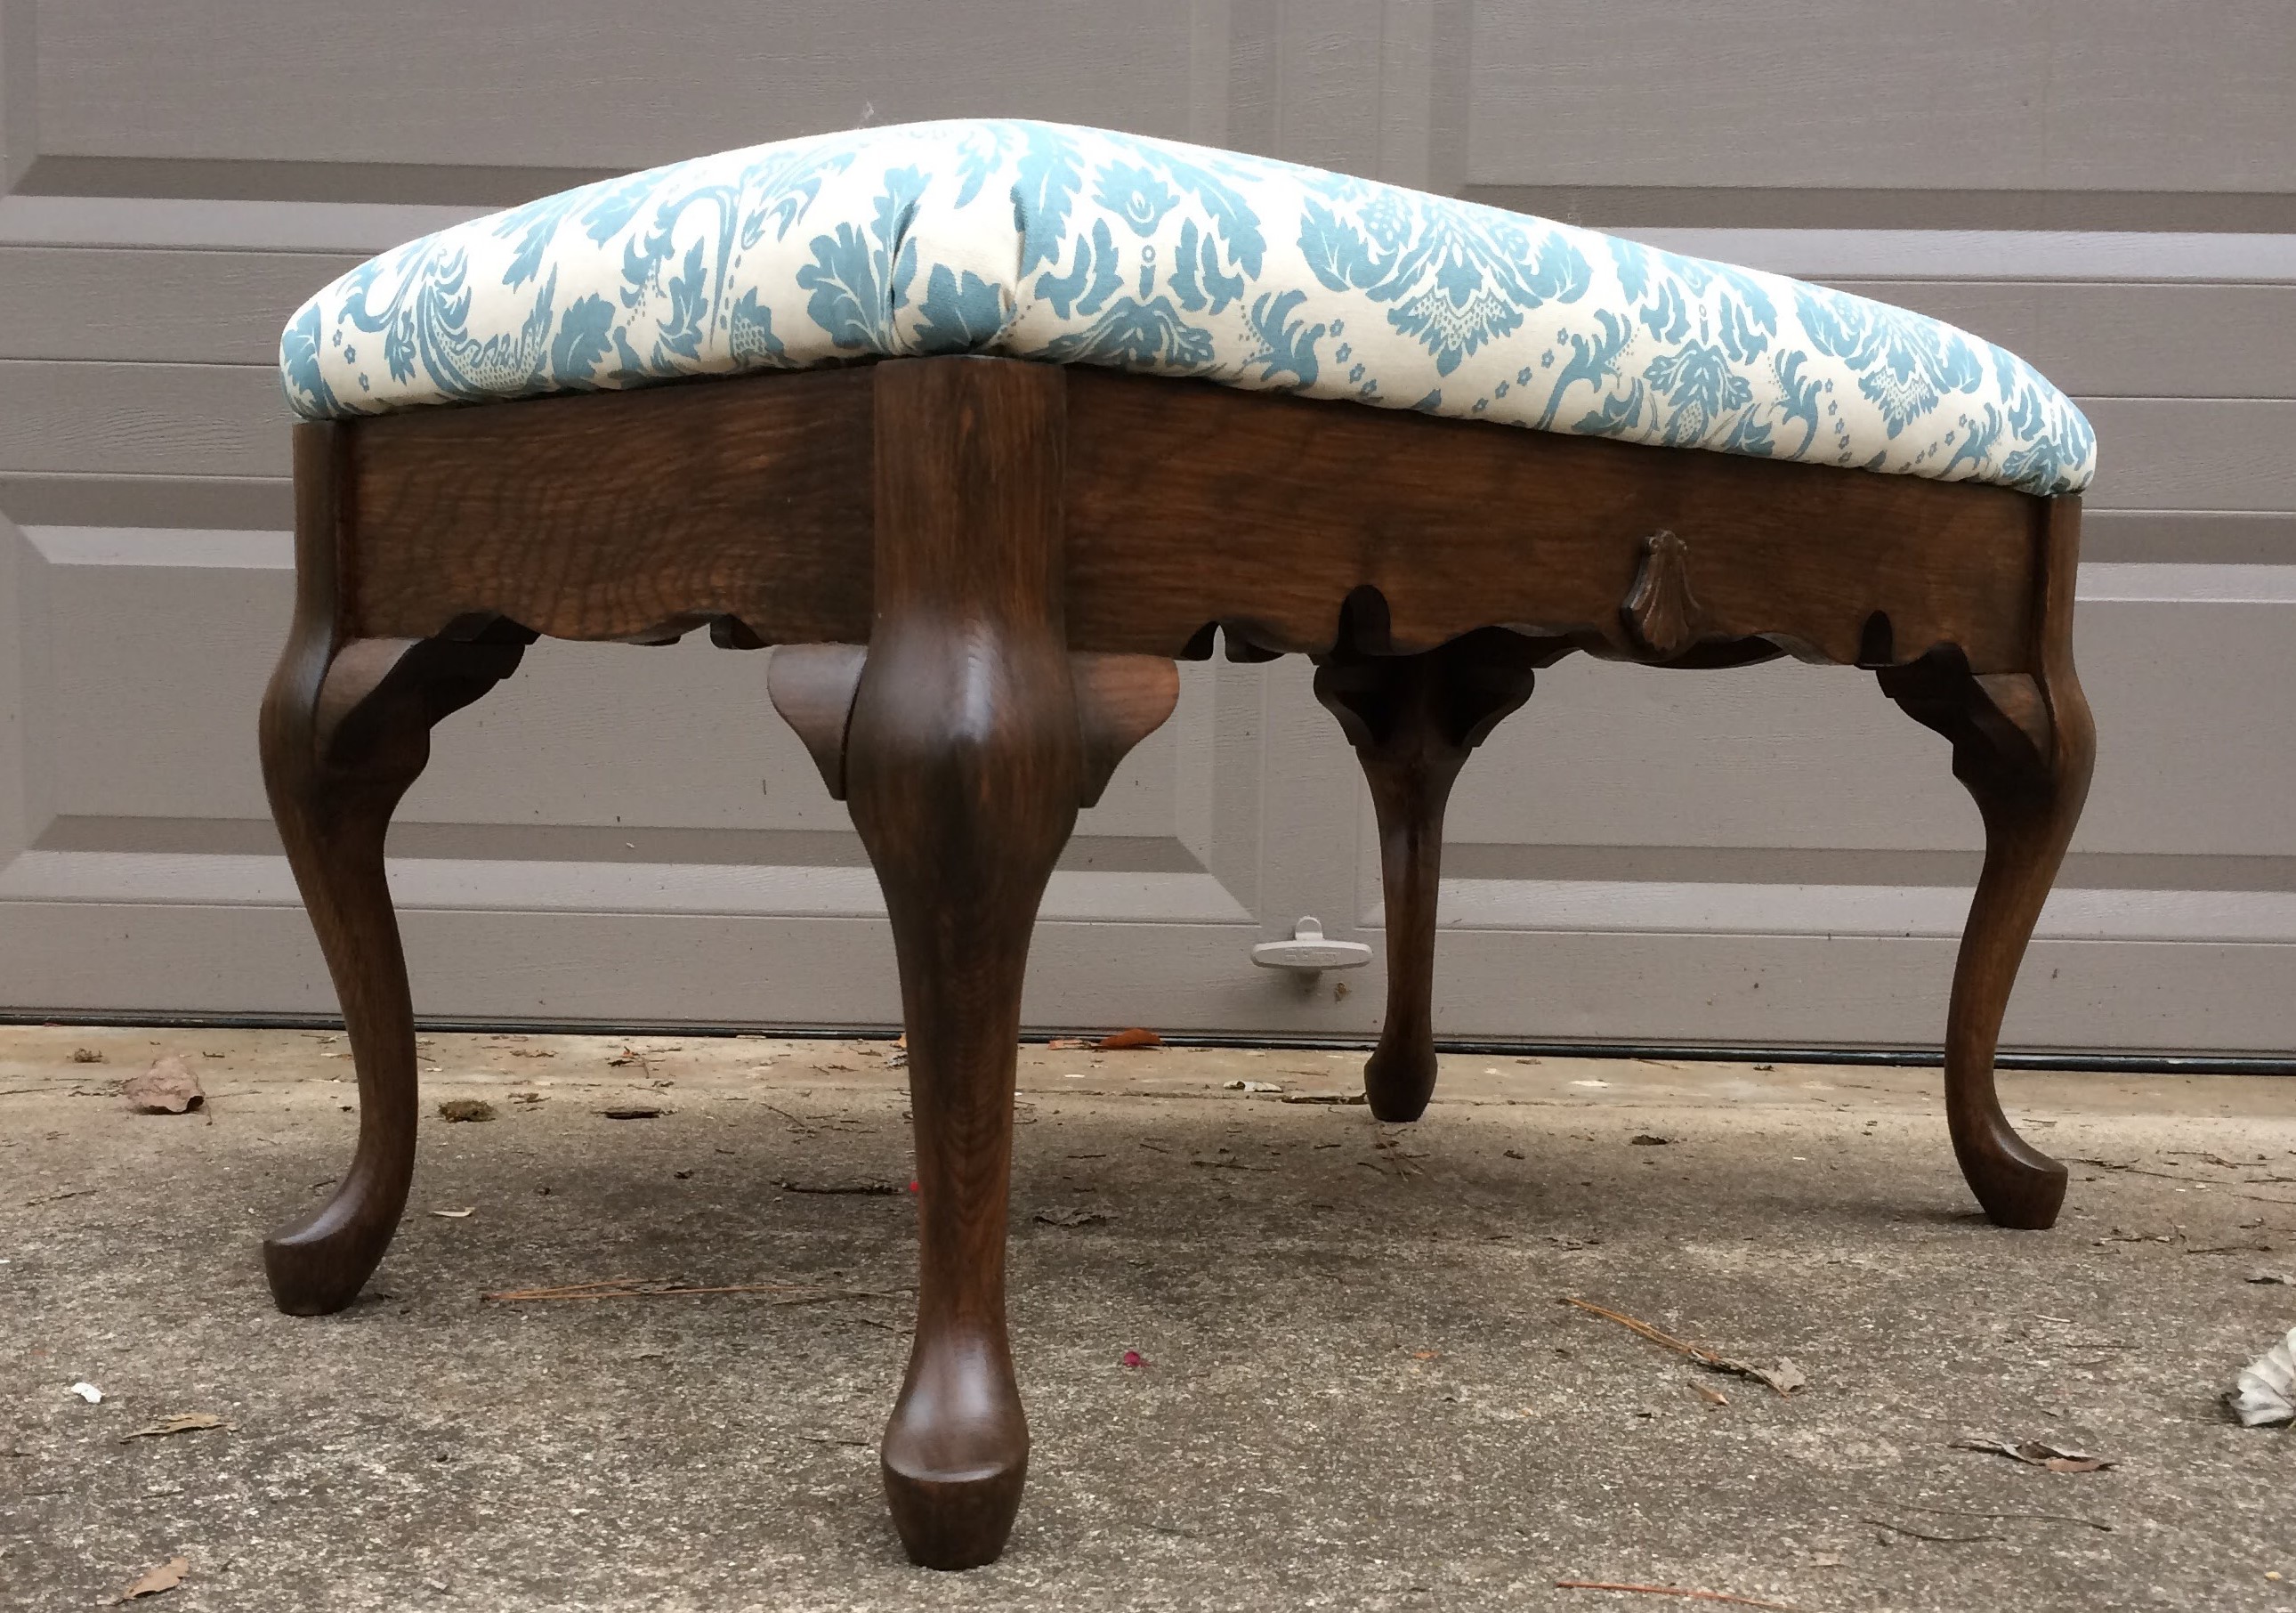
First was Annie Sloan “Coco” chalk paint. I applied three coats to the legs.

I then sealed the chalk paint with one coat of clear wax. Once it was dry and buffed, I applied a second coat of clear wax, followed by Annie Sloan dark wax. By working the brush and using more clear wax as needed, I got exactly the look I was going for. Once it was dry, I finished by buffing the legs one more time.

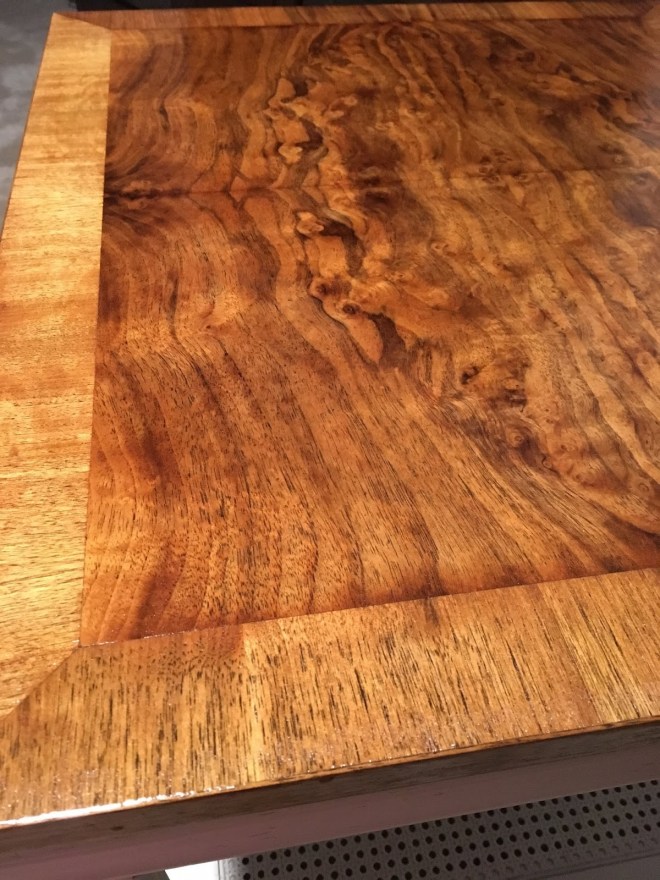
For the table top I began by applying a coat of MinWax stain & polyurethane in honey satin. I had intended to finish the piece with one or two more coats of this product, but changed my mind. I so liked the look of it after just one coat I decided to switch to an oil-based, clear, satin polyurethane to finish the job.

Two coats of clear, satin polyurethane gave the piece the protection and sheen it needed

#16 Lyrical bar stools

Transformation cost: $19.47

I love it when a piece is commissioned; it brings about an outcome that often is not my first vision. These stool are a case in point. I initially envisaged these with a sports theme but when my client wanted musical instruments, and a nod to her husband’s Irish heritage, the idea of wood-burning was born. Beyond just a few characters I had never done wood-burning before but now I’m hooked!

I began by removing the finish from the tops of the stools to create
clean backdrops for the wood-burned images

Next I cleaned and sanded the legs. A previous sloppy paint job had left patches of white paint on the underside of the seat. Rather than try to remove them and then refinish the wood I decided to paint over them. I used painters tape to mark out geometric shapes then sanded those areas too. After several coats of Krylon Gloss Emerald Green spray paint (what better color for someone whose ancestors are from the “Emerald Isle”?) the legs were almost finished.

As a finishing touch (to make the stools more hard-wearing) I used vinyl tubing to cover the lower stretchers. I simply cut pieces the length of the stretcher, made a slit the full length of the piece then wrapped it around the painted wood.

Now I turned my attention to the seats. I created transfers by tracing printed images (embellished with some of my own artwork) onto parchment paper. Another nod to Ireland was adding the shamrock to the drum set image and the Celtic symbol for family to the guitar. Once the reverse side was also traced (so I wouldn’t transfer a mirror image) I transferred the designs onto the stool tops.

To finish the seats I applied 3 coats of oil-based, clear, gloss polyurethane for maximum protection.

#14 Heritage “Cameo II” end table

Transformation cost: $17.82

When my friend Renate saw this piece roadside she instantly contacted me and I rushed to pick it up. At first glance I knew it was a beautiful, quality piece and, on further investigation I was validated. Made in May 1976 by Heritage furniture in Drexel, NC it was part of the Cameo II collection. The catalog boasts: “Superb fruit-wood finishes complement rich grafted and pin knotty walnut veneers and pecan solids”. The pieces in the collection were originally sold in either a wood or a custom (painted) finish. Knowing that made me less reluctant to apply some paint to the piece.

The table top had some nasty water/paint/crayon marks so I began by removing the finish on the top.

Next I gently sanded the top and wiped it with a damp cloth.
The rest of the table got a light sanding and a cleaning with a mild soap solution.

After meticulously masking certain areas, the piece was ready to paint.

Starting with the underside I applied 3-4 coats of Rust-Oleum 2X Ultra Cover in Heirloom White, satin finish.
Once upright the rest of the piece got the same treatment.

I then gently distressed the Heirloom White finish and sealed it with Rust Oleum Satin Clear Enamel

To finish the top I applied 3 coats of a clear gloss oil-based polyurethane. The grain of the walnut veneer came up beautifully!

#10 Oak end table

Transformation cost: $37.39

I was a chalk paint virgin, I admit it! I know, any self-respecting person who’s been DIYing (that is a verb, right?) as long as I have should have used chalk paint a gazillion times by now but, what can I say?,
I guess I’m just late to the party. Anyway, with this piece it was time to venture into chalk paint territory. It was quite a departure for me; I pride myself in being a meticulous painter, and I can lay off like the best of them. After watching numerous Annie Sloan tutorial videos I went to work. Applying chalk paint was like going back to preschool; with a cylindrical brush I slapped it on in every direction, stabbing at it to get into all the nooks and crannies, being careful not to apply too much or to have any drips or runs. After the first coat it looked like the paint and the table had got into a brawl but after the second coat a lovely, flat, uniform finish was achieved. Waxing over the paint is the finishing touch to give it protection and a more dimensional look. I’m very happy with how this piece turned out, I will definitely be using chalk paint again!

I began by stripping the finish off the top of the piece to expose the lovely wood grain. It came off so nicely!

Next I color washed the top of the piece with a 1:2 mix of chalk paint:water. I brushed the wash on then removed excess with a rag until I got the depth of color I was looking for.

I then applied 2 coats of chalk paint to the rest of the piece.
At this point I decided I didn’t like how the color washed top looked against the base so I changed tack.

To finish the piece I went over the top with 2 coats of MinWax PolyShades Honey in a satin finish, I applied a coat of clear wax followed by a coat of white wax to the body of the piece, and I installed a new drawer pull.

#5 Safari chair

Transformation cost: About $18

Just a day after my last post it snowed, and some of that snow still has not melted; it hasn’t exactly been ideal weather for painting and there’s been little to no progress on any transformations! Fortunately I have this little ace up my sleeve. I do feel slightly like I’m cheating with this post since this transformation took place in May 2015, more than 2 years before I started this blog. However, it is an old favorite of mine and it does meet all the criteria to count towards my goal. I picked up the chair from a neighbor’s trash and transformed it into an end-of-year teacher gift. My inspiration came from the fact that Africa was part of this teacher’s Social Studies curriculum. 

I had recently painted a zebra tissue box cover for my BFF in England
(and then one for myself) so I had some practice painting an animal print.

I started by cleaning the chair then lightly sanding it and applying primer.

The animal prints were painted with 4 or 5 different colors of acrylic craft paint.

Two coats of polyurethane finished the job.

#4 Wicker/wood storage chest

Transformation cost: $39.10

I’m so glad I chose to make this piece my first bespoke project; I’m sure I would not have upholstered the lid of this trunk had my client not wanted to use it as a window seat as well as a storage chest. The lid of this piece is a non-standard size and shape. A made-to-order seat cushion would have been very expensive so upholstering the lid was an obvious, win-win solution.
The color scheme in her office (white furniture, pale blue walls and hints of grey) was the basis of our paint and fabric choices.

I began by separating the base from the lid. After a good clean I applied 3 coats of
Rust-Oleum 2X ultra cover in semi-gloss white.

For the non-standard shaped lid I cut a piece of 1″ foam to fit then wrapped the lid and foam in batting.

I then covered the lid with our chosen upholstery fabric. By a stroke of luck I found a fabric whose design almost perfectly matched the design of the wood carving on the base.

Since the fabric pattern matched the wood carving so beautifully, the finishing touch was to hand paint the wood carving in colors to match the fabric.

And finally top and bottom were re-united.
Before the wood carving pattern was easily overlooked; now it gets all the attention it deserves!

Doing double duty as a window seat & storage chest in my neighbor’s home office.

#3 Upholstered bench/coffee table

Transformation cost: $50.06

“What gorgeous legs!” was my thought when I saw these at the end of a neighbor’s driveway on trash day. The wood grain was so beautiful I knew I couldn’t bear for these to get tossed in a dump truck.

I began by cutting a piece of fiberboard to fit the shape of the base. I attached 8 pieces of 3/8″ square dowel that would keep it snugly in position.

I covered the fiberboard with 2.5″ thick foam followed by batting followed by my chosen upholstery fabric.

I debated with myself whether or not to paint the legs but, in the end, I chose a Minwax stain & polyurethane (PolyShades Honey in a satin finish) so as not to conceal the beautiful grain. I cleaned and lightly sanded to prepare the legs for 2 coats.

The finished color is a beautiful rich brown. All that was left was to secure the upholstered top using 4 L-brackets.