#43 Birch chair

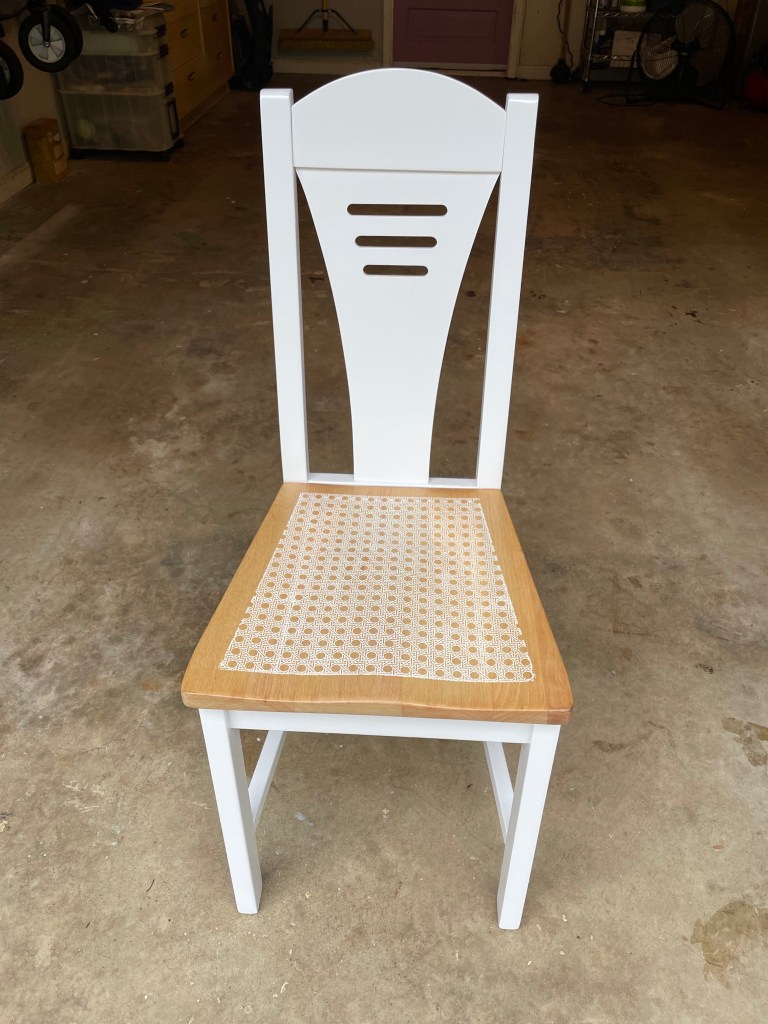
This chair sat in my garden shed for nearly four years while I waited for inspiration; it came in the form of a stencil. If I’m honest, I underestimated this piece. It wasn’t until I started prep work that I realized it’s made of solid birch and is a quality piece of furniture. It quickly took precedence over the piece I was already working on, and I’m thrilled with how it turned out. I had one mishap along the way; read on to see the mistake I won’t make again!

Materials used: Zinsser shellac-base primer, Rust-Oleum semi-gloss protective enamel, Show-Offs stencil, Anita’s acrylic craft paint, Varathane oil-based polyurethane in satin finish.

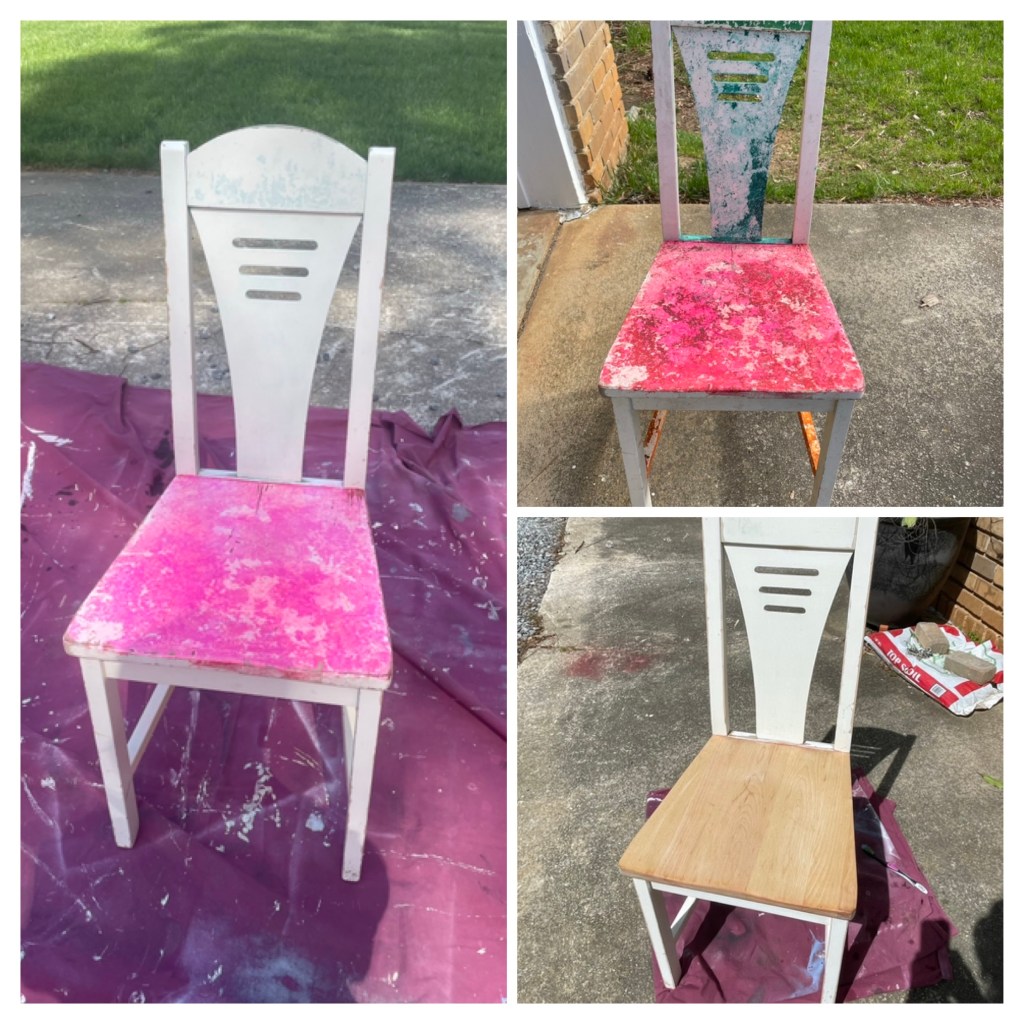
When I went to clean this chair I discovered a label under the seat. A bit of internet research quickly revealed that the chair was made in Canada by AP Industries, Inc. who “made quality case goods out of solid birch”. It was then that I decided to sand the seat back to bare wood to showcase some of the birch.

Once the chair had been cleaned and sanded, I masked off the seat and primed the frame. I chose a shellac-base primer because it will block any residual color better.

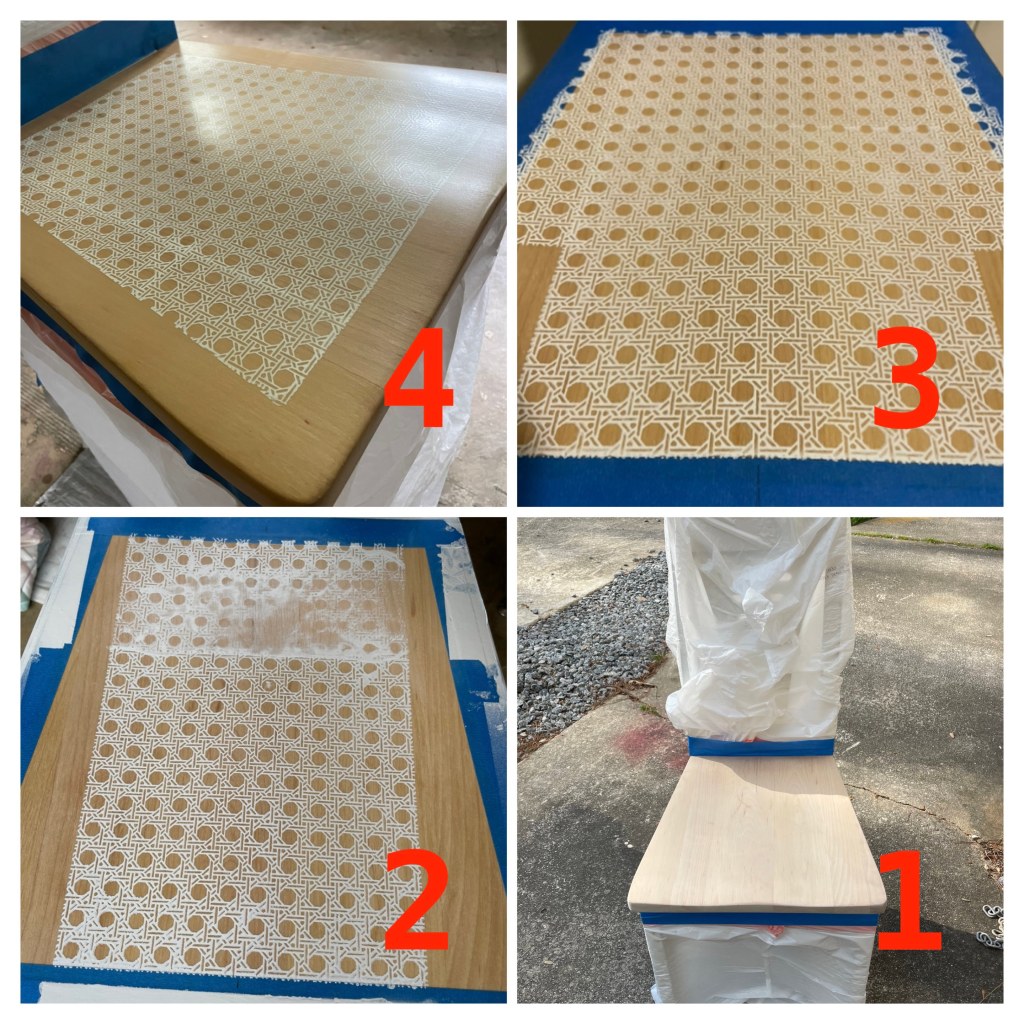
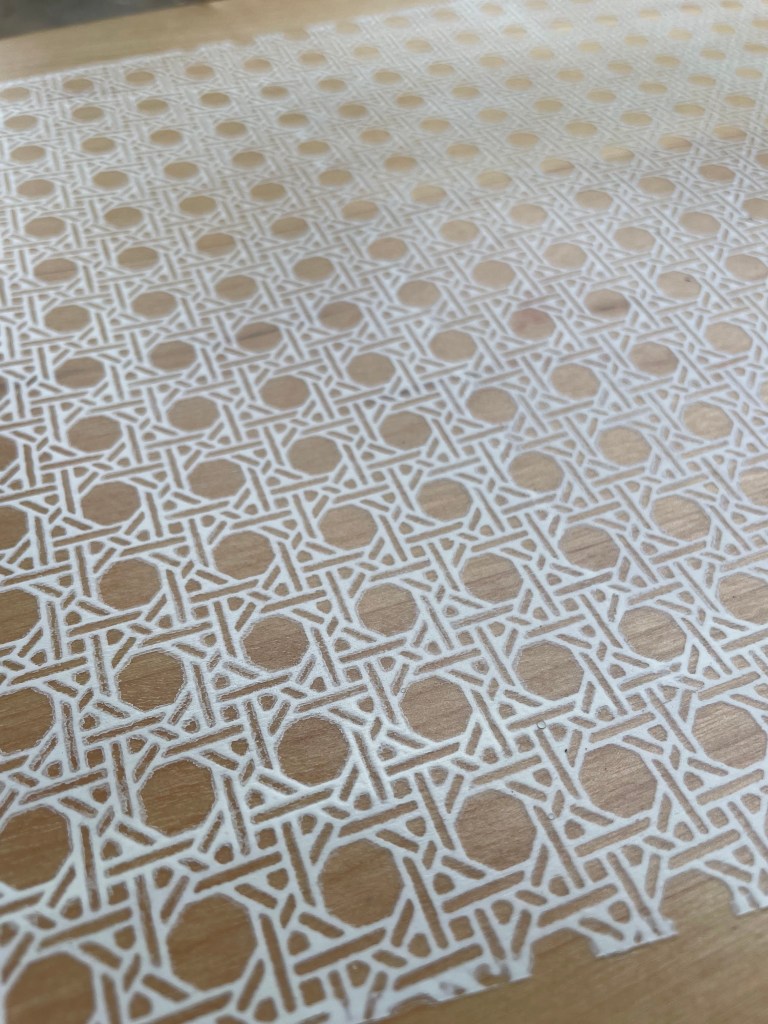
Now it was time to apply my inspiration: a faux cane stencil by Show-Offs. There are no bridges in the stencil; it is attached to a fine silk mesh that the paint can penetrate. After sealing the bare wood with a couple of coats of polyurethane (1) I was ready to start. At this point I made the mistake of trying to spray-paint the frame and stencil at the same time. The first application went well, but after cleaning the stencil with mineral spirits, it no longer stuck properly and the spray paint bled (2). I had to sand the seat back to bare wood and start again with a new stencil and acrylic craft paint that I applied with a sponge brush — much better (3). When the pattern was complete, I finished with three coats of semi-gloss polyurethane (4).

To finish the project I masked the completed seat and applied a couple more coats of semi-gloss enamel to the frame.

#42 Klaussner end table

This project nearly made me hang up my paintbrush, and it will not make my top 10 list when I eventually reach my goal! It still fights me by refusing to be photogenic. Trust me when I tell you that the table top looks better in person than it does in any pics.

A friend of mine originally bought this end table as part of a living room set in the early 2000s. The matching coffee table had not withstood the rigors of raising four children; this table showed the scars, and had been put to the curb. It is a good quality Klaussner table that needed a complete makeover. The flare of the legs, the grid pattern of the lower shelf, and the upward curved edges of the top were what inspired the Japanese-style makeover.

Materials used: Rust-Oleum 2X Ultracover primer, Rust-Oleum 2X Ultracover gloss Colonial red, Varathane wood stain (Kona), Folk Art Treasure Gold 5535, Varathane oil-based polyurethane in satin.

A previous paint job desperately needed fixing.

After I dismantled the table, I used paint stripper to remove most of the finish on the top.

I then sanded the top down to bare wood and painted it matte black.

Meanwhile I sanded and primed the legs and lattice shelf (which was no mean feat). My Dremel 3000 with a sanding attachment was invaluable on the lattice work.

My vision really started to take form when I painted the legs and lattice with Rust-Oleum Colonial Red in a gloss finish.

Turning my attention back to the table top, I printed and cut out some cherry blossom clip art. I transferred the image to the matte black surface using a chalk pencil (part tracing the outline and part freehand). Next I used my Dremel Diamond Wheel Point engraving attachment to carve the image into the wood. A coat of Varathane wood stain in Kona darkened the carved wood, and then I picked out some details with Folk Art Treasure Gold 5535.

Everything was going perfectly (top right pic), until I applied the final coats of lacquer and it turned blotchy and cloudy.

The only way to remove the blotchy lacquer was to sand back to the bare wood again. Since I didn’t want to paint over the engraving, this time I decided to stain the surface. After three applications of Varathane wood stain in Kona, the top was a lovely rich brown color.

I liked the soft sheen so much I decided to apply wax instead of polyurethane at this point. However, the final coats of wax also looked blotchy, no matter how much I buffed it. It was back to the drawing board again as I removed the wax finish with mineral spirits and re-sanded the surface.

After removing the wax, I needed to stain the surface again and touch up the gold details. When I was satisfied with how it looked, I went with finish #3: Varathane oil-based polyurethane in a satin finish. Finally I had success.