Transformation expenses: $120.16
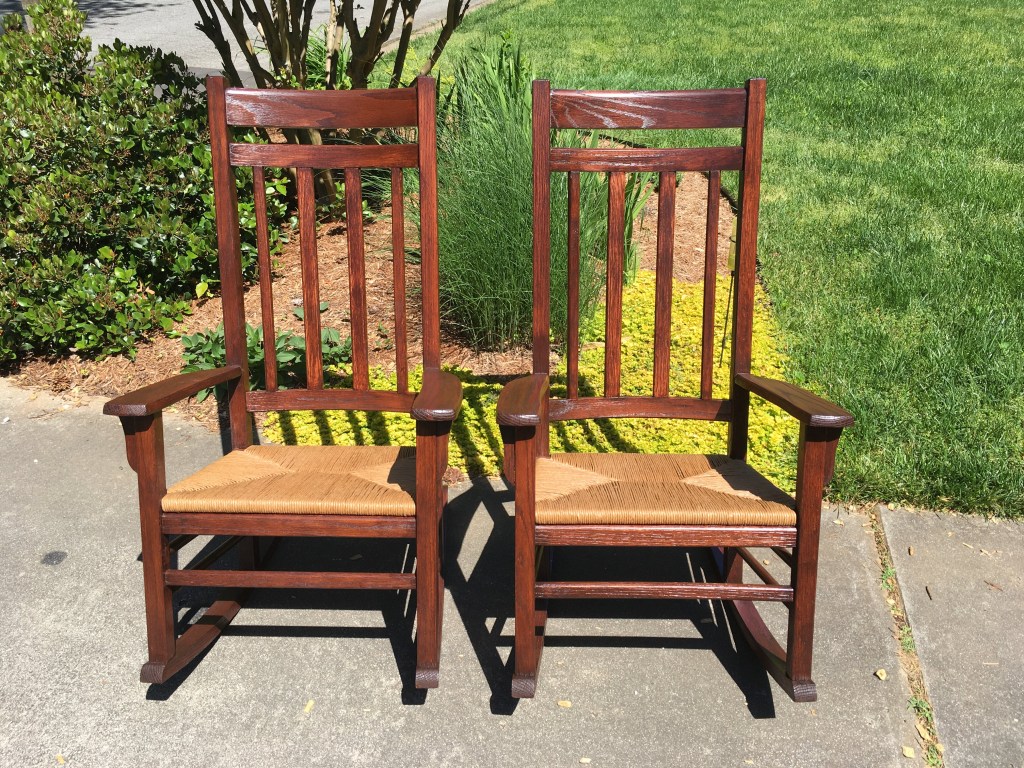
This pair of rocking chairs was no doubt discarded because the herringbone cane was falling apart, and the cost to replace it is prohibitive (around $500 per chair). However it seemed a shame to throw the baby out with the bathwater so I picked them up and contemplated a more economical solution.
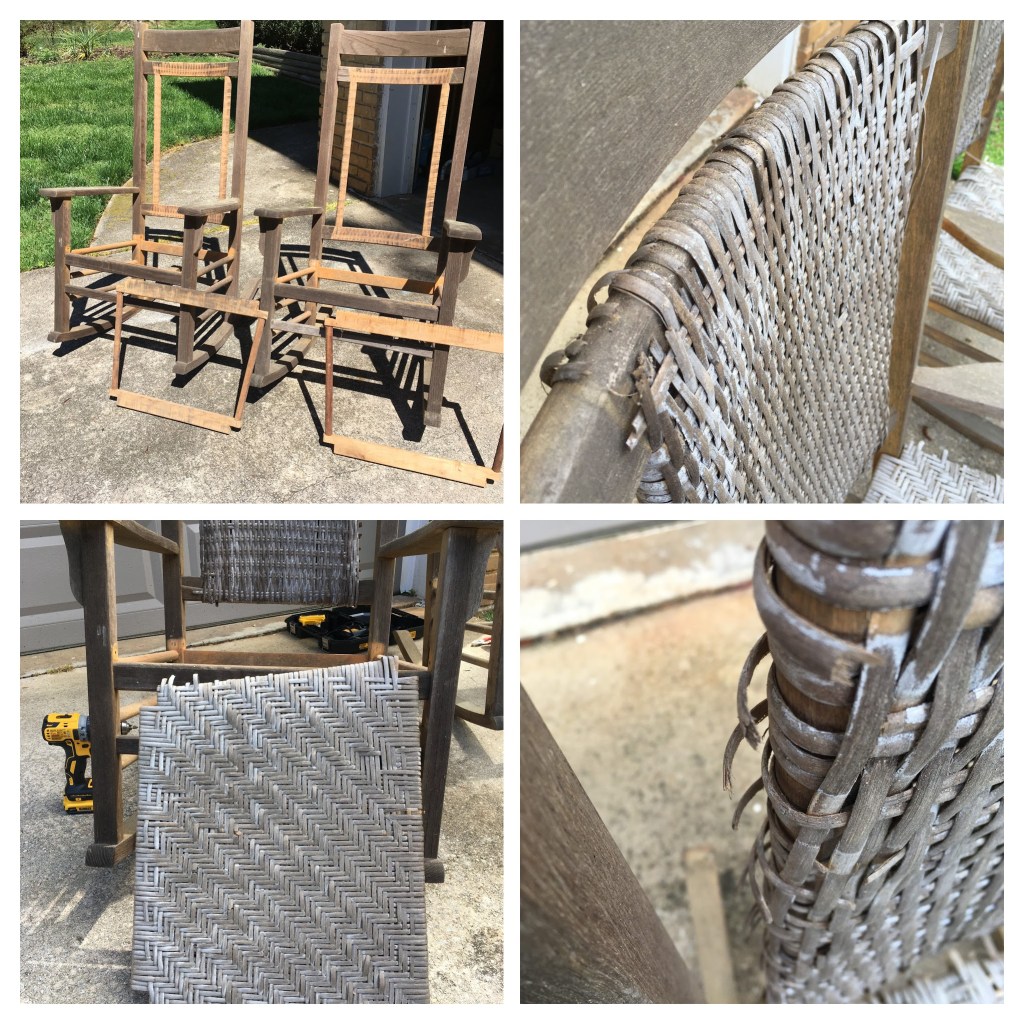
The caning in both chairs was damaged beyond repair. There was no choice but to remove it all. Being able to take out the seat pads made the job a lot easier.

Pressure washing the frames to remove the ingrained dirt was possibly the most fun I’ve had on a project to date. The difference was amazing!

Pressure washing was hard on the wood and patches of the original finish were still there so a good bit of sanding was needed. I used 80 then 150 then 220 grit sandpapers to bare and smooth the wood.

The first of two more economical solutions was to replace the backrest caning on each chair with new spindles. We started with a 9ft long piece of 2″ x 1″ oak. My husband rounded the edges with a palm router then cut four spindles of the right length.
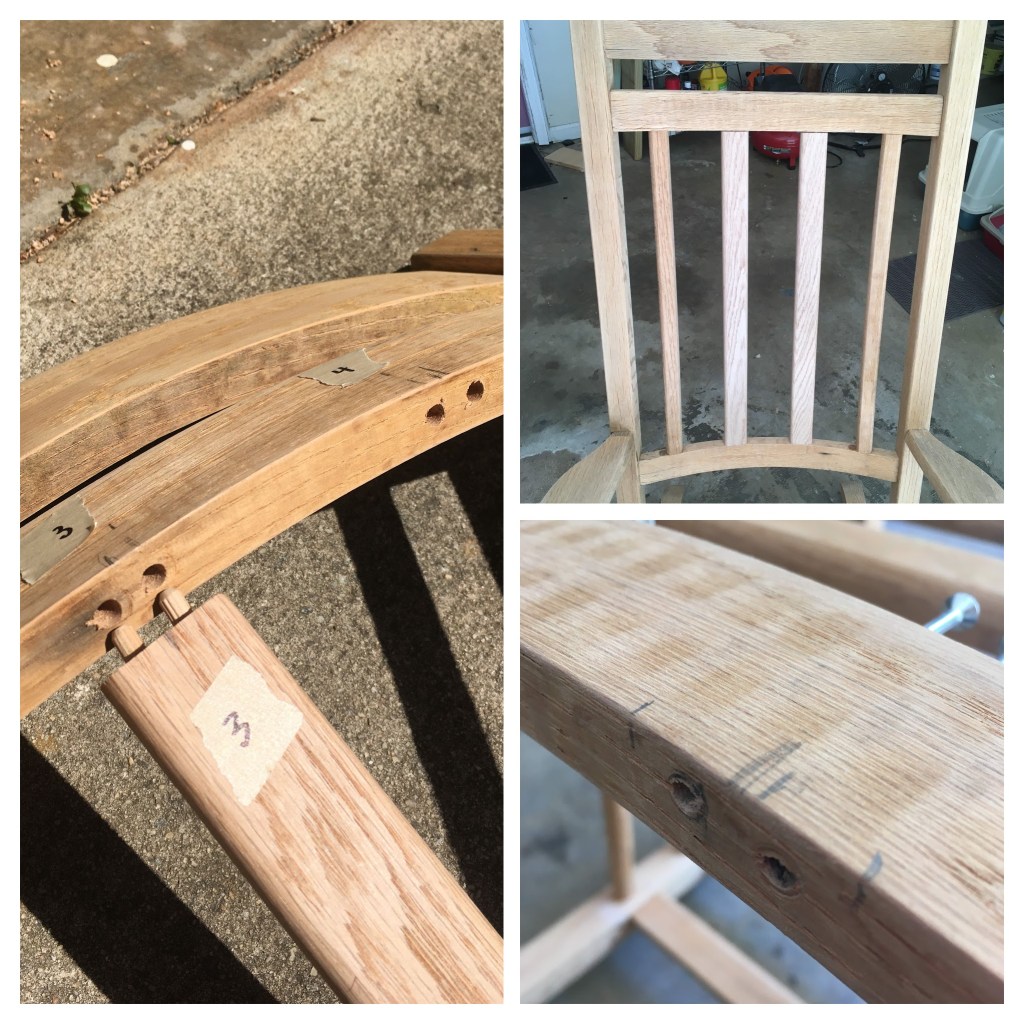
I attached the new spindles using doweling joints at the top rail and 3″ screws through the bottom rail. The frames were now ready for staining.
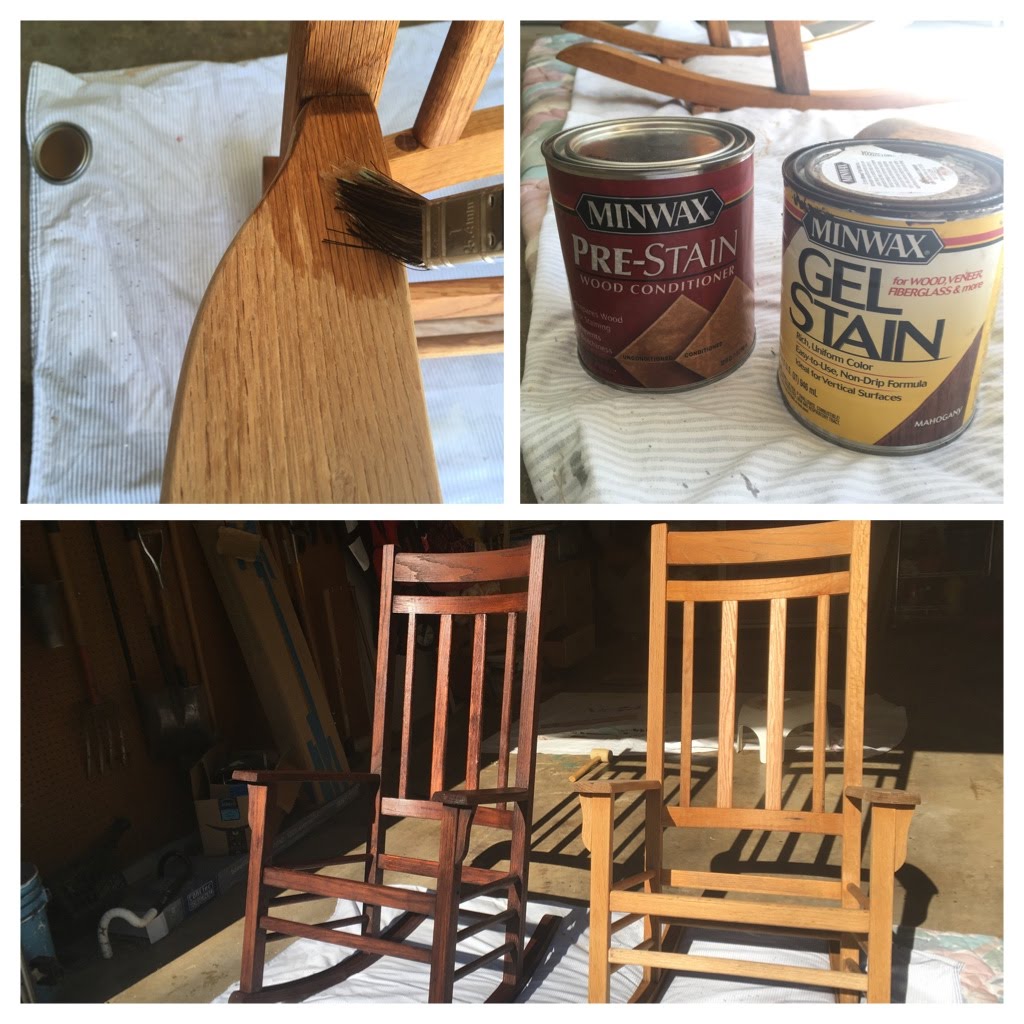
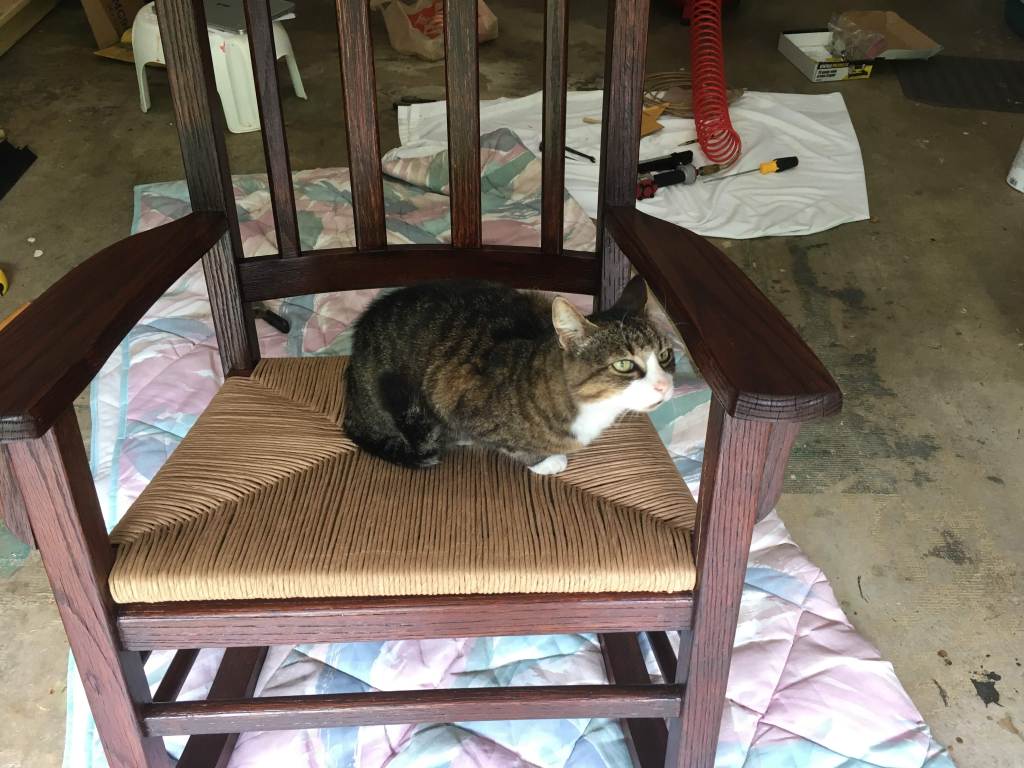
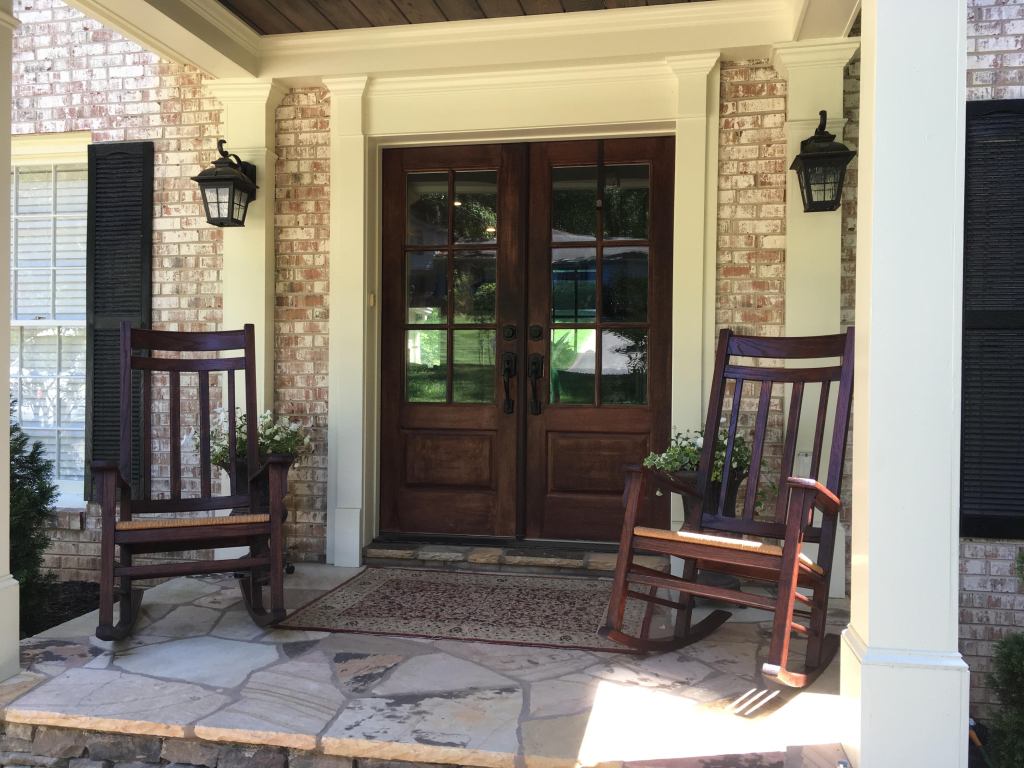
Before staining I treated the chairs with Minwax pre-stain conditioner. I then applied Minwax gel stain in mahogany to match my client’s front door.
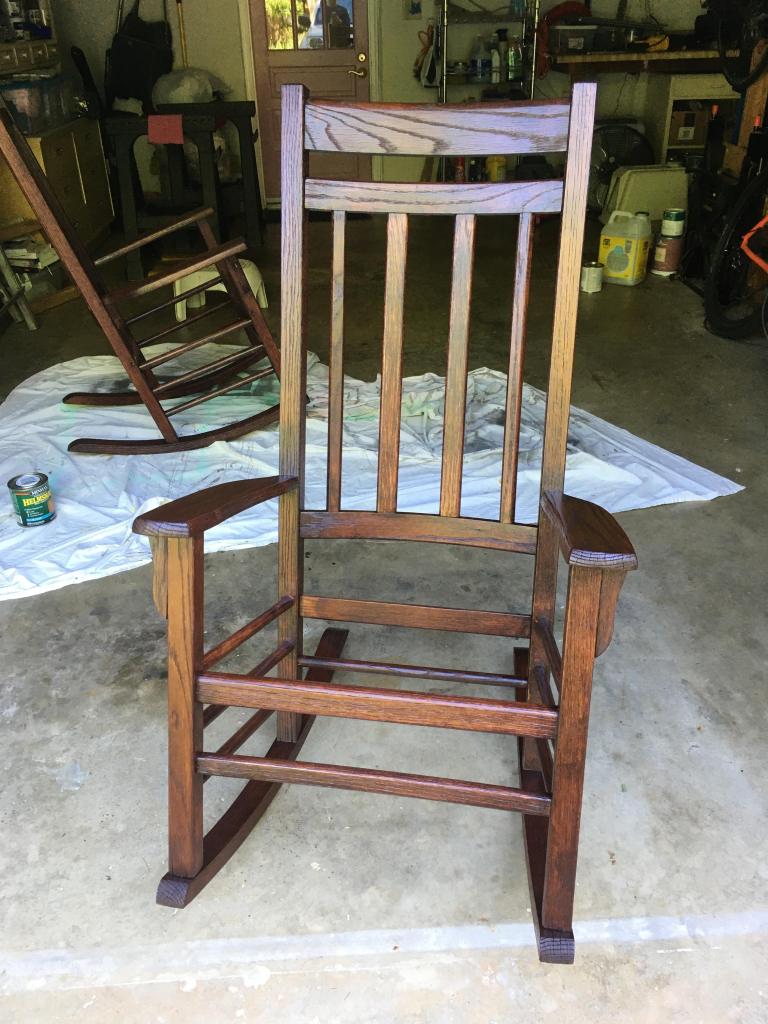
Two coats of Minwax indoor/outdoor Helmsman Spar Urethane in clear satin finished the woodwork.
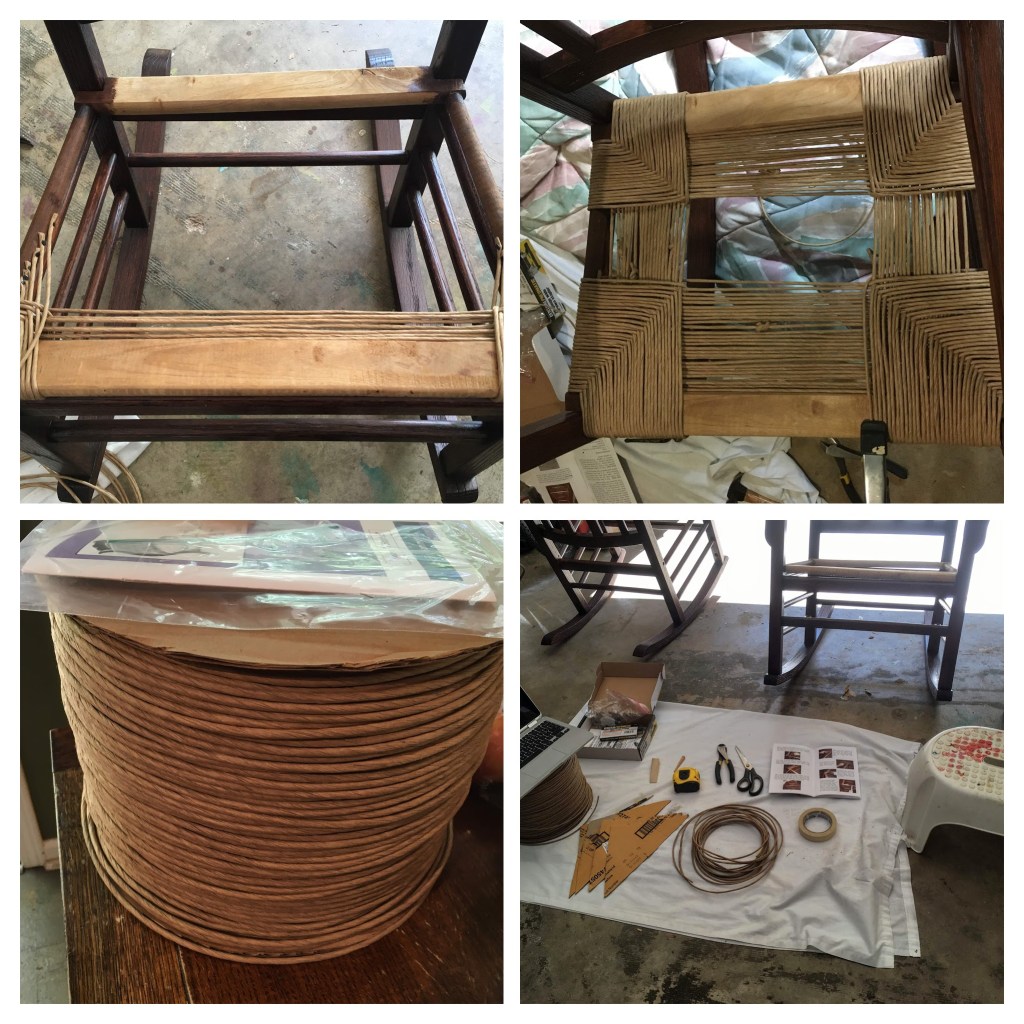
The second solution was to replace the cane seats with woven rush seats. Armed with a 10 lb reel of fiber rush, the necessary tools, and a really good instructional video I took on the challenge. You can find the video here and I am happy to share my learning curve with anyone who wants to attempt this themselves.
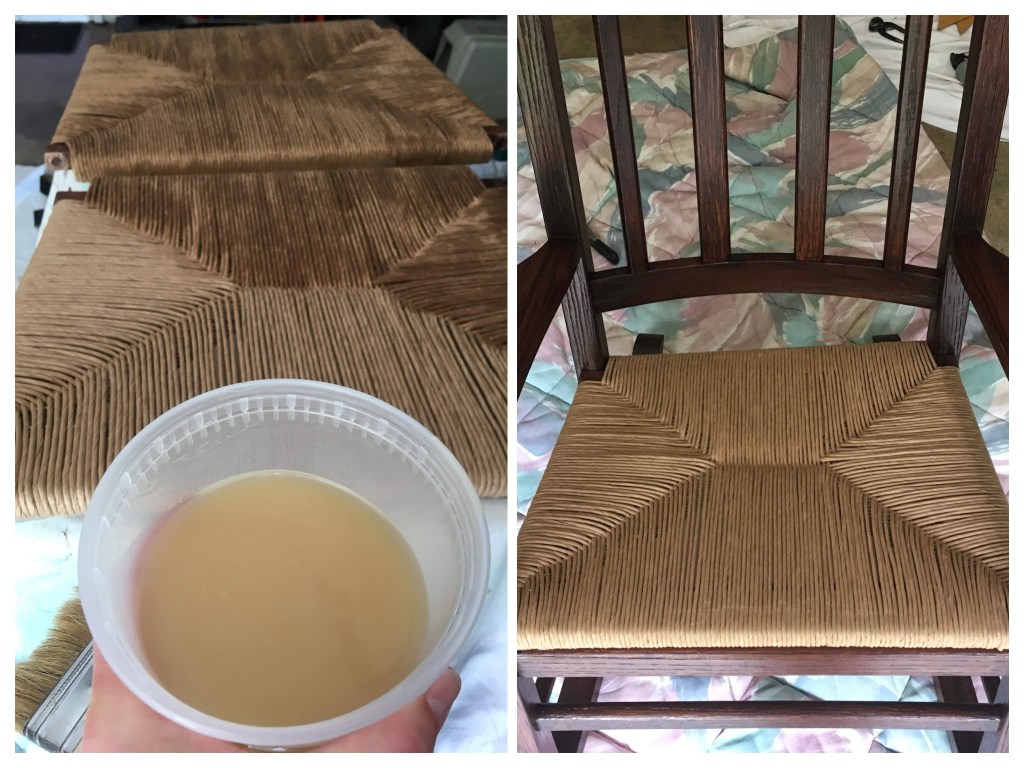
The seats turned out great. To finish them off ,and provide as much protection as possible, I applied 3 coats of shellac (50:50 solution in denatured alcohol) top and bottom.

Finally, I applied slip resistant tape to the unfinished bottoms of the rockers, reattached the seats to the frame, and the job was done!