#44 Windsor chair #2

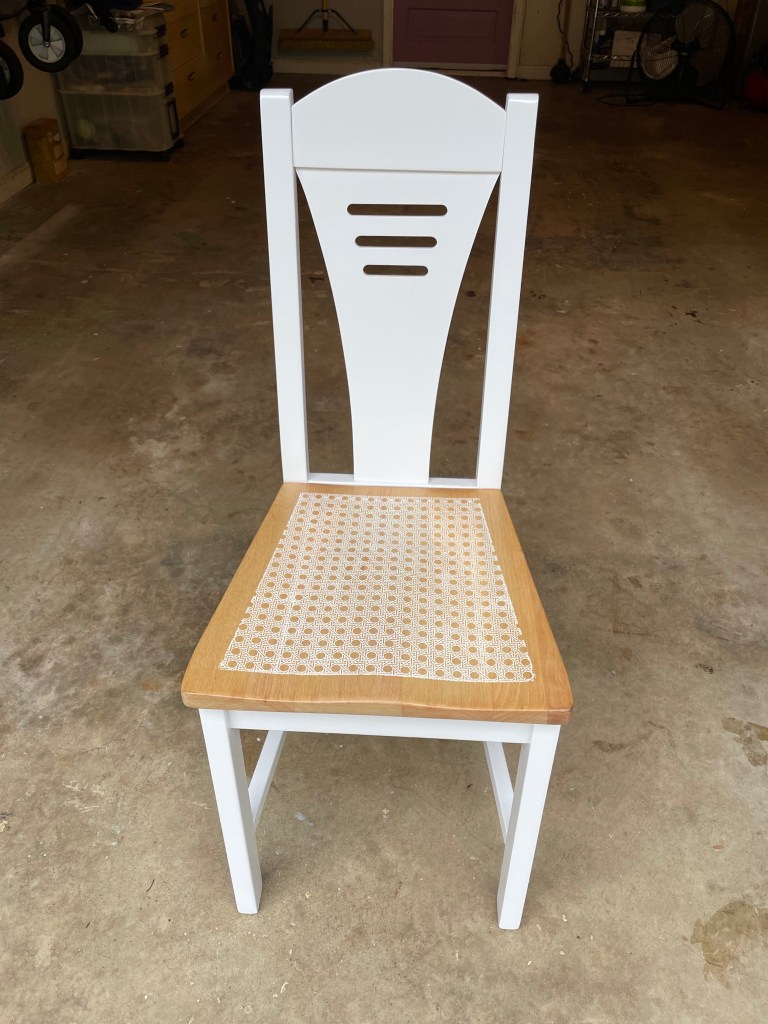
I got this chair off the curb across the street from my house. Something about it drew my attention so I felt very validated when I discovered it is a solid maple, mid-20th-century, Windsor desk chair, possibly made by Ethan Allen; definitely a piece worth rescuing. As usual the design evolved throughout the process and I think the final result is a perfect blend of several influences.

Materials used: Minwax Furniture Refinisher, Peel-Tek masking fluid, Designer Stencils bamboo lattice stencil (c328), Rust-Oleum 2X Ultra Cover in Coastal sage ultra matte, Varathane oil-based polyurethane in semi-gloss finish.

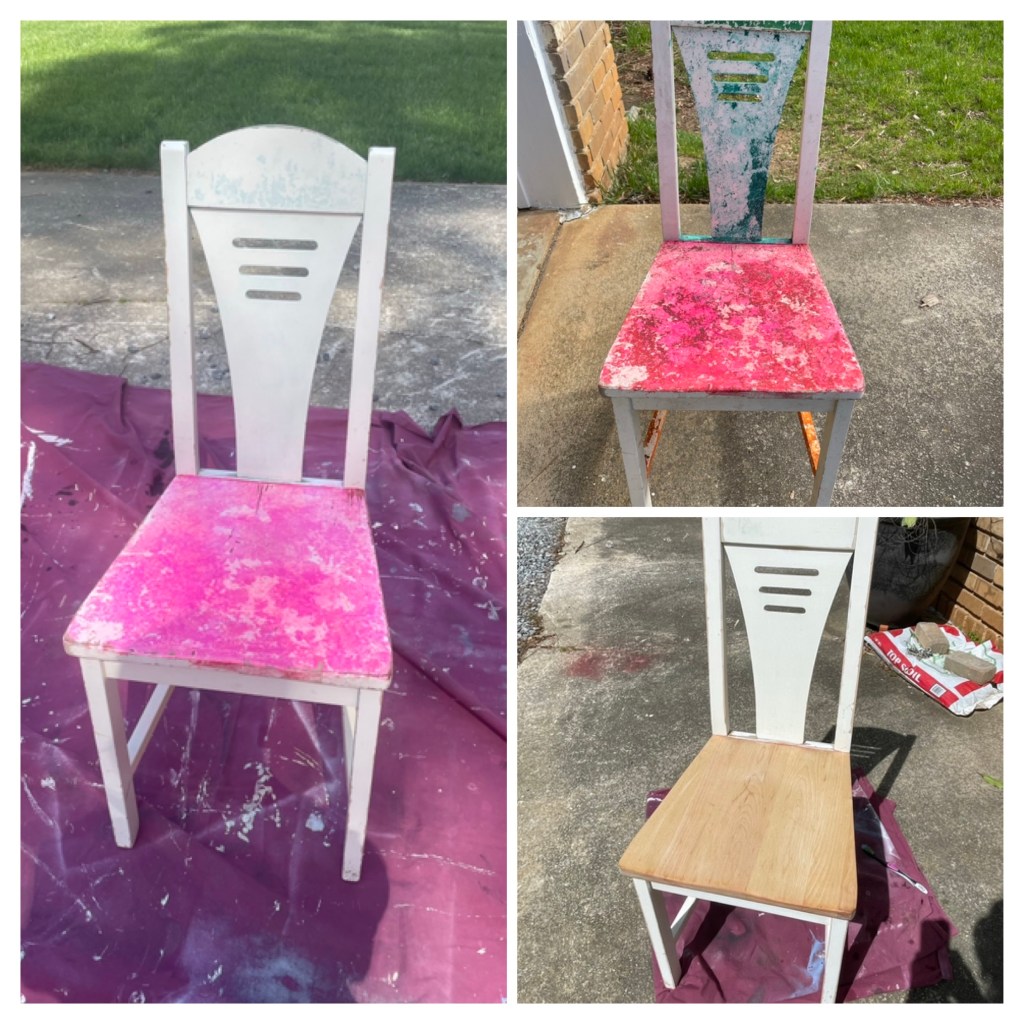
One of the first things that struck me about the chair is the bamboo-style legs, spindles, and stretchers. Since bamboo furniture often has a mid-century vibe to it, and because the existing finish was badly scuffed in places, I decided to first of all remove the dark brown glaze finish. At this point I was thinking I would maybe just restore it to its lighter, natural color.

After cleaning the chair with a weak solution of Simple Green, I removed the glaze finish using Minwax Furniture Refinisher. It came off nicely and I was happy to find beautiful maple wood underneath.

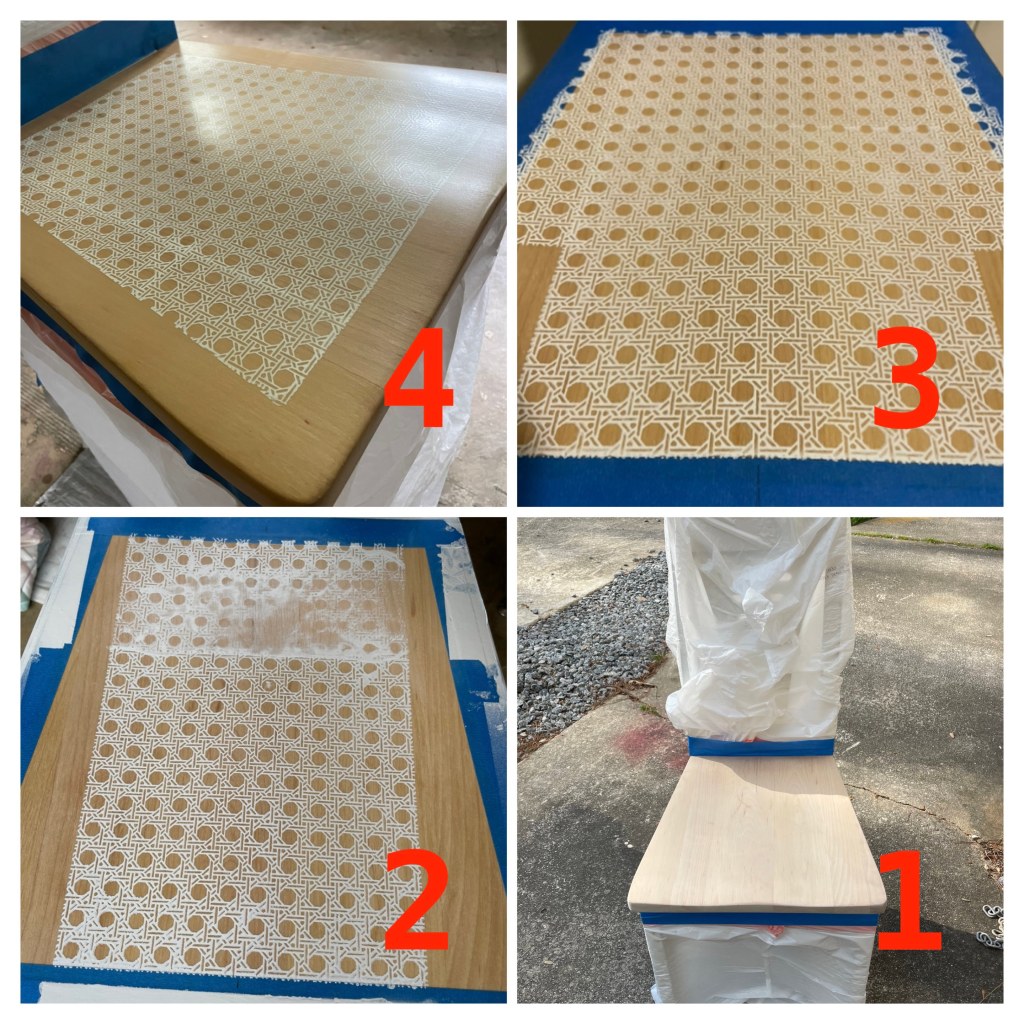
When I started sanding I quickly realized I wasn’t going to be able to prep every nook and cranny to a standard that would have merited a clear polyurethane finish. This was when I decided to go with a Hitchcock-inspired design which includes a stenciled top back rail, some paint, and some clear topcoat. When they were sufficiently sanded, I masked off the chair parts that would stay unpainted.

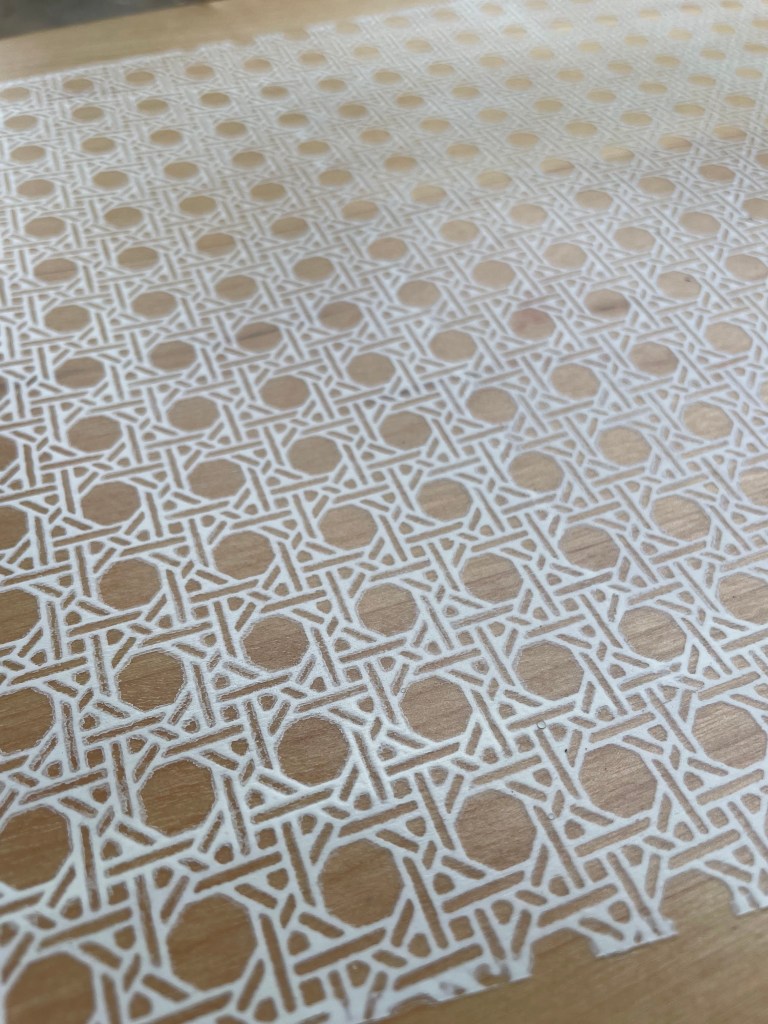
At this point I had decided to use a bamboo stencil and knew that I wanted the pattern to be in the natural, maple color. So I had to find a way for the pattern to be masked off while I painted the rest of the chair parts. I found Peel-Tek masking fluid on-line and applied it to the top back rail using the stencil and a stencil brush.

Now I was ready to apply 2 cans of Rust-Oleum 2X Ultra Cover in Coastal Sage ultra matte finish. I chose this color because it is in the mid-century color palette.

It took a long time to peel off the Peel-Tek masking fluid but it worked perfectly! Once all the masking tape was also removed, the chair just needed its finishing coats of Varathane polyurethane in semi-gloss finish. The semi-gloss finish really brings out the warm glow and the chatoyance of the maple.

#43 Birch chair

This chair sat in my garden shed for nearly four years while I waited for inspiration; it came in the form of a stencil. If I’m honest, I underestimated this piece. It wasn’t until I started prep work that I realized it’s made of solid birch and is a quality piece of furniture. It quickly took precedence over the piece I was already working on, and I’m thrilled with how it turned out. I had one mishap along the way; read on to see the mistake I won’t make again!

Materials used: Zinsser shellac-base primer, Rust-Oleum semi-gloss protective enamel, Show-Offs stencil, Anita’s acrylic craft paint, Varathane oil-based polyurethane in satin finish.

When I went to clean this chair I discovered a label under the seat. A bit of internet research quickly revealed that the chair was made in Canada by AP Industries, Inc. who “made quality case goods out of solid birch”. It was then that I decided to sand the seat back to bare wood to showcase some of the birch.

Once the chair had been cleaned and sanded, I masked off the seat and primed the frame. I chose a shellac-base primer because it will block any residual color better.

Now it was time to apply my inspiration: a faux cane stencil by Show-Offs. There are no bridges in the stencil; it is attached to a fine silk mesh that the paint can penetrate. After sealing the bare wood with a couple of coats of polyurethane (1) I was ready to start. At this point I made the mistake of trying to spray-paint the frame and stencil at the same time. The first application went well, but after cleaning the stencil with mineral spirits, it no longer stuck properly and the spray paint bled (2). I had to sand the seat back to bare wood and start again with a new stencil and acrylic craft paint that I applied with a sponge brush — much better (3). When the pattern was complete, I finished with three coats of semi-gloss polyurethane (4).

To finish the project I masked the completed seat and applied a couple more coats of semi-gloss enamel to the frame.

#33 Ethan Allen console cabinet

Transformation expenses: $205

Before I even got it home fate had a plan for this Ethan Allen cabinet. On the day I decided to rescue it, I called a friend and neighbor to help me load it onto my truck. Straight away she knew it would work as the bar cabinet she and her husband wanted for their library/office renovation. Designing it to be a showstopper in an eclectic room with both rustic and modern elements was a challenge. I’m happy with how it turned out.

I started by taking the piece apart, stripping the top, removing the old hardware, filling the holes with doweling and wood filler, and cleaning and sanding everything.

I primed the carcass with two cans of Rust-Oleum 2X Ultracover primer. I then added some glamour to the inside panels of the doors & cabinet using Rust-Oleum Aged Metallic paint in Vintage Gold. You’d think this stuff was real gold the way it has been disappearing off the shelves!

Next I added the Wow! factor with four coats of Behr high gloss enamel in a custom color that we’ll call Hermes Orange. I actually took a friend’s Hermes scarf box to The Home Depot for them to color match.

The lovely maple top of this cabinet is the design element that pulls everything together. I custom stained it to complement the rustic fireplace mantel it would be near. The stain was a 50:50 mix of Varathane premium wood stains in Cognac and Dark Walnut. I then added a bespoke stenciled design that mirrors the one on the new door pulls.

New door pulls from Bellwith Keeler and new brass hinges updated the hardware

The back panel had to be replaced because it had warped, so I got my husband to cut out all the identification from the old back panel and then I attached it to the underside of the cabinet. I also attached mirror glass to the inside of the back panel, then reassembled the piece. A glass interior shelf was the finishing touch.