#23 Ocean Mist table

Transformation cost: $19.02

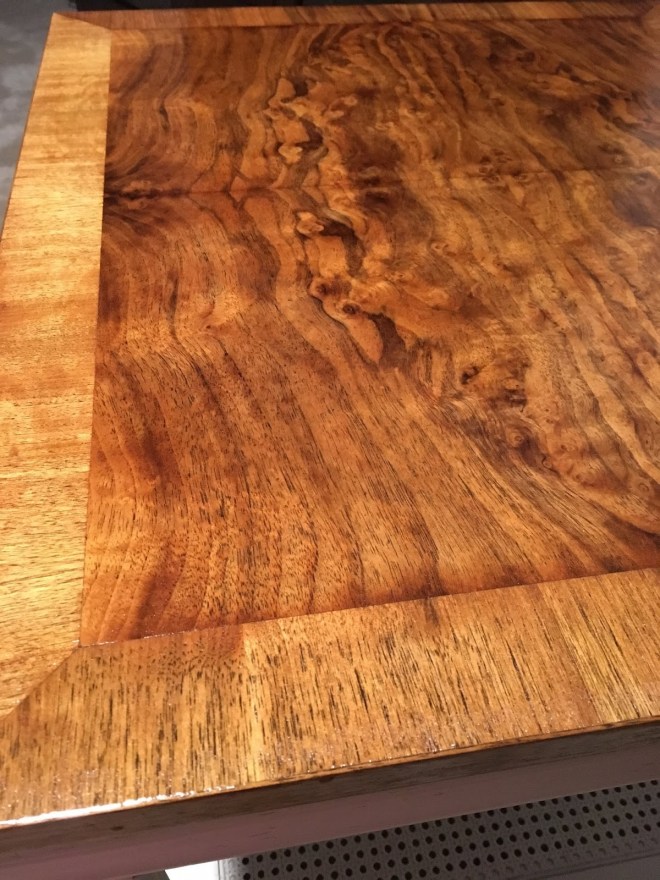
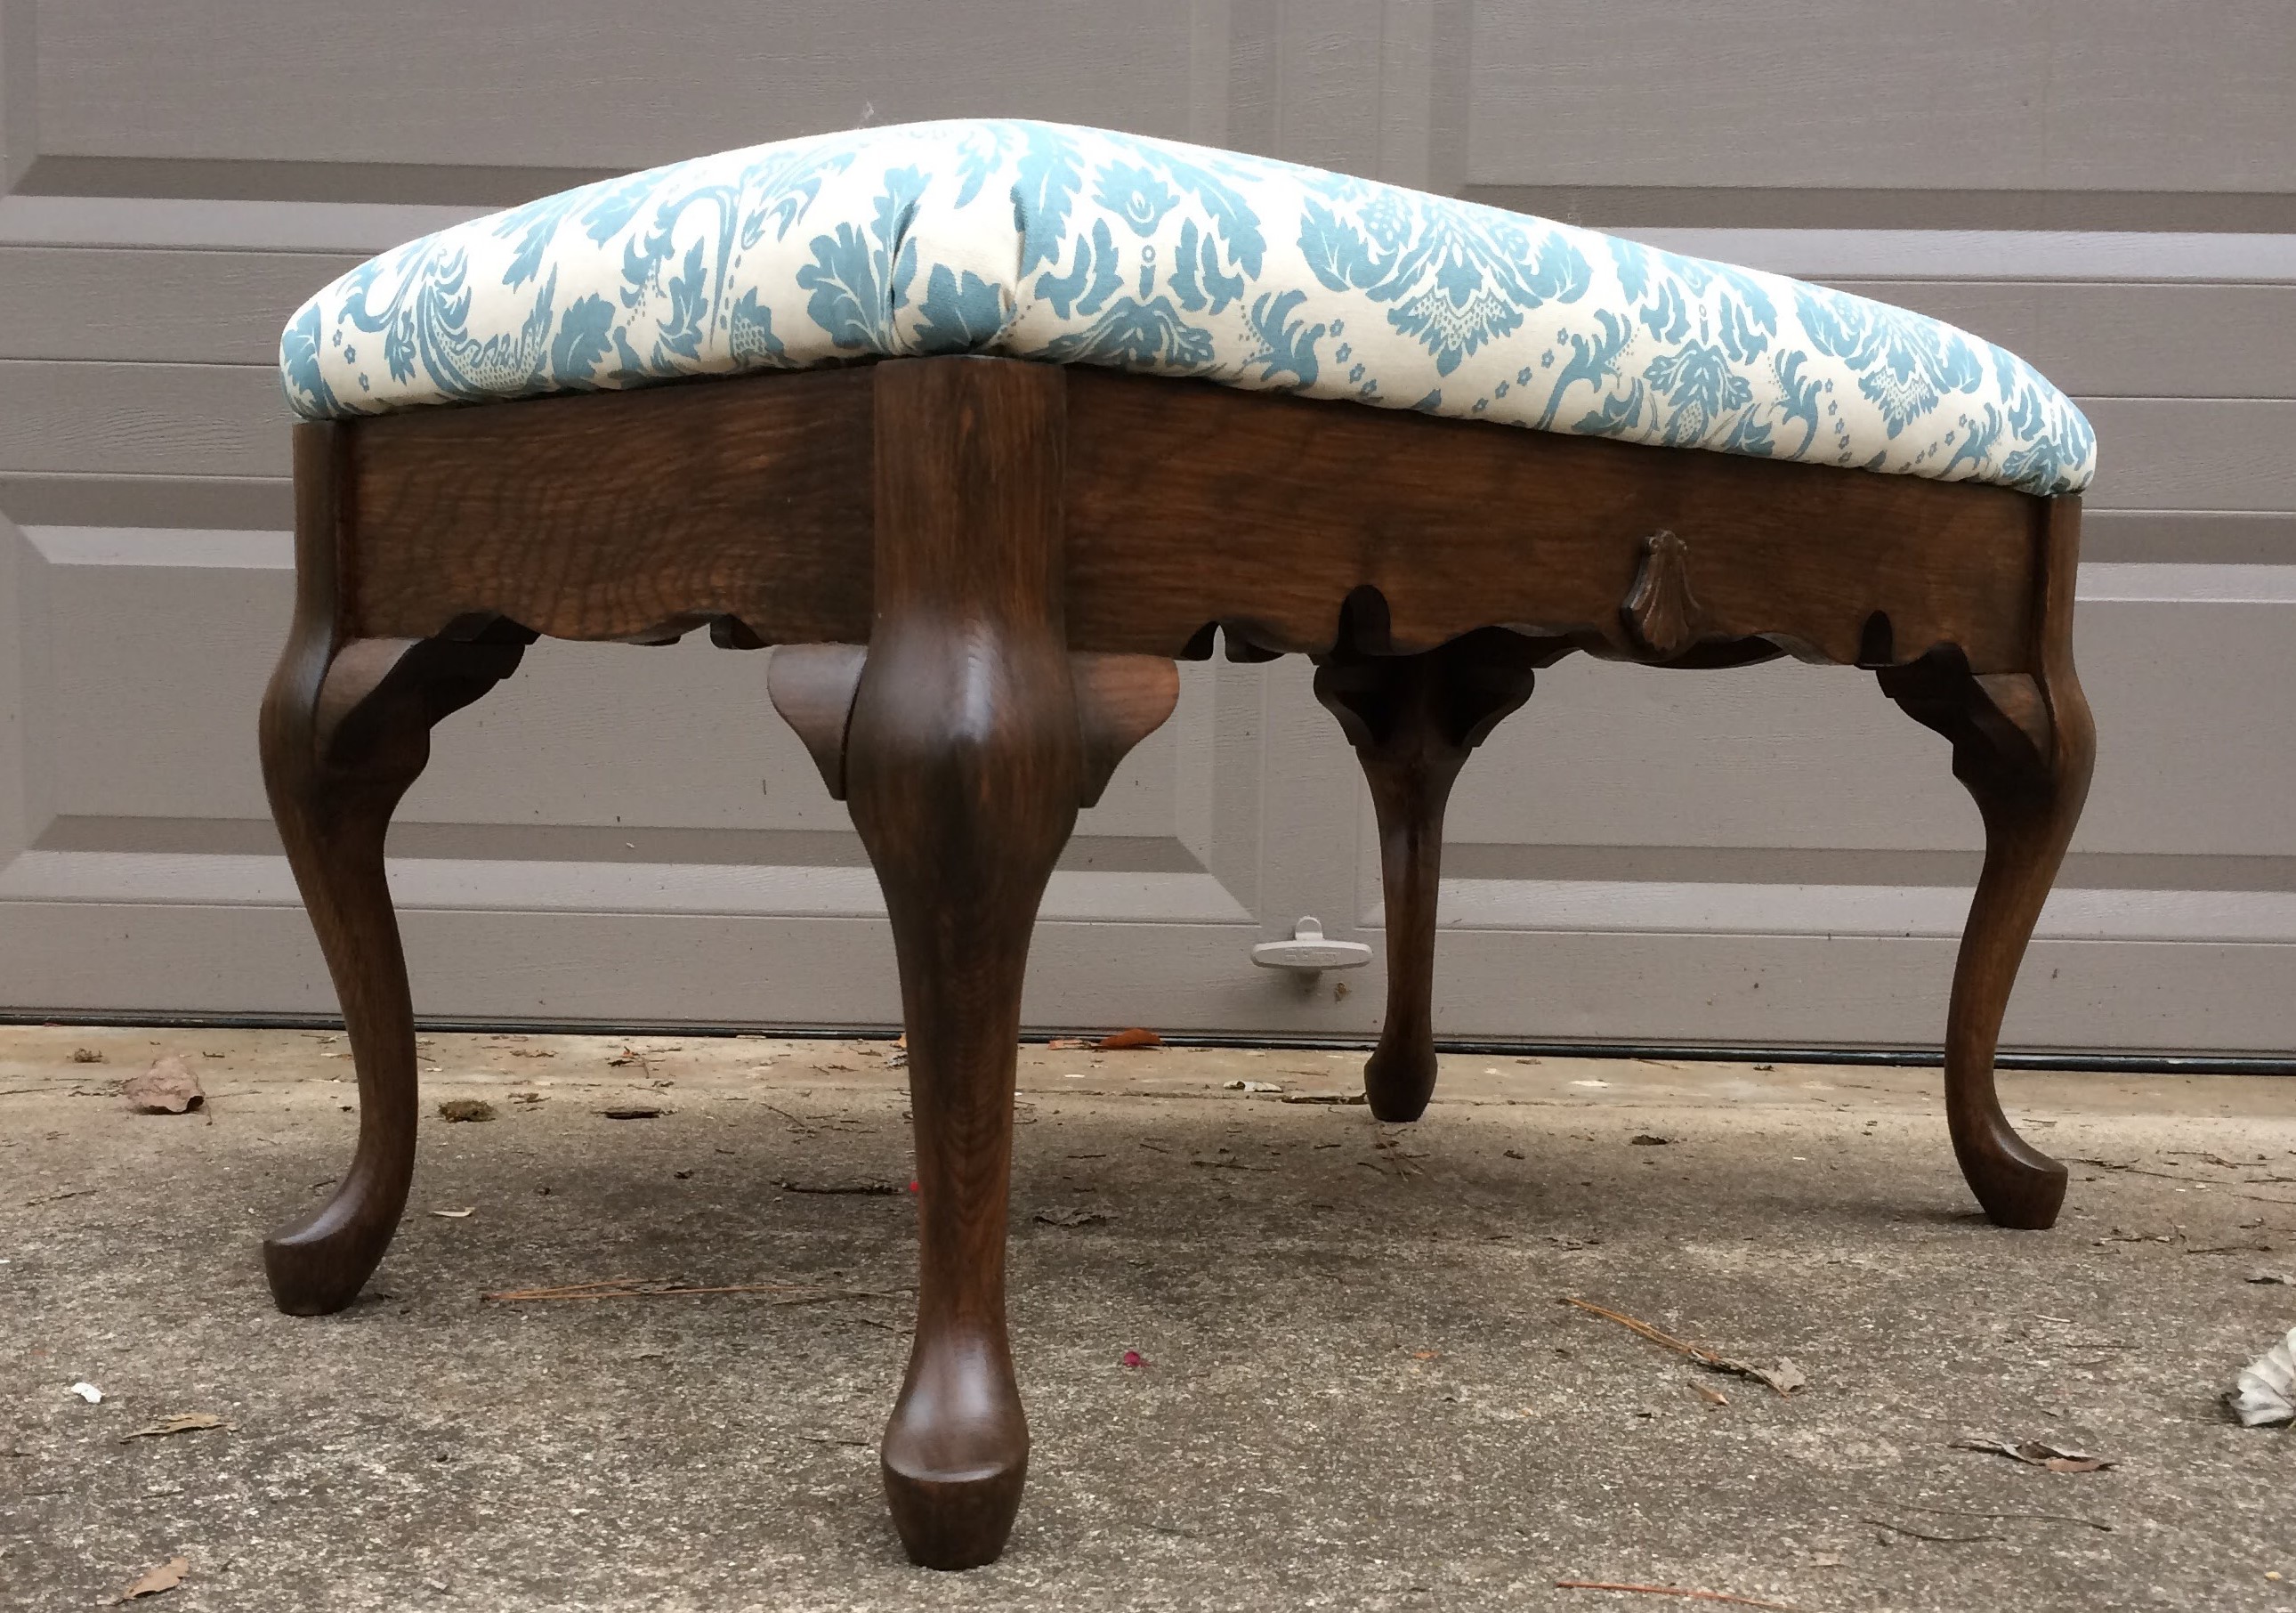
This piece reminded me of TT#8 (The Book Lover’s table), which I completed back in February 2018. They are made of similar materials and are assembled in a similar way. Oddly enough I had the exact same setback with both pieces!

I had no qualms about painting the piece and decided to have a little fun with it. The Gothic arch shaped indentations on the front were my inspiration.

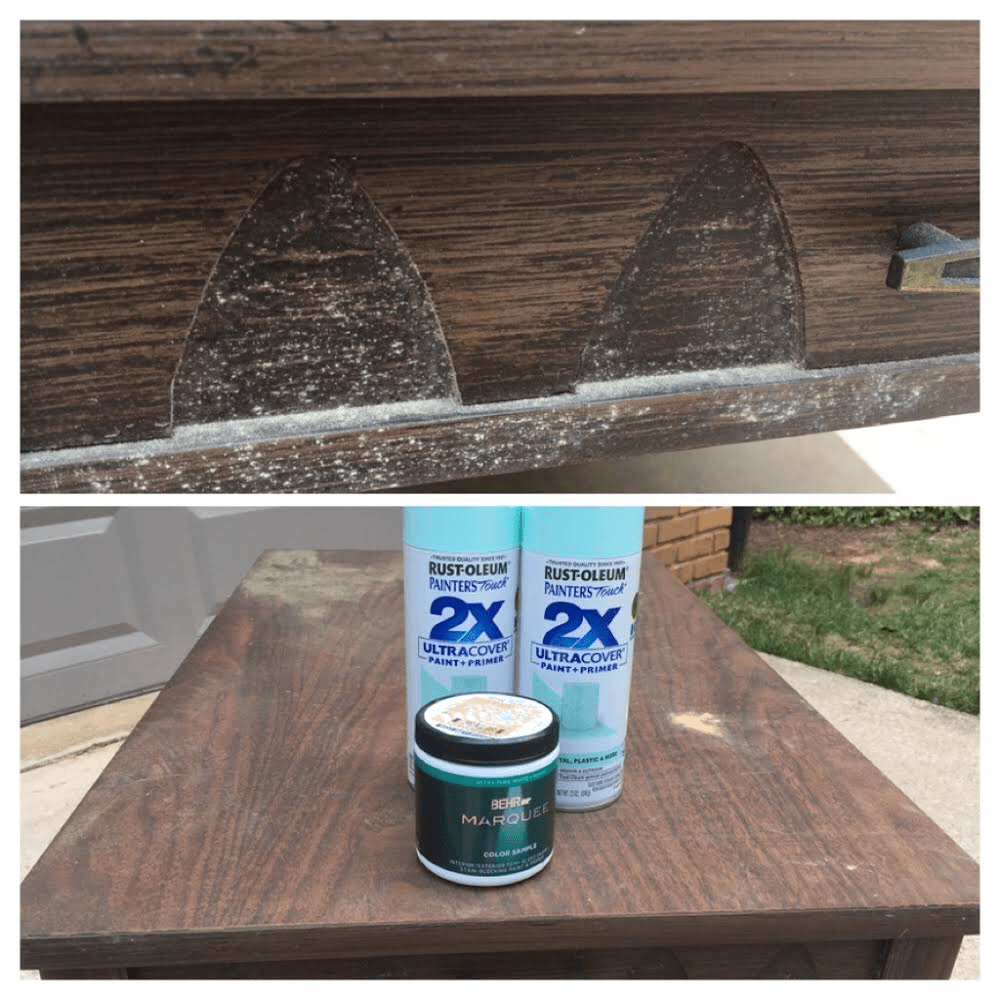
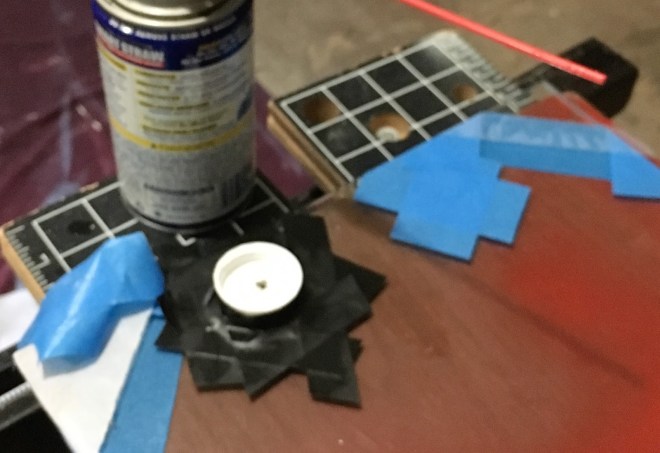
The supplies I needed for my arch inspired design were RustOleum Ultra Cover (Paint + Primer) spray paint in ocean mist gloss finish and a color-matched sample of Behr latex paint.

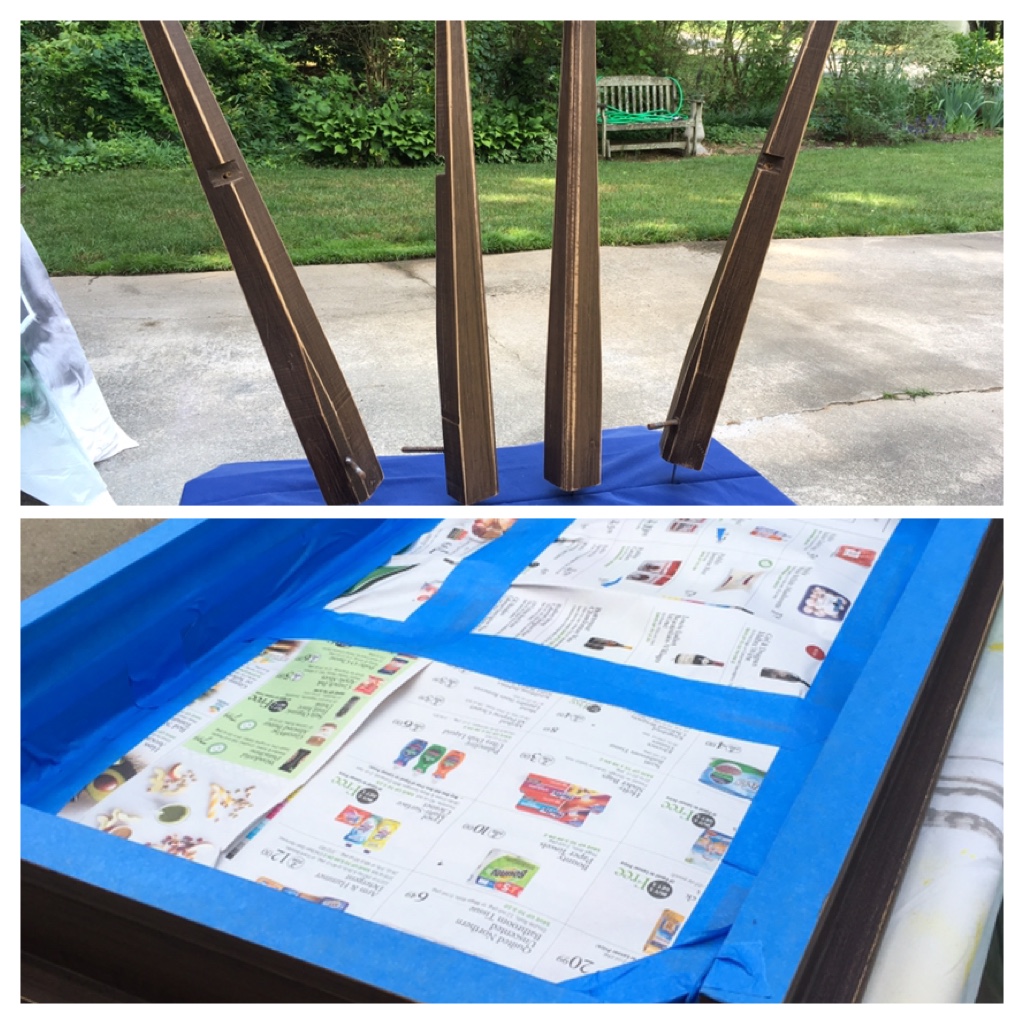
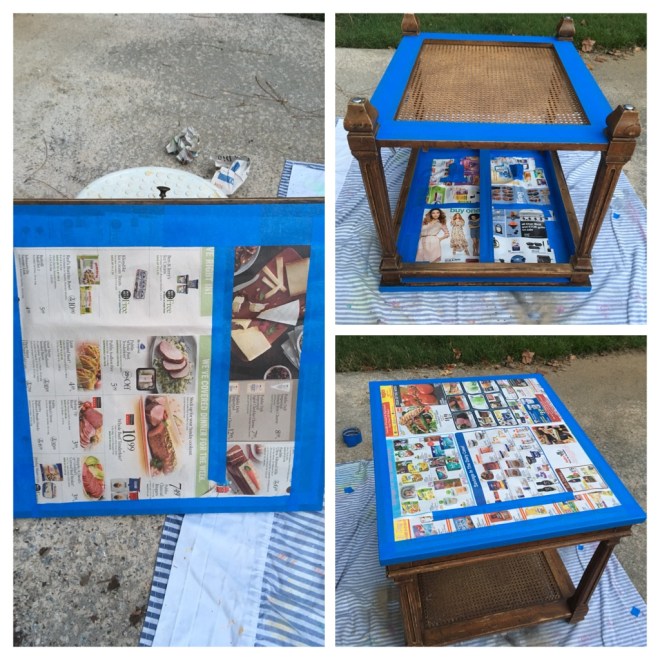
Next, the usual sequence: Disassemble. Clean. Sand. Mask. I put extra effort into the sanding because I would be applying a gloss finish that would highlight every flaw. A nail hammered into the top of each leg made it easier to clamp them for painting.

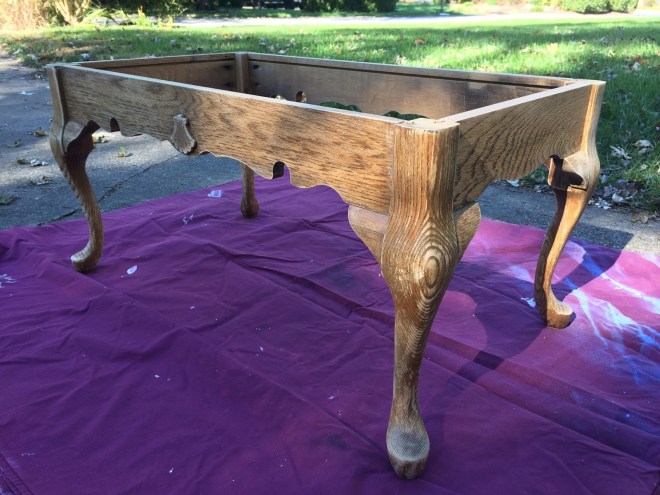
The paint was going on beautifully until it wasn’t! In certain areas the paint started to wrinkle, just as it had with the Book Lover’s table. Whereas with the Book Lover’s table I made lemonade out of lemons, this piece was destined for a different look. There was nothing for it but to let the paint dry thoroughly, sand away the wrinkles, and try again.

When all the components had been reworked to my satisfaction, I was ready to start on the design. I made a template from the indentations and used it to pencil my design on the table top. It was starting to look like a Paint by Numbers kit.

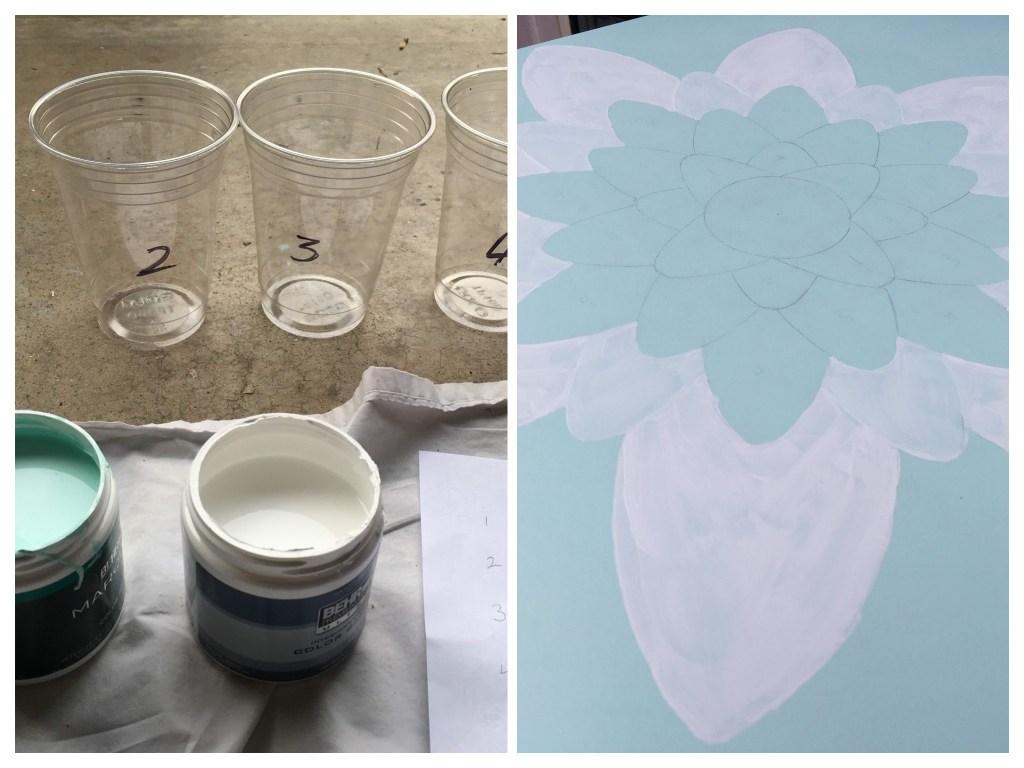
With the color-matched sample and some white paint I already had, I mixed six different shades of the Ocean Mist color and began hand painting.

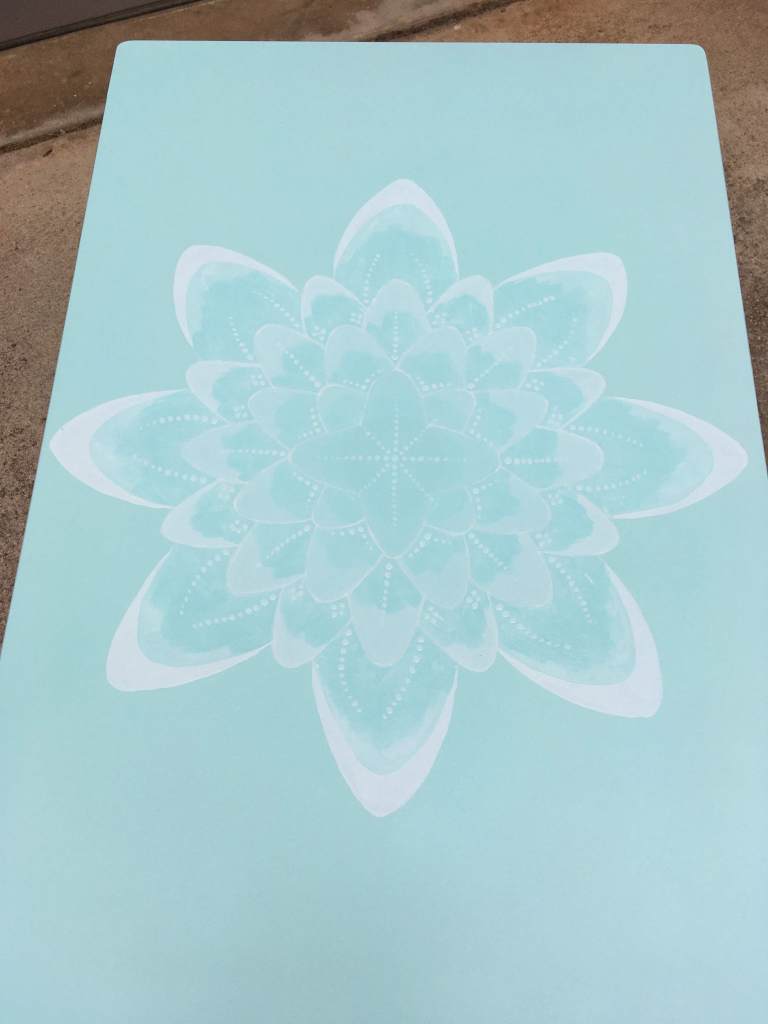
Some time later ……. I locked in the finished design by adding a few coats of gloss lacquer over the hand-painted areas.

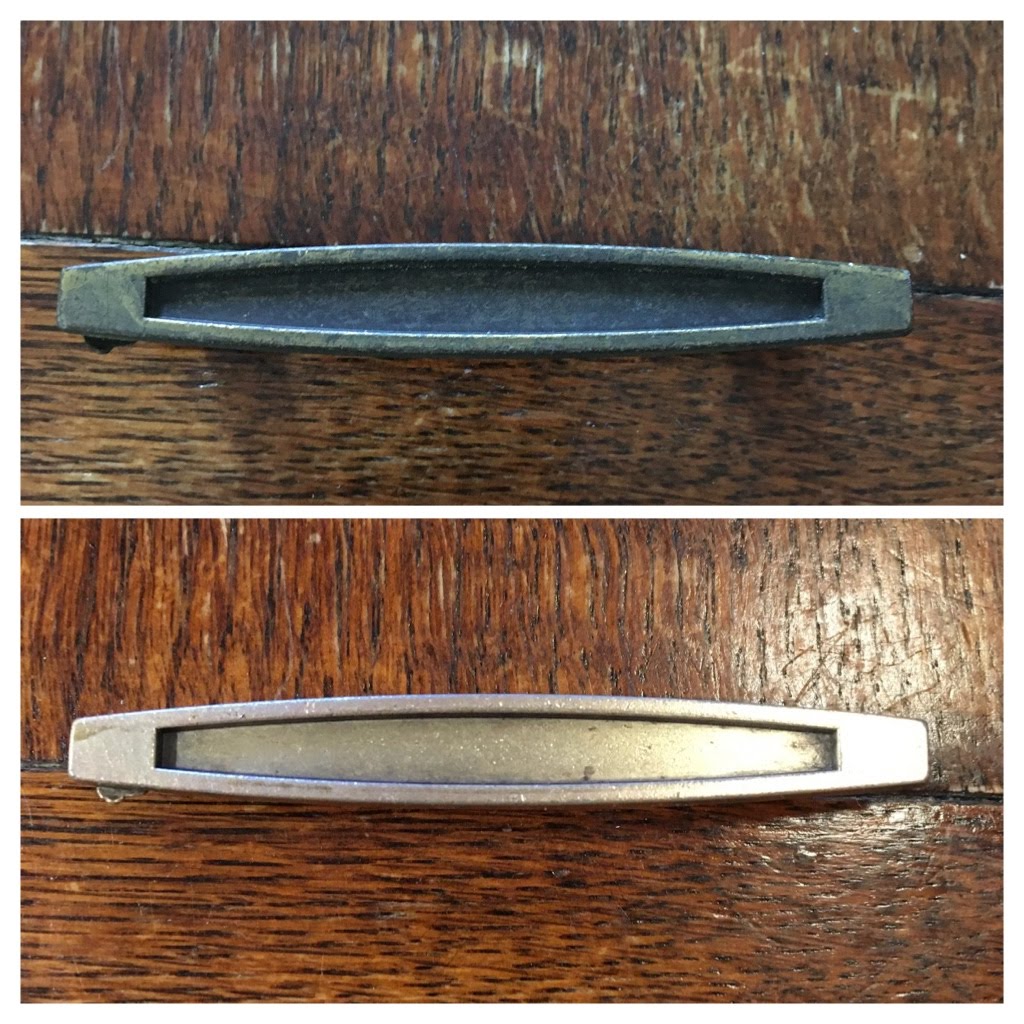
Finally, I cleaned the original hardware with some Bar Keeper’s Friend and put everything back together.

#21 Hekman coffee table

Transformation cost: $20.50

When a neighbor was discarding this table I almost didn’t take it because it is large and heavy and I was short on storage space. I’m glad I changed my mind because it is going to be perfect for the large living room my son will have in his shared apartment. Also, it’s incredibly robust so will hopefully withstand the wear and tear from four 19-year old boys.

Markings on the underside of the table quickly revealed its distinguished heritage. Despite knowing the manufacturer and serial number, my internet searches for more information have been fruitless. However, I will rest with the knowledge that a similar Hekman coffee table would today cost upwards of $500, and that “Now, almost a century old, Hekman is widely recognized as one of America’s premier furniture suppliers.” (excerpt from http://www.hekman.com/our_history)

Removing the worn and damaged finish on the table top was my first priority. Once I had also cleaned the legs with a mild soap solution, the piece was ready for its new finishes.

First was Annie Sloan “Coco” chalk paint. I applied three coats to the legs.

I then sealed the chalk paint with one coat of clear wax. Once it was dry and buffed, I applied a second coat of clear wax, followed by Annie Sloan dark wax. By working the brush and using more clear wax as needed, I got exactly the look I was going for. Once it was dry, I finished by buffing the legs one more time.

For the table top I began by applying a coat of MinWax stain & polyurethane in honey satin. I had intended to finish the piece with one or two more coats of this product, but changed my mind. I so liked the look of it after just one coat I decided to switch to an oil-based, clear, satin polyurethane to finish the job.

Two coats of clear, satin polyurethane gave the piece the protection and sheen it needed

#20 Bar stool bistro table

Transformation cost: $26.05

Part 1 of a 2-part transformation this bar stool-looking thing was acting as base for a larger, round table top. It could have become many things but its fate was sealed when I temporarily stored it on my front porch and realized it is perfect as the bistro table we needed. I probably could have bought a small table for about the same price but this way I have the satisfaction of knowing I made it and it didn’t get trashed! Part 2 will be the transformation of the table top piece.

Once separated from the particle board table top this base was ready for its stand-alone transformation. After sanding and cleaning, the legs were ready for a paint finish that would complement our porch furniture and decor.

I chose Rust-Oleum metallic oil-rubbed bronze because I had previously used it to freshen up our porch light casings. NOTE TO SELF: This paint clogs easily and I wasted some partial cans because they would no longer spray.

Once I had created a paper template for the top I was ready to take the tiling plunge. I started by sticking a single row of tiles to the rim. Meanwhile I laid out the design for the top on my paper template. I used wheeled mosaic nippers to cut some square tiles in half for the center of the design.

I let the rim dry for 24-hours before I applied the tile design to the top of the table. The old table top and some cookbooks made a handy weight to encourage everything to set level.

The next day I grouted everything with a pre-mixed grout in alabaster color.

To finish the top I applied one coat of mosaic grout sealer to protect against red wine and coffee!

The finished piece goes perfectly on our front porch and is just the right size for front porch essentials!

#14 Heritage “Cameo II” end table

Transformation cost: $17.82

When my friend Renate saw this piece roadside she instantly contacted me and I rushed to pick it up. At first glance I knew it was a beautiful, quality piece and, on further investigation I was validated. Made in May 1976 by Heritage furniture in Drexel, NC it was part of the Cameo II collection. The catalog boasts: “Superb fruit-wood finishes complement rich grafted and pin knotty walnut veneers and pecan solids”. The pieces in the collection were originally sold in either a wood or a custom (painted) finish. Knowing that made me less reluctant to apply some paint to the piece.

The table top had some nasty water/paint/crayon marks so I began by removing the finish on the top.

Next I gently sanded the top and wiped it with a damp cloth.
The rest of the table got a light sanding and a cleaning with a mild soap solution.

After meticulously masking certain areas, the piece was ready to paint.

Starting with the underside I applied 3-4 coats of Rust-Oleum 2X Ultra Cover in Heirloom White, satin finish.
Once upright the rest of the piece got the same treatment.

I then gently distressed the Heirloom White finish and sealed it with Rust Oleum Satin Clear Enamel

To finish the top I applied 3 coats of a clear gloss oil-based polyurethane. The grain of the walnut veneer came up beautifully!

#10 Oak end table

Transformation cost: $37.39

I was a chalk paint virgin, I admit it! I know, any self-respecting person who’s been DIYing (that is a verb, right?) as long as I have should have used chalk paint a gazillion times by now but, what can I say?,
I guess I’m just late to the party. Anyway, with this piece it was time to venture into chalk paint territory. It was quite a departure for me; I pride myself in being a meticulous painter, and I can lay off like the best of them. After watching numerous Annie Sloan tutorial videos I went to work. Applying chalk paint was like going back to preschool; with a cylindrical brush I slapped it on in every direction, stabbing at it to get into all the nooks and crannies, being careful not to apply too much or to have any drips or runs. After the first coat it looked like the paint and the table had got into a brawl but after the second coat a lovely, flat, uniform finish was achieved. Waxing over the paint is the finishing touch to give it protection and a more dimensional look. I’m very happy with how this piece turned out, I will definitely be using chalk paint again!

I began by stripping the finish off the top of the piece to expose the lovely wood grain. It came off so nicely!

Next I color washed the top of the piece with a 1:2 mix of chalk paint:water. I brushed the wash on then removed excess with a rag until I got the depth of color I was looking for.

I then applied 2 coats of chalk paint to the rest of the piece.
At this point I decided I didn’t like how the color washed top looked against the base so I changed tack.

To finish the piece I went over the top with 2 coats of MinWax PolyShades Honey in a satin finish, I applied a coat of clear wax followed by a coat of white wax to the body of the piece, and I installed a new drawer pull.

#8 Book lover’s table

Transformation cost: $27.30

Even though the flat surfaces of this piece were ugly, beveled, veneered particle board, the tapered legs and upright pieces are solid wood with some attractive detailing. I instantly knew I could make it look elegant. A fortuitous accident with a paint finish resulted in exactly the look I was hoping for; a cracked, aged finish in elegant gold & heirloom white with (in places) touches of the almost black original color.

The first step was to remove one of the pieces of particle board; to be replaced later with something much more lovely.

I removed the legs and gave everything a good clean and a light sanding.

Next I applied a coat of Kilz Complete oil-based primer, followed by Rust-Oleum metallic gold paint, followed by Rust-Oleum 2X Ultra Cover in heirloom white satin finish.

When I applied the metallic gold paint it inexplicably wrinkled in random areas. I liked it so I left it and let it dry thoroughly before applying the top coat of heirloom white. When I went to age it with sandpaper, the wrinkling gave way to a beautiful cracked look.

To attach the new glass top to the rest of the table we would need screw holes. The glass supplier was going to charge $5 per hole so I enlisted my brilliant husband. With a spear-headed carbide drill bit, plenty of lubrication and patience he expertly made the four holes I needed.

The finishing touch was to install the new glass table top. The finished piece is a lovely, elegant table perfect for someone who wants to show off their reading collection!

#3 Upholstered bench/coffee table

Transformation cost: $50.06

“What gorgeous legs!” was my thought when I saw these at the end of a neighbor’s driveway on trash day. The wood grain was so beautiful I knew I couldn’t bear for these to get tossed in a dump truck.

I began by cutting a piece of fiberboard to fit the shape of the base. I attached 8 pieces of 3/8″ square dowel that would keep it snugly in position.

I covered the fiberboard with 2.5″ thick foam followed by batting followed by my chosen upholstery fabric.

I debated with myself whether or not to paint the legs but, in the end, I chose a Minwax stain & polyurethane (PolyShades Honey in a satin finish) so as not to conceal the beautiful grain. I cleaned and lightly sanded to prepare the legs for 2 coats.

The finished color is a beautiful rich brown. All that was left was to secure the upholstered top using 4 L-brackets.