#35 Pedestal table

Materials used: Wood filler, spray paint, transfer, ceiling paint, wood stain, polyurethane.

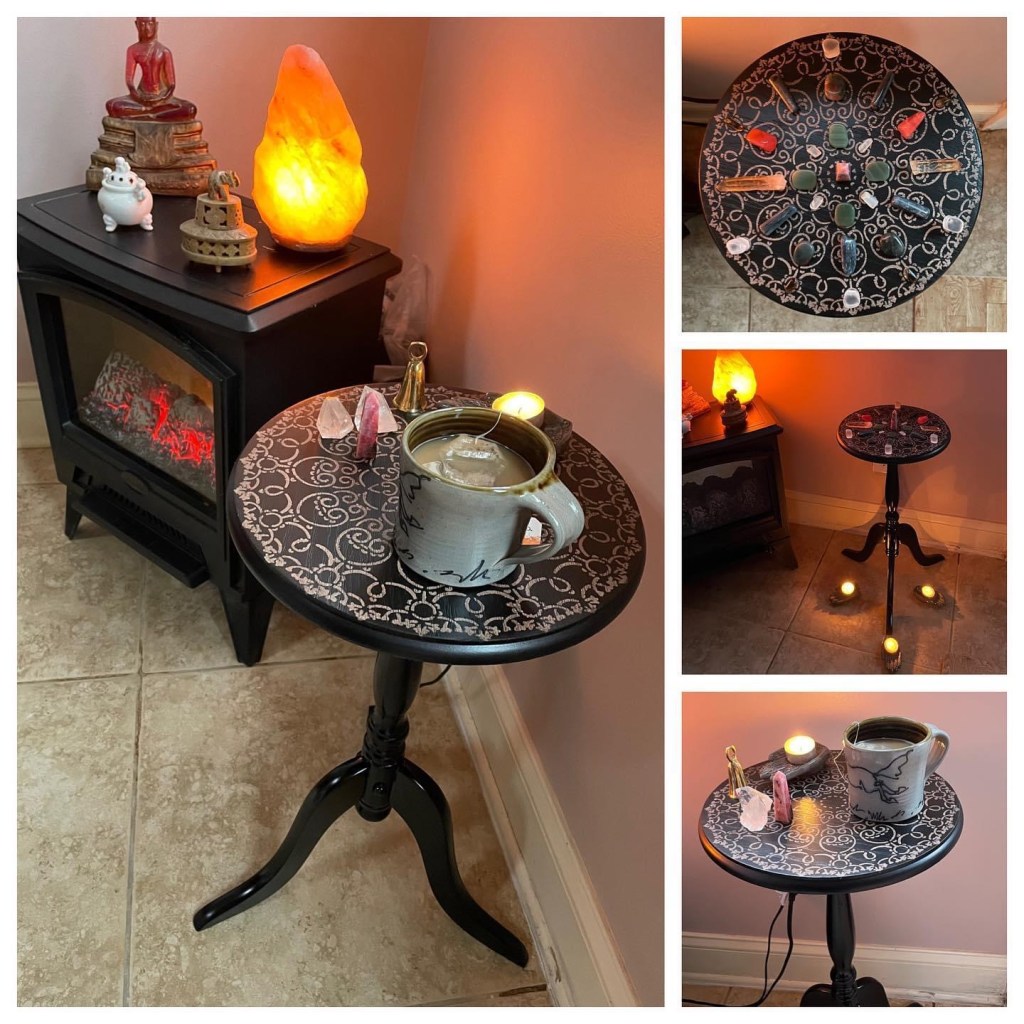
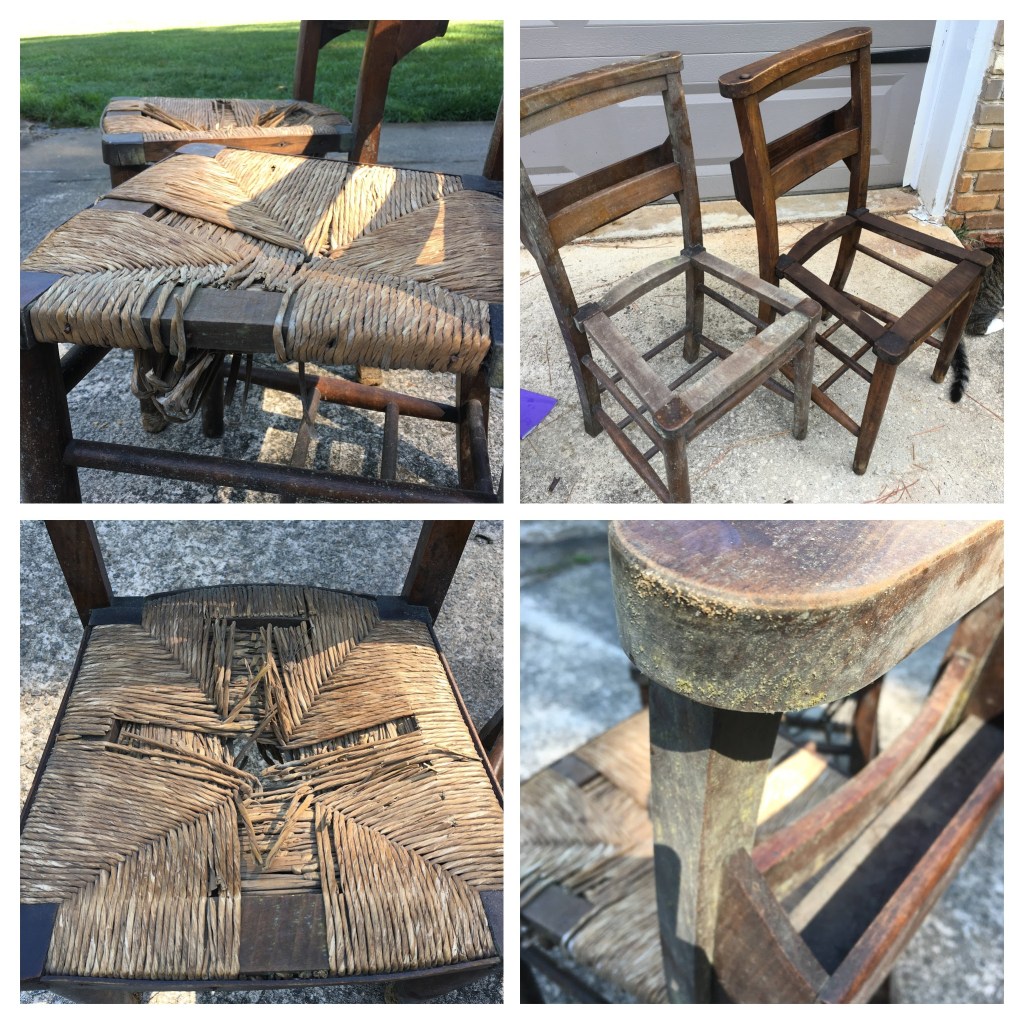
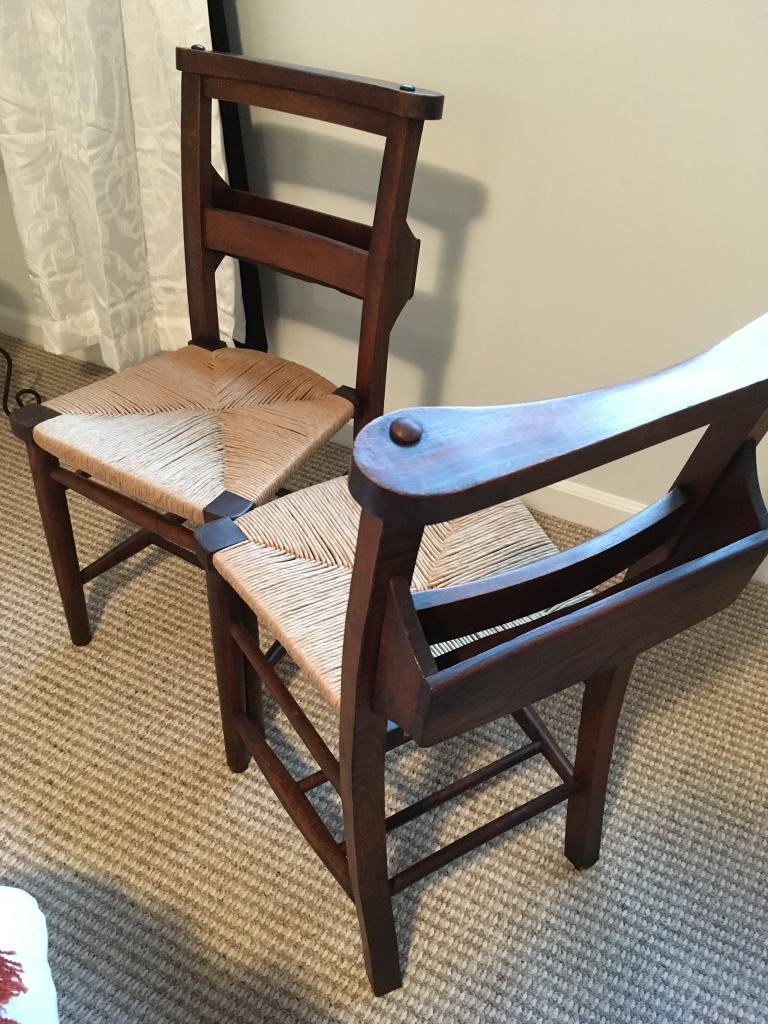
This pedestal table was one of several abandoned furniture pieces in a fixer-upper homestead my friend bought. Rather than discard it, she offered it to me to transform. Now that it’s finished, I find myself in need of a table about this size and shape, but with a different look. I’m hoping something similar comes my way soon so I can try out another design.

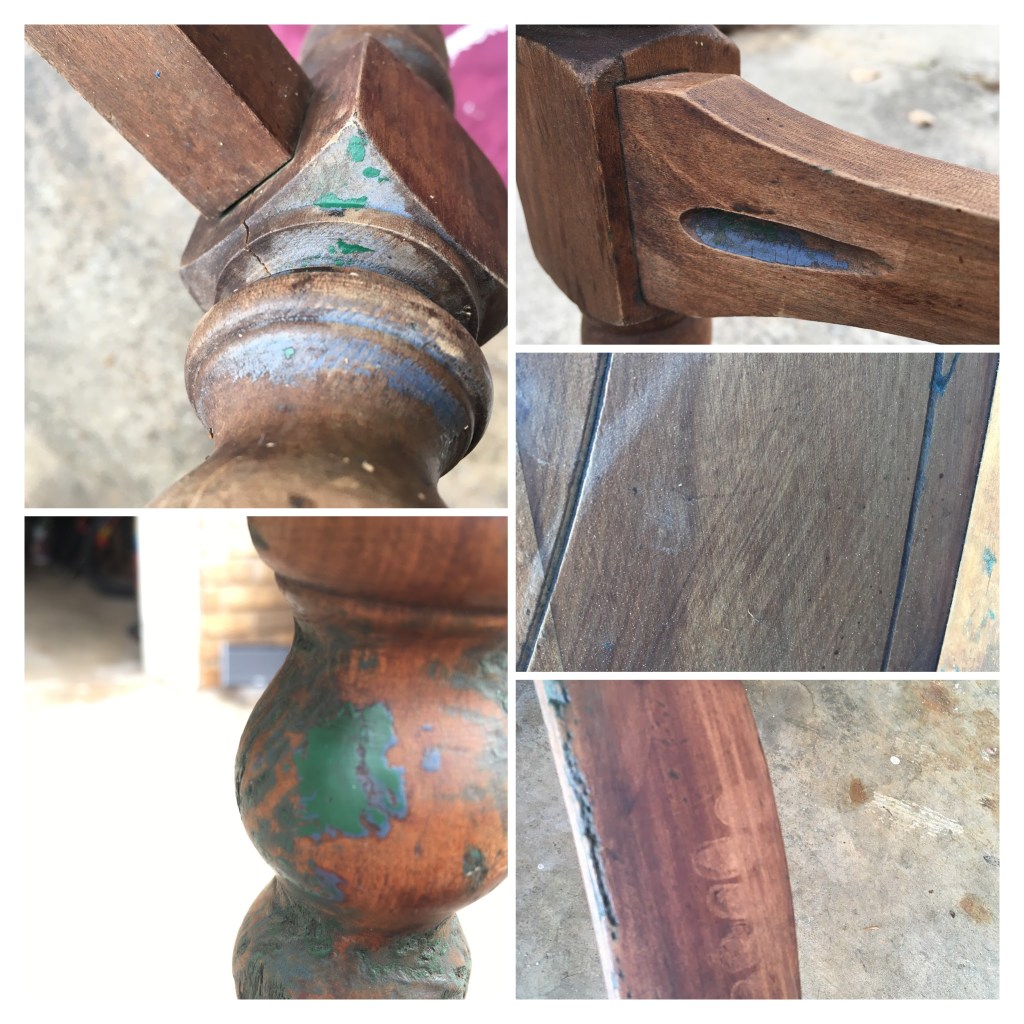
Before I could do anything with this table I needed to be able to fix a wobbly foot that was preventing it from standing stably. It turns out that removing the feet from the pedestal was a lot easier than I thought. You can see a how-to video here.

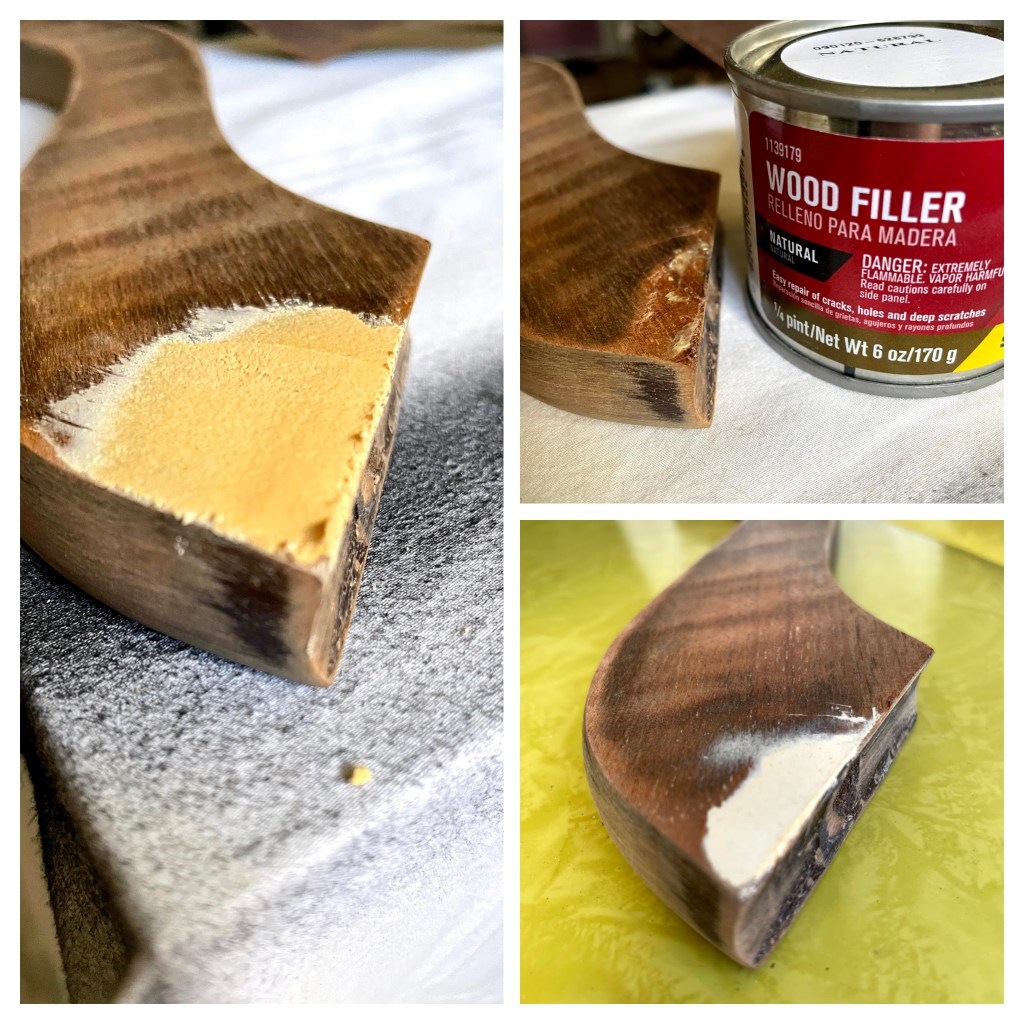
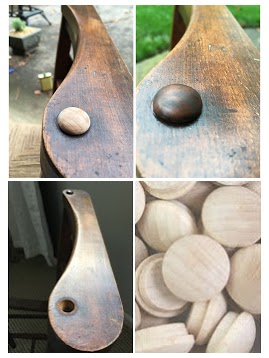
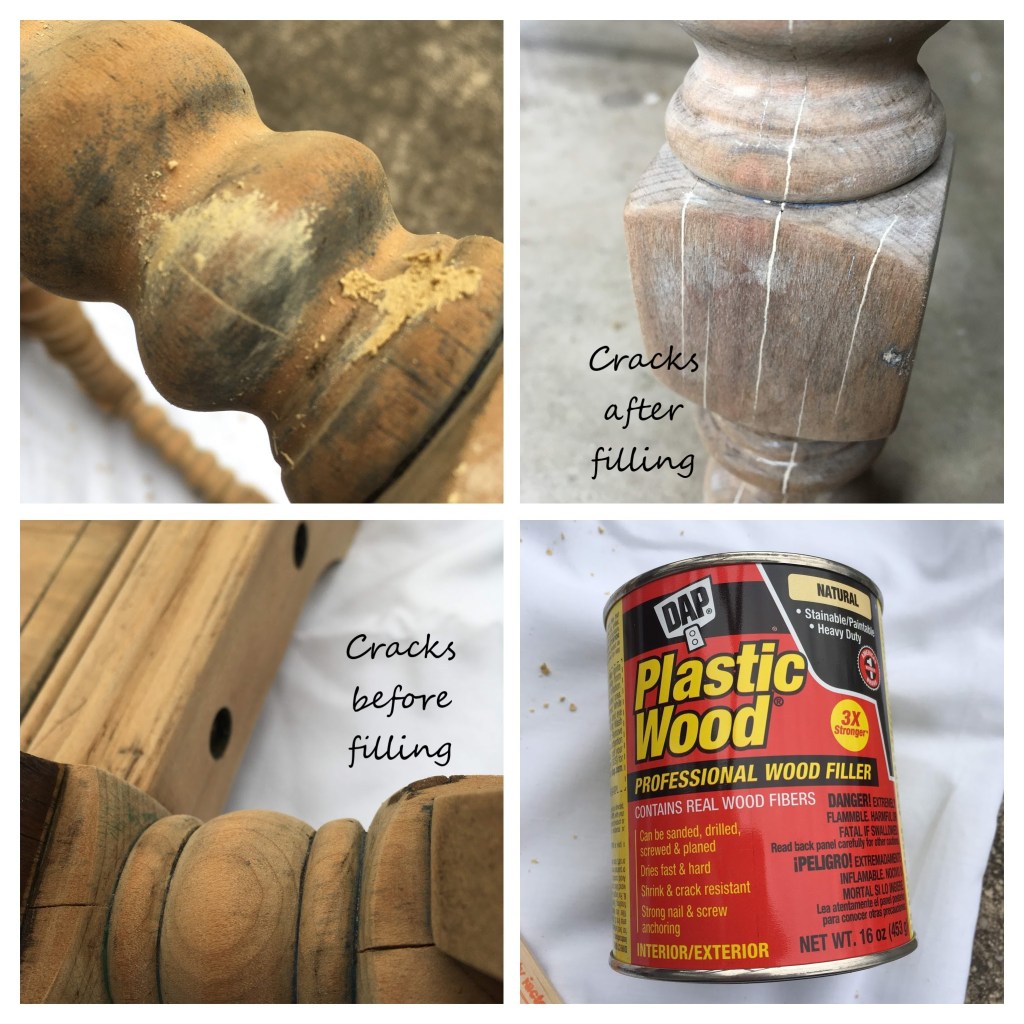
Once the feet were removed from the pedestal I cleaned and sanded all the woodwork and repaired the damaged foot with wood filler.

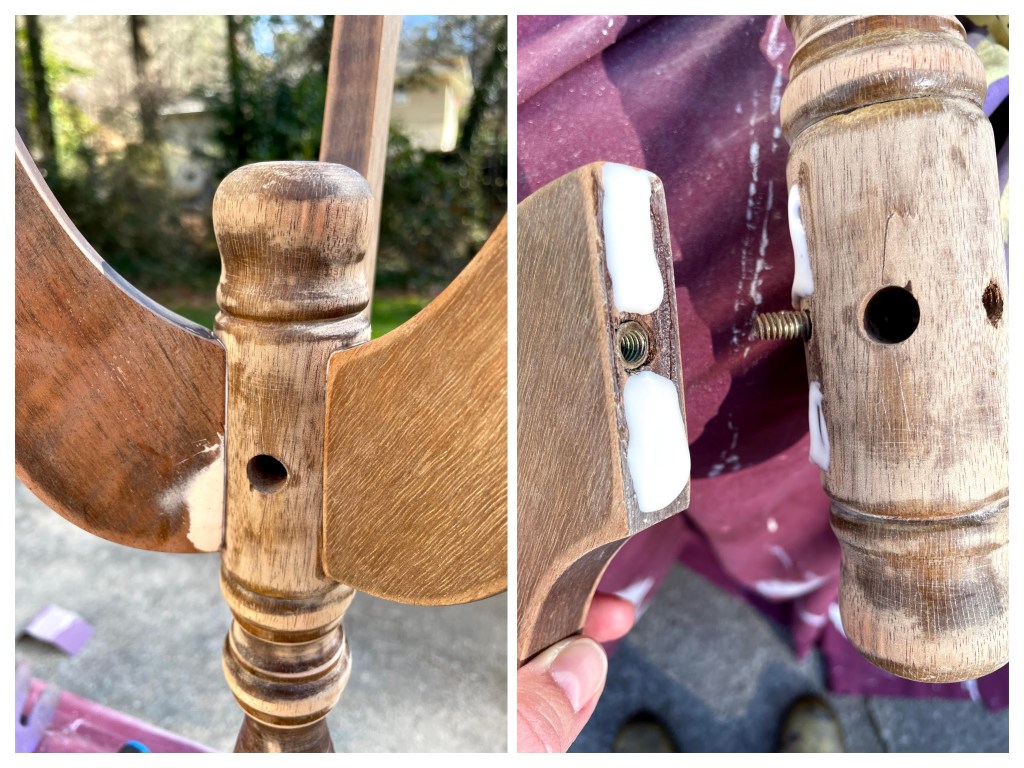
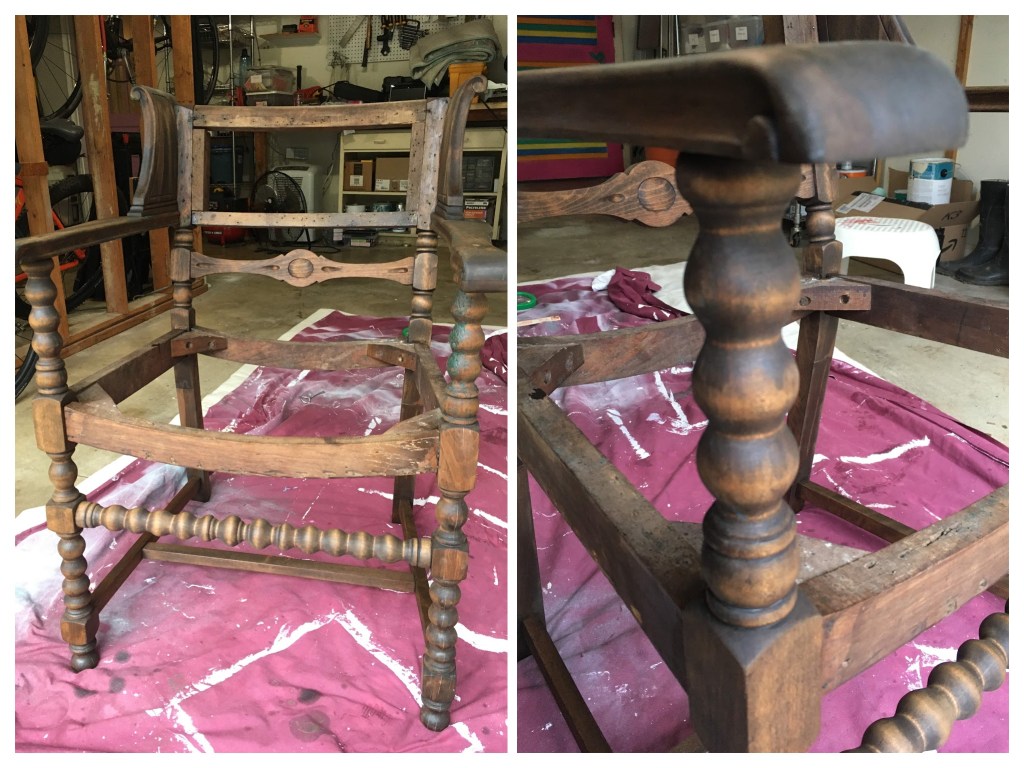
I then reassembled the base using plenty of wood glue to make sure the feet are now really secure.

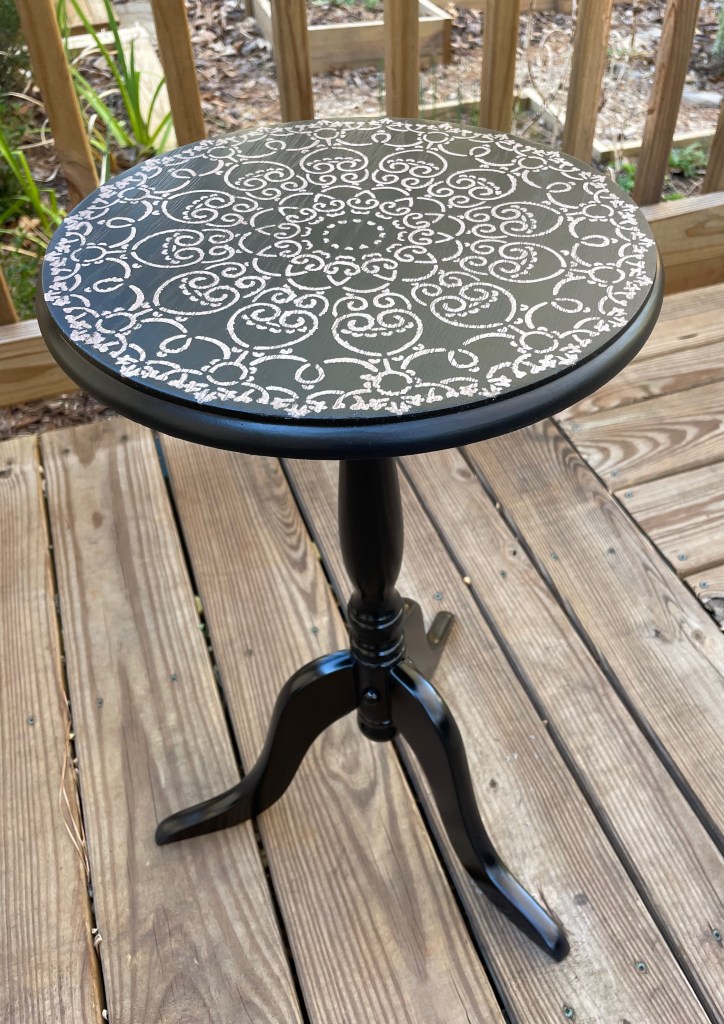
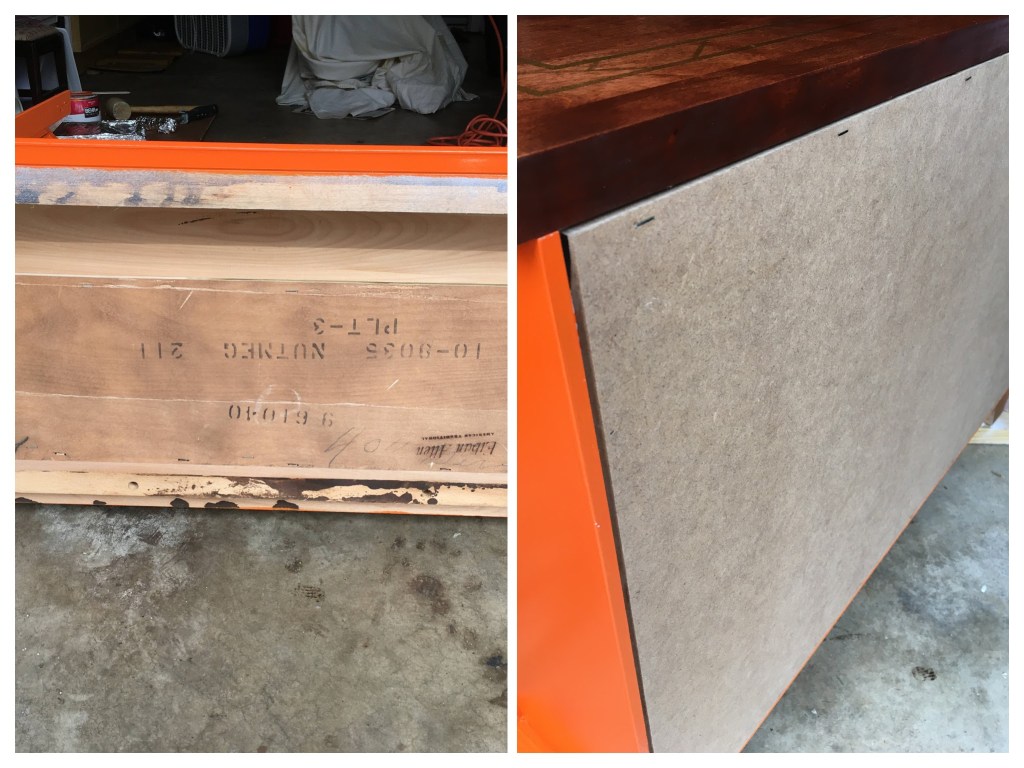
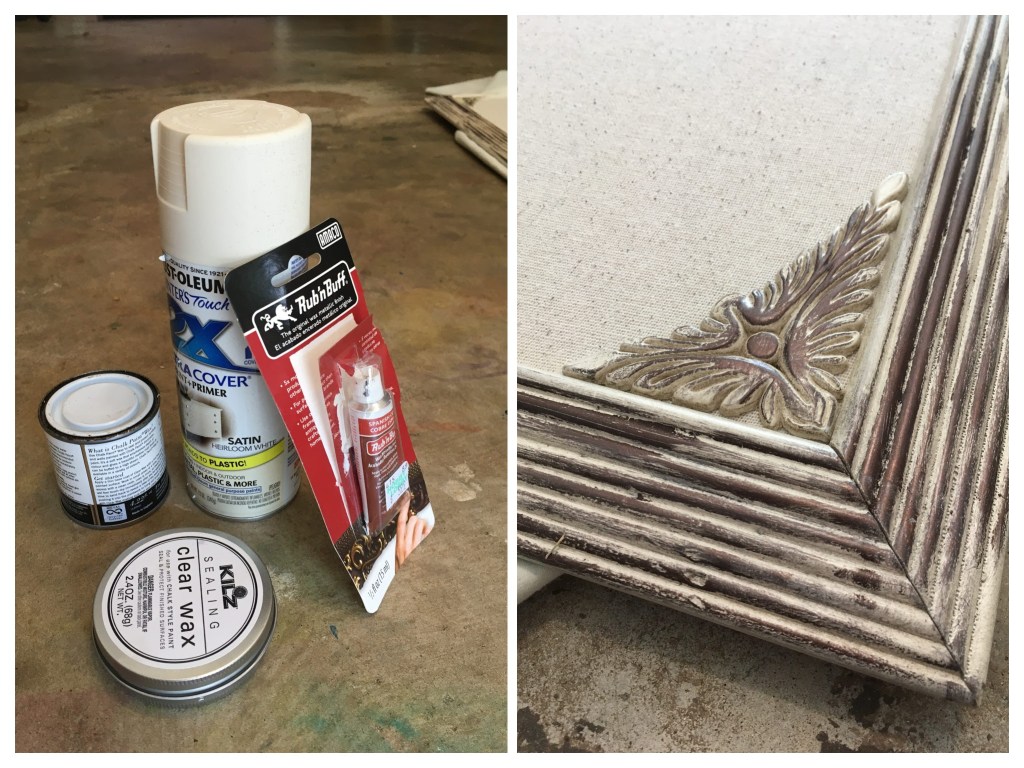
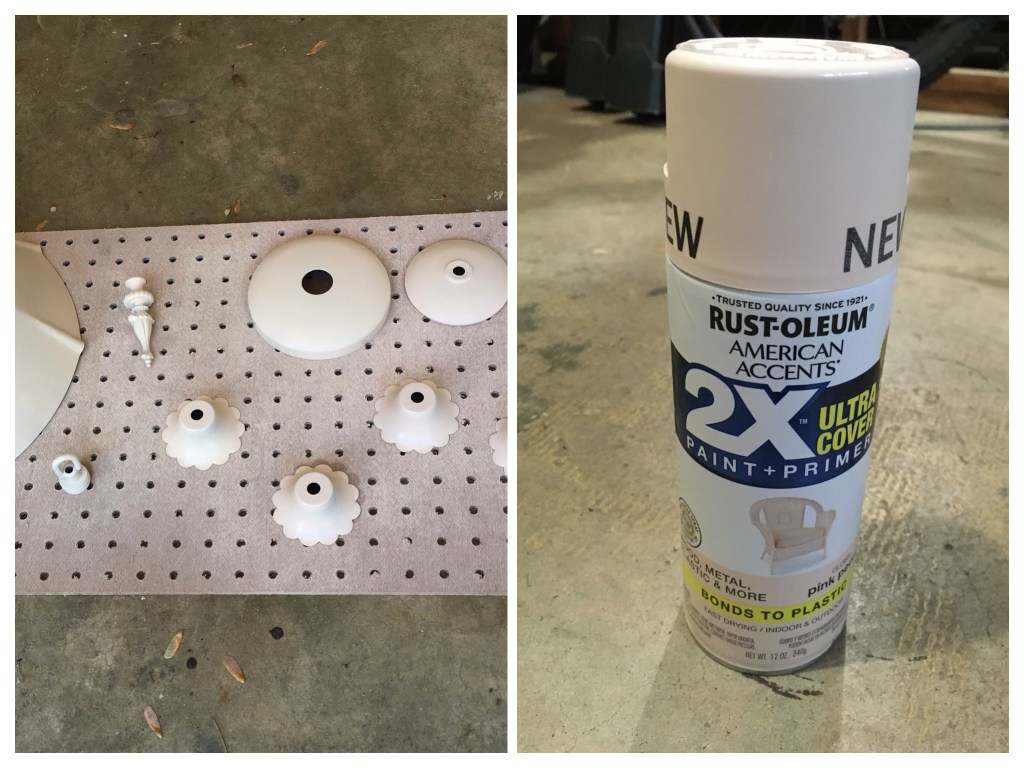
I had planned to leave the tabletop bare, but when I sanded it I found that the veneer was too thin. Plan B was to paint the entire table with several coats of Rust-Oleum 2X Ultra Cover in Canyon Black satin finish.

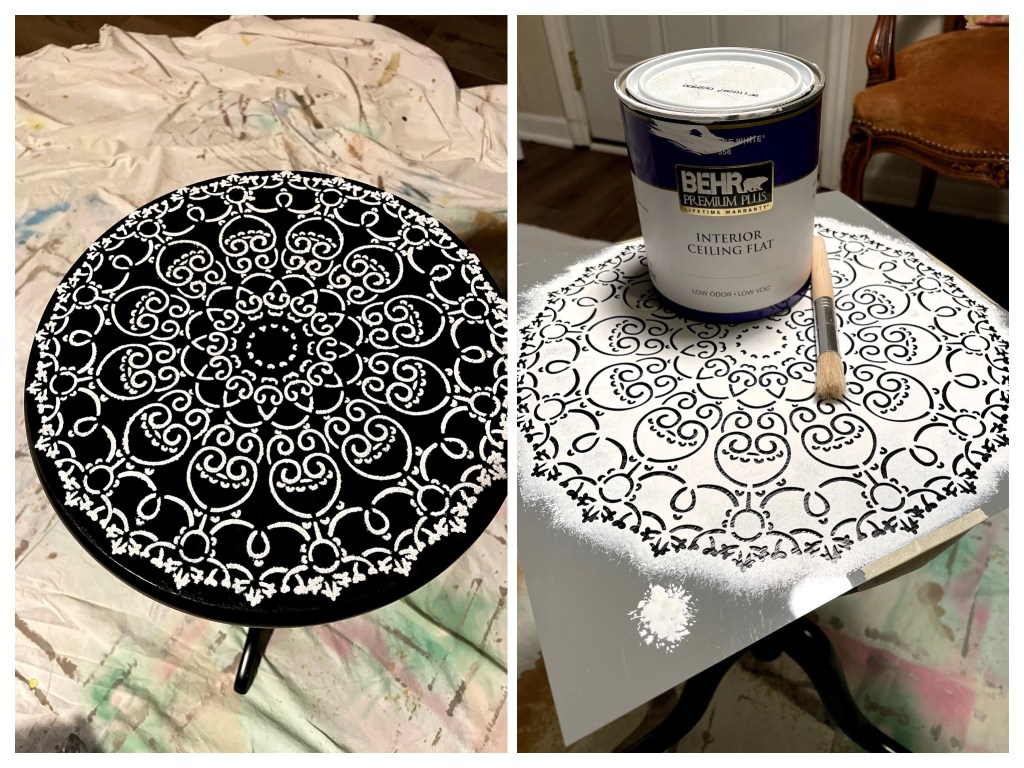
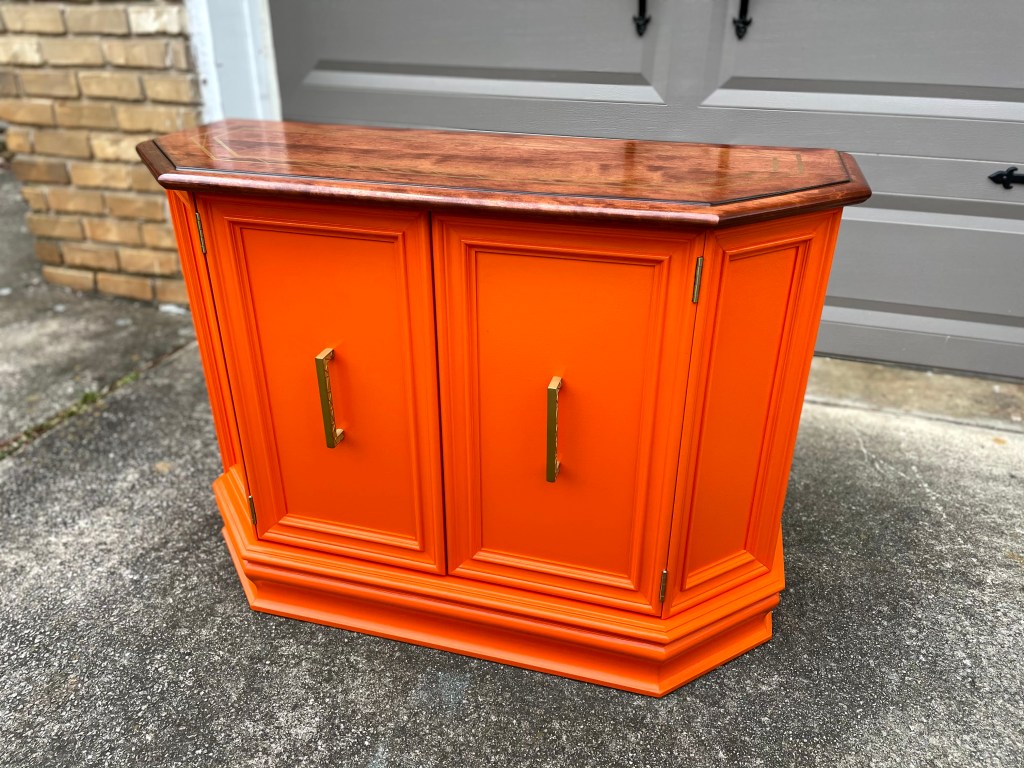
I used the same stencil I used on the Sophia desk to apply a perfectly sized pattern to the tabletop. I used ceiling paint because its flat finish would take up color from a stain.

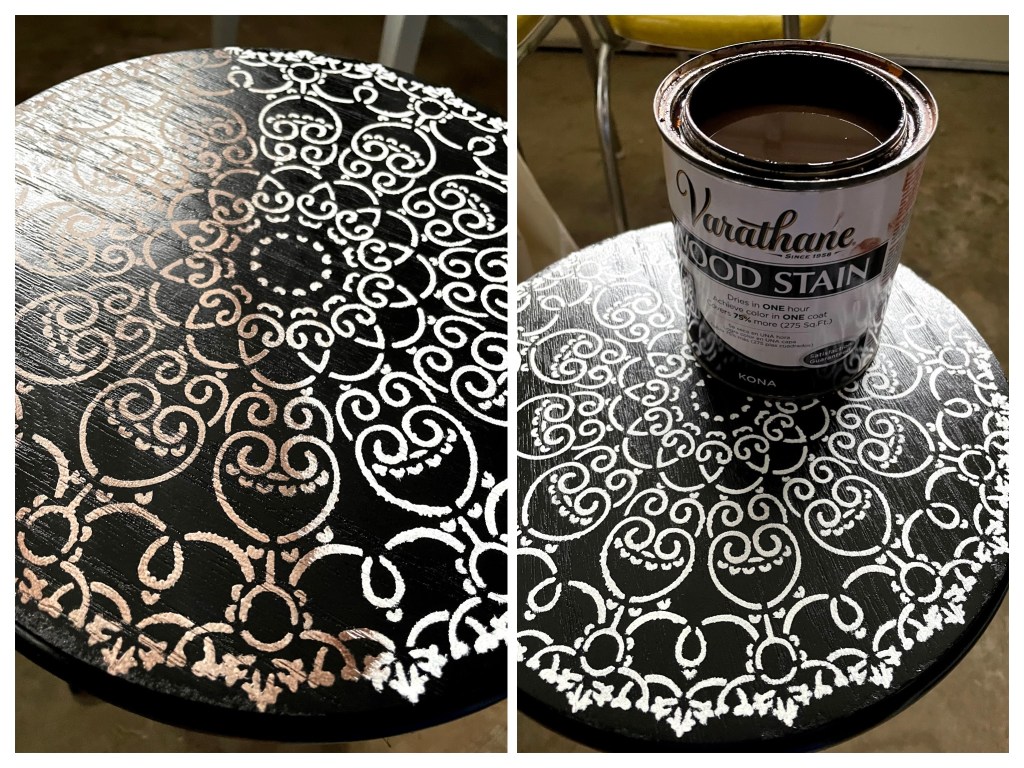
A quick application of some Varathane wood stain in Kona took the edge off the brightness of the white ceiling paint. And a few coats of Varathane oil-based polyurethane in a satin finish give the tabletop the protection it needs.

#33 Ethan Allen console cabinet

Transformation expenses: $205

Before I even got it home fate had a plan for this Ethan Allen cabinet. On the day I decided to rescue it, I called a friend and neighbor to help me load it onto my truck. Straight away she knew it would work as the bar cabinet she and her husband wanted for their library/office renovation. Designing it to be a showstopper in an eclectic room with both rustic and modern elements was a challenge. I’m happy with how it turned out.

I started by taking the piece apart, stripping the top, removing the old hardware, filling the holes with doweling and wood filler, and cleaning and sanding everything.

I primed the carcass with two cans of Rust-Oleum 2X Ultracover primer. I then added some glamour to the inside panels of the doors & cabinet using Rust-Oleum Aged Metallic paint in Vintage Gold. You’d think this stuff was real gold the way it has been disappearing off the shelves!

Next I added the Wow! factor with four coats of Behr high gloss enamel in a custom color that we’ll call Hermes Orange. I actually took a friend’s Hermes scarf box to The Home Depot for them to color match.

The lovely maple top of this cabinet is the design element that pulls everything together. I custom stained it to complement the rustic fireplace mantel it would be near. The stain was a 50:50 mix of Varathane premium wood stains in Cognac and Dark Walnut. I then added a bespoke stenciled design that mirrors the one on the new door pulls.

New door pulls from Bellwith Keeler and new brass hinges updated the hardware

The back panel had to be replaced because it had warped, so I got my husband to cut out all the identification from the old back panel and then I attached it to the underside of the cabinet. I also attached mirror glass to the inside of the back panel, then reassembled the piece. A glass interior shelf was the finishing touch.

#32 Antique church chairs

Transformation expenses: About $20

I nearly ignored these chairs thinking they were children’s furniture. Thank God I was sufficiently intrigued by the bible backs to pick them up! I quickly discovered they are antique church chairs, probably made in England in the late 19th century. The frames were dirty but in good condition, and responded beautifully to some simple restoration. A replacement plug and some newly woven rush seats completed their transformation to gorgeous accent chairs with a rich history.

It is likely these chairs were made in England by a company called West & Collier. They look just like chair # 112b from the company’s catalogue of the time. West & Collier was founded in 1869 in a village named Frieth in Buckinghamshire, England. The wood is probably elm and the two extra spindles between the back legs would have been for stowing a gentleman’s top hat during service.

The chair frames were dirty but in good condition, while the rush seats were both damaged beyond repair. I began my restoration by removing the old rush and cleaning the frames with a very dilute solution of Simple Green all purpose cleaner.

After cleaning (bottom right), I applied Howard Restor-A-Finish in walnut (top right), and then Howard Feed-N-Wax (bottom left)

With the frames nicely restored I was ready to weave some new fiber rush seats. This was my second time using a technique I learned from an incredible instruction video by Ed Hammond of Peerless Rattan. I chose to not finish the woven rush with shellac because these seats will be indoors.

The final step of this restoration was to replace the missing button top wood plug. I got the part I needed from Widget Co. With a little sanding, I was able to make it fit like a glove and have the more rounded-off look of the originals. Once in place I used a mix of Varathane stains (dark walnut and kona) to give it the right color and antiqued look.

#31 The Sophia desk

Transformation expense: About $35

This was my first transformation done with an apprentice and it was a baptism of fire for 9-year old Sophia! By the end we had applied eight coats of paint and wax to this piece! The hurdles we had to overcome were good teaching moments, and the end result was well worth all the effort. My design inspiration was a refinished piece by The Resplendent Crow.

This desk is solid wood, and has some decent joinery, but had also seen its fair share of wear and tear.

Rolling up her sleeves, Sophia got to work cleaning the desk inside and out. We then sanded and used wood filler to repair the biggest imperfections, including a crack in the top.

Sophia chose a beautiful, pale blue color (Permafrost) for the Behr Chalk Paint. We applied the first coat and immediately ran into two serious problems: 1) When the desk was moved, the crack in the top re-opened and 2) Stain from the sanded surface was bleeding through the paint causing yellowing.

Fixing the recurring crack was made harder because the top could not be removed (a couple of wood wedges were gluing it firmly in place). To install a metal bracket across the joint I had to drill pilot holes down through the desktop because I couldn’t get a drill in from the underside. Once the stabilized crack and pilot holes were filled and sanded, we could move on to problem #2.

A couple of coats of Kilz oil-based primer sealed the surface and prevented any further bleeding of the stain.

Now we could go back and apply three coats of the beautiful pale blue chalk paint.

When the painting was finished we decided to take this desk to the next level by adding some stenciling to the top.

Two coats of clear wax give protection and a beautiful sheen to the finish.

Tea break!

Finally we were ready for the finishing touches: We removed all the painter’s tape, polished the whole surface to a lovely sheen, and re-installed the hardware, which had been cleaned and painted in Rust-Oleum white semi-gloss spray paint.

#30 Picture frame jewelry board

Transformation expenses: $35.74

A while ago we hired a dumpster during a landscape project. When neighbors threw in a perfectly good picture frame I grabbed it knowing it would be good for something. Months later some friends and I were browsing quaint shops after a lovely afternoon tea. One friend saw a jewelry board that she particularly liked and I offered to create something similar with this frame.

Keeping costs to a minimum was the biggest challenge on this project. For my design I needed:

  • 5/8″ dowel rod & plywood
  • Leather cord & 1 yd fabric
  • Decorative tacks & cup hooks
  • Wooden decorative appliques

Fortunately I already had these things left over from previous projects:

  • Spray paint
  • Clear, dark & metallic wax
  • Thin batting
  • Beads & craft paper

The frame was rather uninteresting so I embellished it with wooden appliques and a layering of paints and waxes. The frame, appliques and doweling were first painted with Rust-Oleum 2X Ultra Cover in Antique White. I also painted the brass cup hooks with Rust-Oleum Hammered spray paint in dark bronze.

I then applied clear wax, followed by dark wax, followed by Amaco Rub ‘n Buff metallic wax in Spanish Copper.

Meanwhile I wrapped the plywood with thin batting followed by a neutral fabric.

I secured the prepared plywood into the frame using panel pins. I then cut four equal strips of leather cord for hanging earrings. I punched holes in each end of them all and pairs of holes at intervals along two of the strips (for earrings with posts). These were then nailed to the board using decorative tacks and a bead as a spacer. For bracelet storage I attached a length of the painted doweling using the two painted cup hooks. Finally, more decorative tacks function as hangers for necklaces. The back of the frame is finished with craft paper and a pair of D-hooks for hanging.

#28 Full metal bed

Transformation expenses: $40.14

I’ve always loved seeing metal beds painted in interesting colors. When a neighbor posted that she was getting rid of this one I was equal parts excited by its prospects and intrigued by it’s design; I had never seen a metal bed shaped like this before. Luckily it was just what a friend wanted for her spare room so I gave myself the green light to pick it up knowing it already had a final destination.

My interest was really sparked when I found some of the original, wood effect finish on the side rails of this bed (bottom right pic). A bit of internet research has me believing this is probably a Simmons bed made in the 1920s or 30s. It might have originally looked like the 1930s one in the top right pic. Sadly any original labels/markings were long since painted over.

It wasn’t easy to tell what was rust and what was the original wood effect finish but a thorough cleaning and sanding was needed either way.

A coat of Rust-Oleum Rust Reformer in all the crevices and exposed spots will ensure if there is any residual rust it won’t rear it’s ugly head later.

This project was finished with 5 cans of Krylon Fusion satin spray paint in Lagoon Blue. The color (picked by my client to go with a family heirloom quilt) brings a smile to my face every time I see it. The industrial look of the frame has really been lifted by the cheerfulness of the color.

#27 Antique Jacobean-style chair

Transformation expenses: Frame restoration – $4.84, professional upholstering in leather – $420

This circa 1890s winged armchair was put to the curb at a property that was being flipped. Its transformation was a labor of love. For the first time ever I employed the help of professionals; the re-upholstering of this chair was beyond my capabilities, so after I had transformed the frame, I took it to Budget Upholstery & Fabrics. I would not ordinarily have gone to such great expense but the antique value of this piece made it worthwhile.

Some people reading this might question me refinishing rather than restoring this chair. We’ve seen antique appraisers lamenting over a piece that has diminished in value by being refinished. This was not that type of piece (see below). I’d like to think the original furniture maker would be pleased to know that 120+ years later someone had put so much time and effort into making it functional and beautiful again. Read on for more on its journey from mildewed neglect to fireside treasure.

Peter Cook (executive producer of Antiques Roadshow) wrote: ” Understandably, our Americana experts on the Roadshow live for wonderful old pieces of furniture that have somehow survived in terrific condition …. Most old furniture, of course, doesn’t come close to meeting those standards. On the contrary, most furniture has been well used (even abused), scratched, broken, and often repaired many times. How could such furniture not be improved by a good job of refinishing or restoring? A comparison with a friend’s antique left me in no doubt that this piece was beyond simple restoration. On the left is my friend’s chair which is well preserved and still has its original patina. On the right is this chair which was dull and mildewed in places.

As well as signs of neglect this chair had evidence of poorly applied stain (see brush marks and fingerprints) and at least two different applications of paint (blue & green).

I first cleaned the piece with a mild detergent and then with TSP All Purpose Heavy Duty Cleaner (used by antique restorers). After both cleanings the chair still needed more than just a finish coat. I knew then that I would need to sand it back to the raw wood.

My goal was never to get it looking like new, rather to remove all ingrained dirt/mildew and get it a fairly even color for staining. After many, many hours of painstaking work (using just 220 or 400 grit finishing sandpaper) the sanding was finally complete. The piece still bears a lot of the marks of old age (scratches, dings, traces of old paint) but those all give it character.

Before staining I filled the hairline cracks (probably from water damage) with Plastic Wood Professional Wood Filler. I simply rubbed it in with a (glove-covered) finger, let it dry, then sanded away the excess.

On recommendation from an online appraiser I chose a dark walnut oil-based stain by MinWax. I applied it with a brush then immediately removed any excess with a clean rag.

Despite it saying it “May be stained, sealed, or painted immediately after sanding” I was disappointed the wood filler did not pick up enough of the dark walnut color. The filled cracks were still visible, but thankfully I was able to blend them in with a little Annie Sloan dark wax.

As I began applying the finishing coats of Kilz clear sealing wax, some previously unnoticeable smudges of wood filler appeared (left pic). To fix the problem, I removed the wax with some solvent, sanded again, and re-touched the stain. After the whole frame had two coats of buffed wax and cured for 30 days it was ready to go the upholsterer.

#26 Pair of solid oak rocking chairs

Transformation expenses: $120.16

This pair of rocking chairs was no doubt discarded because the herringbone cane was falling apart, and the cost to replace it is prohibitive (around $500 per chair). However it seemed a shame to throw the baby out with the bathwater so I picked them up and contemplated a more economical solution.

The caning in both chairs was damaged beyond repair. There was no choice but to remove it all. Being able to take out the seat pads made the job a lot easier.

Pressure washing the frames to remove the ingrained dirt was possibly the most fun I’ve had on a project to date. The difference was amazing!

Pressure washing was hard on the wood and patches of the original finish were still there so a good bit of sanding was needed. I used 80 then 150 then 220 grit sandpapers to bare and smooth the wood.

The first of two more economical solutions was to replace the backrest caning on each chair with new spindles. We started with a 9ft long piece of 2″ x 1″ oak. My husband rounded the edges with a palm router then cut four spindles of the right length.

I attached the new spindles using doweling joints at the top rail and 3″ screws through the bottom rail. The frames were now ready for staining.

Before staining I treated the chairs with Minwax pre-stain conditioner. I then applied Minwax gel stain in mahogany to match my client’s front door.

Two coats of Minwax indoor/outdoor Helmsman Spar Urethane in clear satin finished the woodwork.

The second solution was to replace the cane seats with woven rush seats. Armed with a 10 lb reel of fiber rush, the necessary tools, and a really good instructional video I took on the challenge. You can find the video here and I am happy to share my learning curve with anyone who wants to attempt this themselves.

The seats turned out great. To finish them off ,and provide as much protection as possible, I applied 3 coats of shellac (50:50 solution in denatured alcohol) top and bottom.

Finally, I applied slip resistant tape to the unfinished bottoms of the rockers, reattached the seats to the frame, and the job was done!

#25 Mini chandelier birdfeeder

Transformation cost: $12.60

I have my constipated dog to thank for this find. We were taking a long walk to get “things” moving and our route took us past this treasure. A chandelier was TT#1 (Chandelier) and I was excited to find another to work on; they make such good garden decor.

I am convinced this is a vintage piece but I’ve had mixed feedback to my enquiries. The International Brotherhood of Electrical Workers says this fixture was made in Newburgh, New York in October 2013 (according to the serial number). However, Underwriters’ Laboratories Inc. says it must be at least 25 years old because they stopped using that font on their labeling 25 years ago.

As I began cleaning the dismantled piece some of the paintwork dissolved and what was left peeled and cracked. Using acetone, a rag and a toothbrush I was able to remove all the paint completely.

The bare metal parts were now ready for their finish coats of Rust-Oleum 2X Ultra Cover gloss in pink peony. I made sure to reserve some paint for finishing touches after reassembly.

When it came to putting it back together I made a few changes. First I used lock up caps to seal the part of the arm that would have attached to the candle tube. I discarded the canopy and inverted the top bobeche so that rain water wouldn’t pool in it. The hanger loop neatly tops it off. I finished the job by touching up with the remaining paint.