#40 Windsor chair

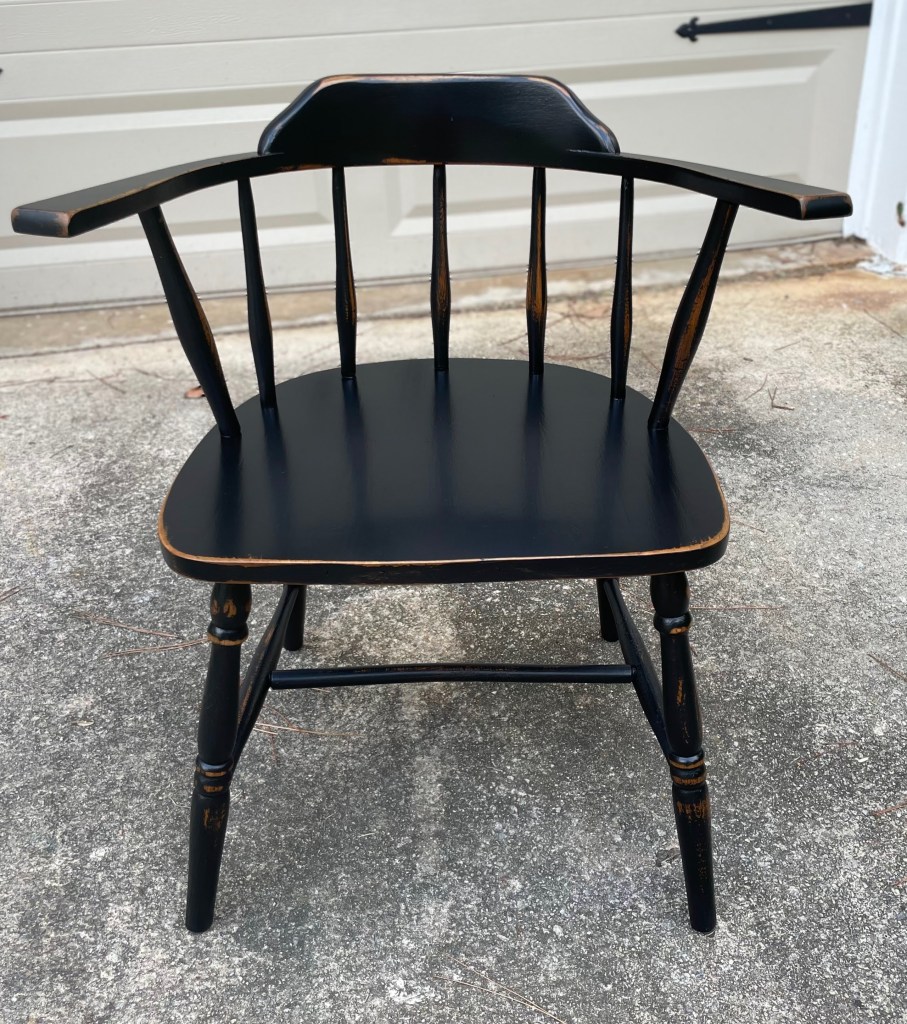
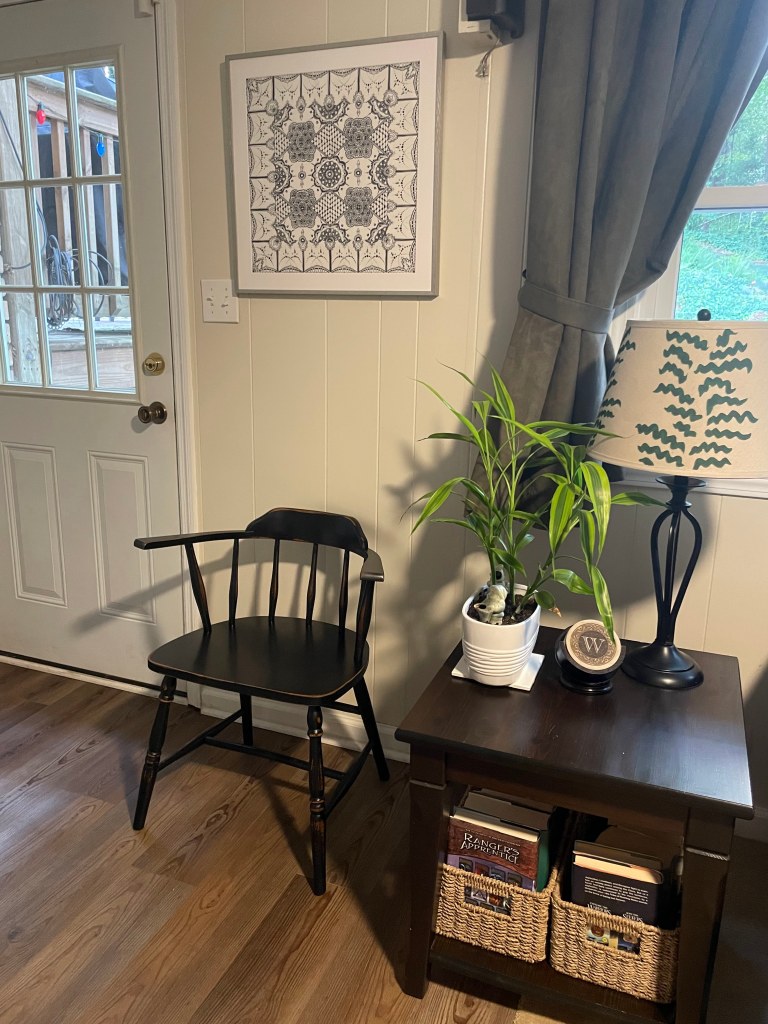
If a chair could look like a hug then I think it would be this chair. As usual I hesitated when I first saw it because I already had a garage full of projects. I just couldn’t resist its charm.

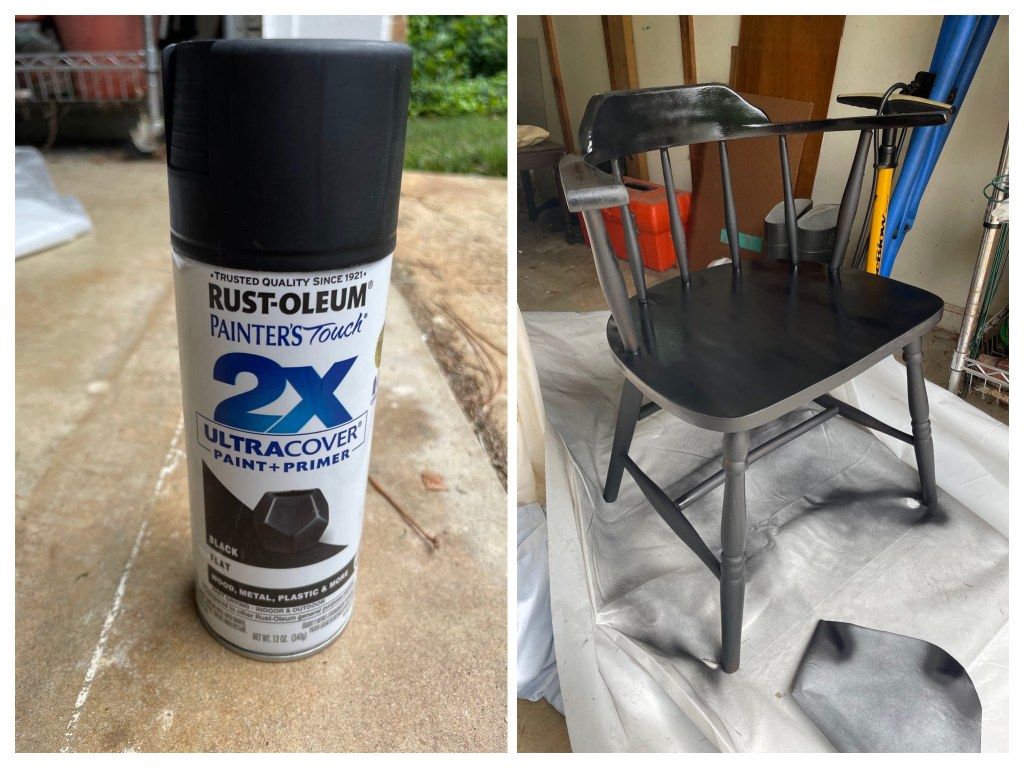
Materials used: Rust-Oleum 2X spray paint (black, flat), Varathane oil-based polyurethane (satin).

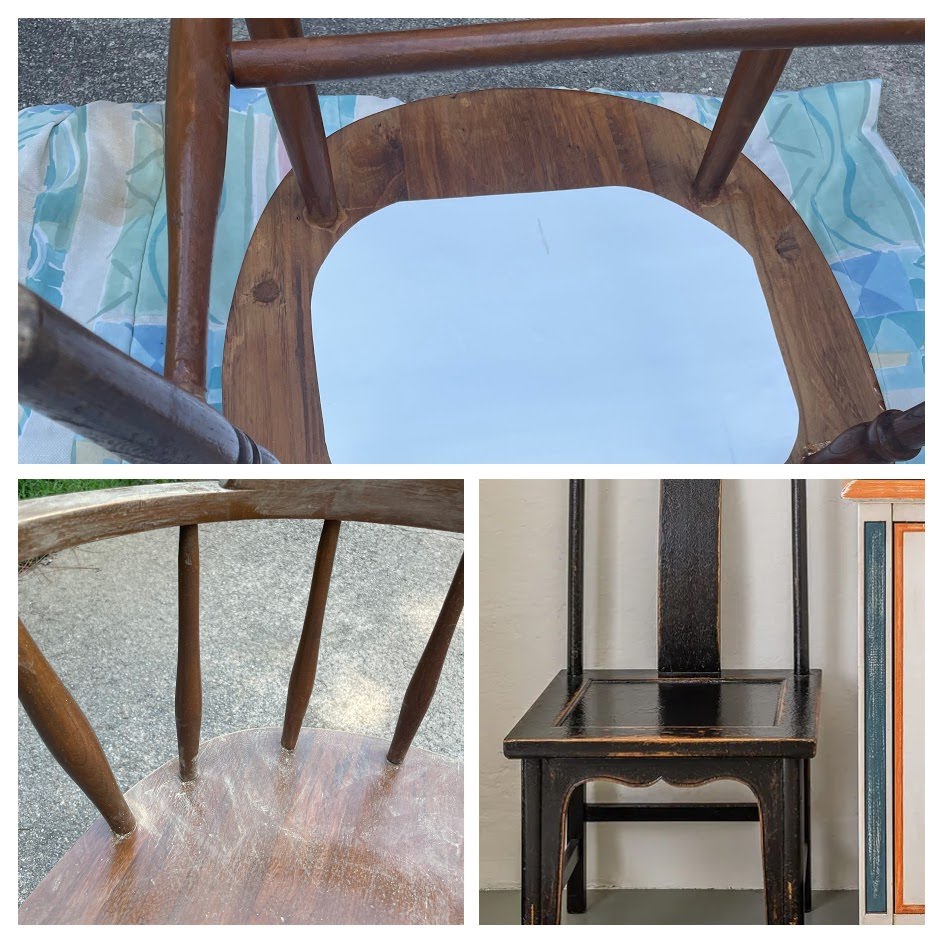
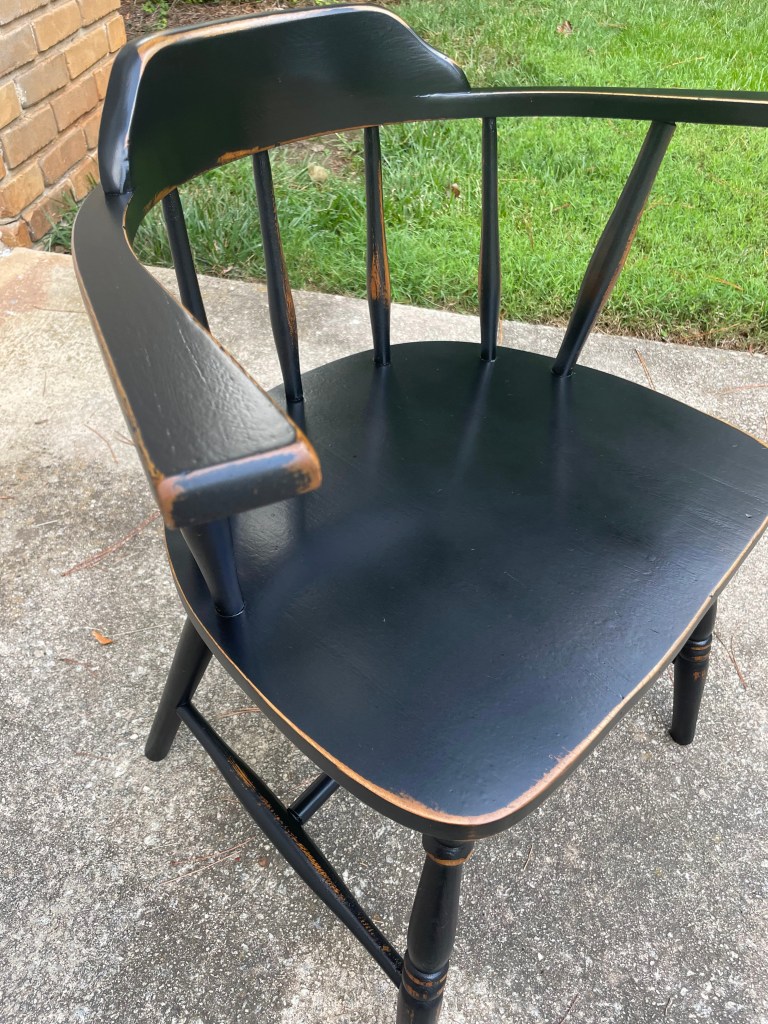
In my research I learned a lot about Windsor chairs, but I never found out the provenance of this particular one. I only know it is a low-back Windsor chair with a shield seat and front legs that are turned and tapered. At the same time as learning that Windsor chairs were often painted dark green, brown, or black (to disguise mixed use of woods) I saw a chair in House & Garden that became my inspiration piece (bottom right). After cleaning, I sanded the chair a little to smooth out a few lumps and bumps. I didn’t want to paint over the markings so I covered them with a piece of contact paper.

One can of Rust-Oleum 2X Ultra Cover in flat black formed the base coat.

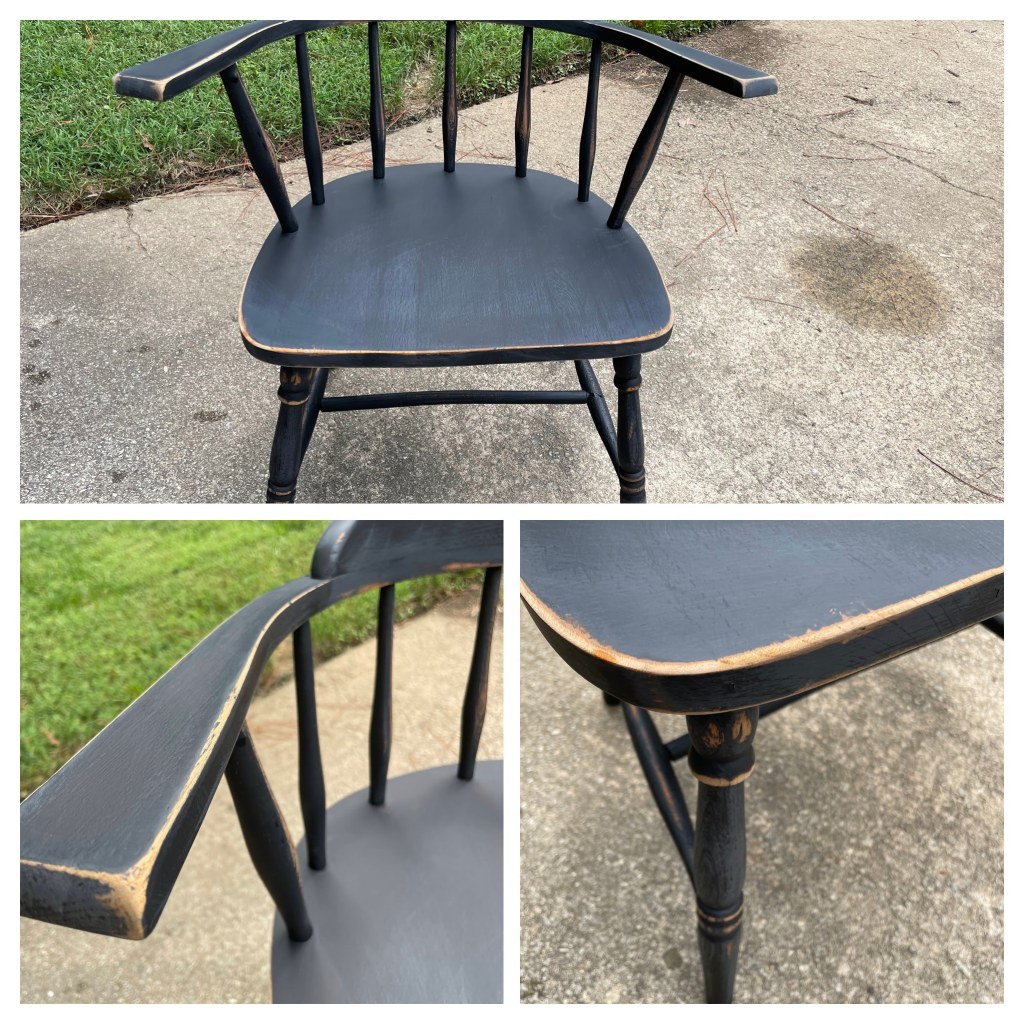
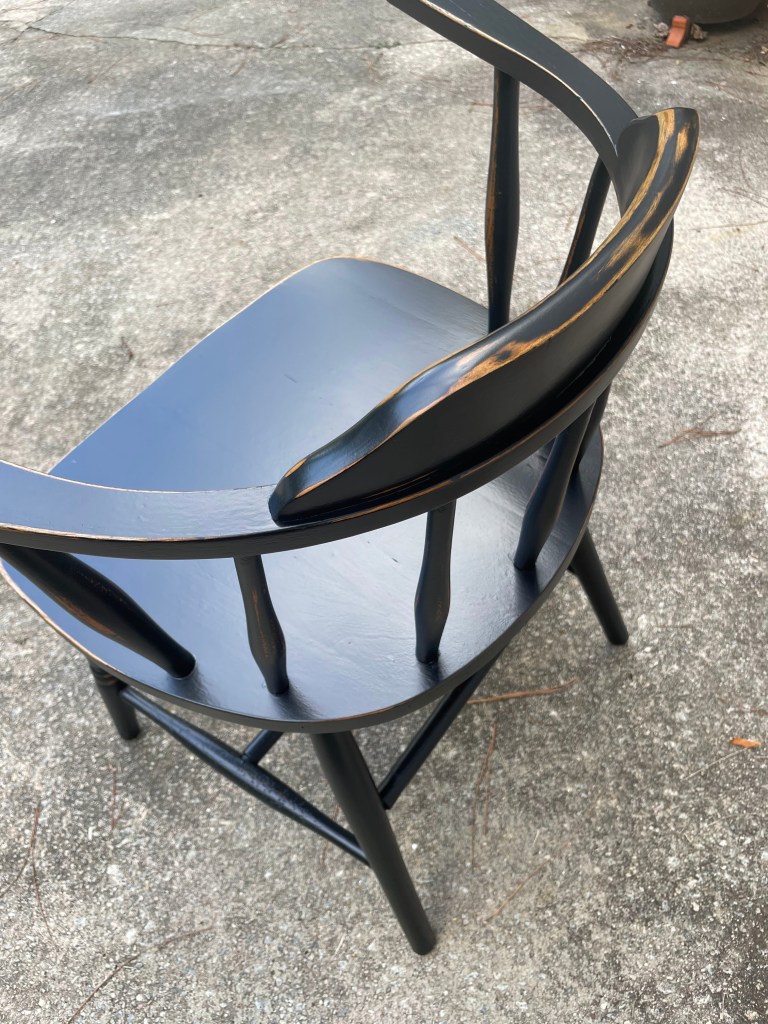
When the base coat was dry I used 220 then 400 grit sandpaper to give it the distressed look I wanted.

I finished the piece with three coats of Varathane oil-based polyurethane in a satin finish, lightly sanding the whole chair before the third and final coat. I could also have finished it with some clear wax but… spindles! Spraying spindles is a lot easier than brushing them.

#39 MCM bentwood armchair a.k.a. “The Ballerina”

Materials used: Minwax Antique Furniture Refinisher, shellac, polyurethane, Krylon spray paint, foam, batting, upholstery fabric, weed barrier.

On May 28, 2020 I got a surprise call. My friend’s father, Jim, knew about my mission and was calling to see if I would make this chair one of my transformations. It had been his son-in-law’s work chair and Jim had saved it from being thrown away years before. How lucky am I to have friends and followers who bring me gifts like these?! I’m ashamed to say it then spent two years in my garage—a victim of other projects and life’s distractions, but never forgotten. It’s had to wait a long time for its moment in the spotlight, but I hope you will agree it was worth the wait.

Jim Wright knew good workmanship when he saw it, so I was not surprised to find a Liberty Chair Company tag under the seat. Several messages, emails, and phone calls later I found out it had been made in Liberty, NC in the late 60s/early 70s. At that time it was model 700 and was named “Contemporary Chair”. Members of an online woodworking community think the wood is cherry, and in 1969 its wholesale price was $10.45.

Although the bones of this chair were sound, it was dirty and had been stained and upholstered badly. It was not a difficult decision to strip it down to the bare wood and refinish.

I removed the existing finish using Minwax Antique Furniture Refinisher, then sanded the frame with 150, 220, and finally 400 grit sandpaper. The final prep step was to remove all dust with an air compressor and wipe with a slightly damp cloth.

Refinishing began with a full aerosol can of shellac to seal the wood, accentuate the grain, and give it a lovely honey color.

Now it was time to elevate this chair from the ordinary. After some minor repairs I slippered the feet in Krylon “Ballet Slipper” gloss spray paint. Hence the chair’s nickname “The Ballerina”, because now it looks like it’s on points.

To finish the framework I applied 3 coats of clear, Varathane, oil-based polyurethane in a satin finish. As always I lightly sanded everything before the final coats.

Finally I re-upholstered the seat with a boucle-style fabric. It was a little stretchy in one direction so, to prevent over-stretch, I first attached it to some cotton lining fabric. Fully re-assembled this chair deserves to be in the spotlight.

#27 Antique Jacobean-style chair

Transformation expenses: Frame restoration – $4.84, professional upholstering in leather – $420

This circa 1890s winged armchair was put to the curb at a property that was being flipped. Its transformation was a labor of love. For the first time ever I employed the help of professionals; the re-upholstering of this chair was beyond my capabilities, so after I had transformed the frame, I took it to Budget Upholstery & Fabrics. I would not ordinarily have gone to such great expense but the antique value of this piece made it worthwhile.

Some people reading this might question me refinishing rather than restoring this chair. We’ve seen antique appraisers lamenting over a piece that has diminished in value by being refinished. This was not that type of piece (see below). I’d like to think the original furniture maker would be pleased to know that 120+ years later someone had put so much time and effort into making it functional and beautiful again. Read on for more on its journey from mildewed neglect to fireside treasure.

Peter Cook (executive producer of Antiques Roadshow) wrote: ” Understandably, our Americana experts on the Roadshow live for wonderful old pieces of furniture that have somehow survived in terrific condition …. Most old furniture, of course, doesn’t come close to meeting those standards. On the contrary, most furniture has been well used (even abused), scratched, broken, and often repaired many times. How could such furniture not be improved by a good job of refinishing or restoring? A comparison with a friend’s antique left me in no doubt that this piece was beyond simple restoration. On the left is my friend’s chair which is well preserved and still has its original patina. On the right is this chair which was dull and mildewed in places.

As well as signs of neglect this chair had evidence of poorly applied stain (see brush marks and fingerprints) and at least two different applications of paint (blue & green).

I first cleaned the piece with a mild detergent and then with TSP All Purpose Heavy Duty Cleaner (used by antique restorers). After both cleanings the chair still needed more than just a finish coat. I knew then that I would need to sand it back to the raw wood.

My goal was never to get it looking like new, rather to remove all ingrained dirt/mildew and get it a fairly even color for staining. After many, many hours of painstaking work (using just 220 or 400 grit finishing sandpaper) the sanding was finally complete. The piece still bears a lot of the marks of old age (scratches, dings, traces of old paint) but those all give it character.

Before staining I filled the hairline cracks (probably from water damage) with Plastic Wood Professional Wood Filler. I simply rubbed it in with a (glove-covered) finger, let it dry, then sanded away the excess.

On recommendation from an online appraiser I chose a dark walnut oil-based stain by MinWax. I applied it with a brush then immediately removed any excess with a clean rag.

Despite it saying it “May be stained, sealed, or painted immediately after sanding” I was disappointed the wood filler did not pick up enough of the dark walnut color. The filled cracks were still visible, but thankfully I was able to blend them in with a little Annie Sloan dark wax.

As I began applying the finishing coats of Kilz clear sealing wax, some previously unnoticeable smudges of wood filler appeared (left pic). To fix the problem, I removed the wax with some solvent, sanded again, and re-touched the stain. After the whole frame had two coats of buffed wax and cured for 30 days it was ready to go the upholsterer.

#9 Bamboo wicker chair with upholstered seat

Transformation cost: $42.64

This piece was being discarded by a friend of mine who was helping her parents move and clean house. Other than missing 3 casters and having a small split in one leg it was in great condition and is a good quality piece. At first I envisaged this piece with a pretty damask fabric and pastel paintwork but the price of the fabric sent me back to the drawing board. In the end the geometric pattern I found at my local craft store (where upholstery fabrics are permanently 30% off!) gave me the inspiration I needed to take a completely different tack!

Cleaning a piece before painting is arguably the most important part of any transformation, and this was no easy piece to clean. However, with my trusty toothbrush, some compressed air and patience the dirt disappeared!

Using the old fabric and foam as a guide I cut and sewed the new cover, carved out a new seat pad and covered it with batting followed by the new fabric cover. The final touches were to hot glue some ribbon trim to the edges of the fabric and re-create the original tufting using four fabric-covered buttons.

Meanwhile I treated the framework of the chair to 3 coats of Krylon ColorMaster paint & primer in gloss black .

And the finishing touch was to reunite frame & seatpad