#15 Bulldog bulletin board

Transformation cost: $19.12

Having abandoned a sports theme on another project I decided to do it on this bulletin board instead.

I began by printing two copies of a Georgia Bulldog image and spray gluing them onto contact paper. I then used a craft knife to cut out all the black areas on one image and all the red areas of the other to create two different templates. I was careful to include “bridges” on the black template so it would hold together until it was on the board

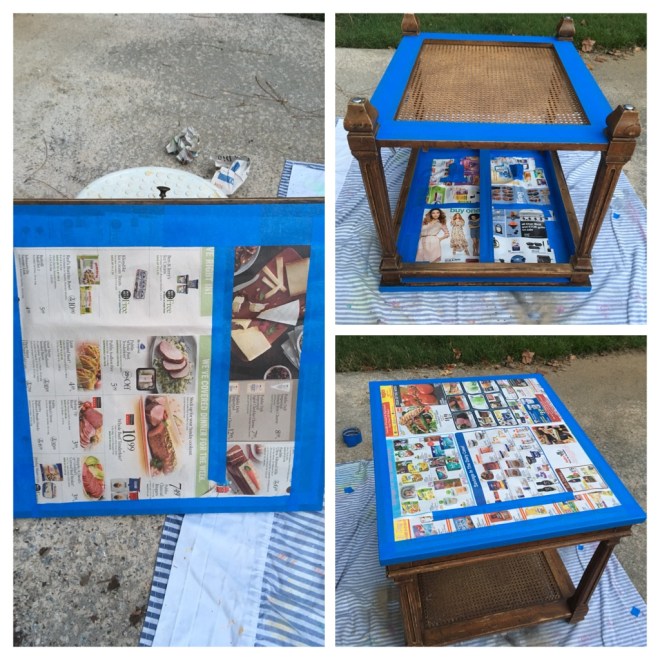
Next I applied the black template to the center of the cork board, masked off the remaining area and sprayed several coats of Krylon Short Cuts Flat Black spray paint.

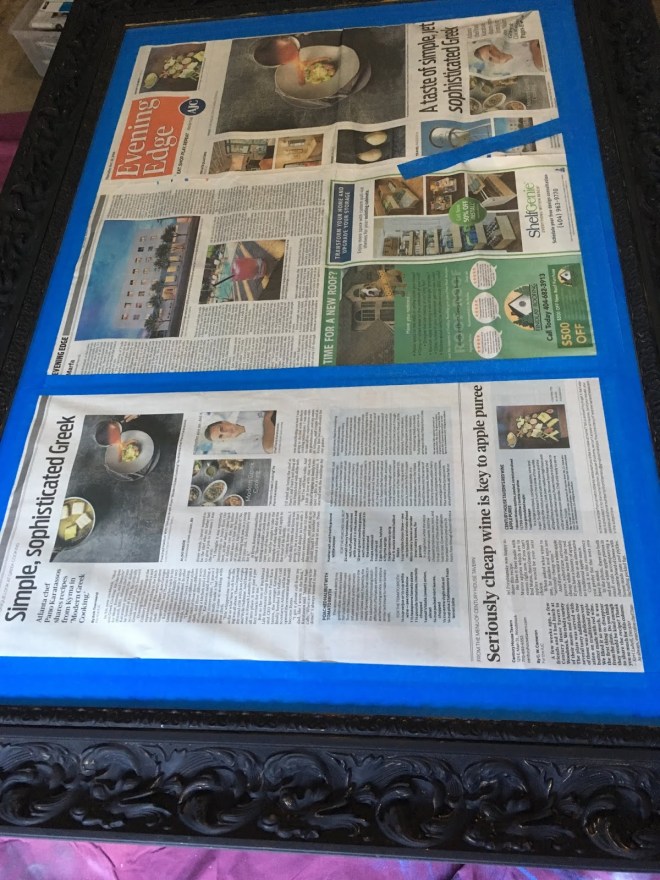
When the black paint was dry I covered all but the frame.
After priming I applied several coats of Krylon Short Cuts Gloss in Red Pepper.

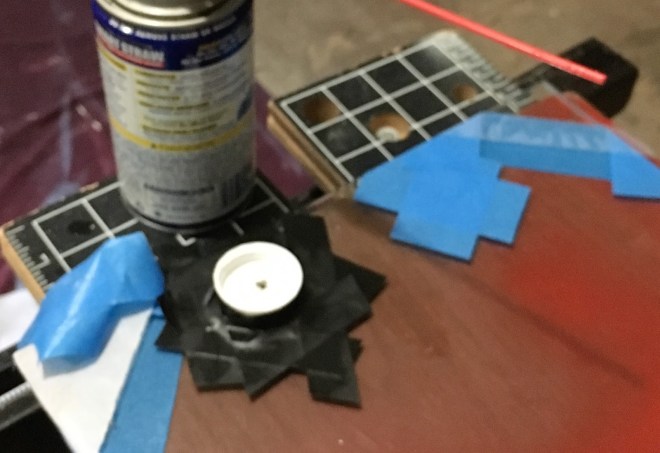
Now it was time to add more red. I applied the red template over the previously painted bulldog. Then I divided the corkboard into three equal width vertical stripes. With the frame and the center strip (except the template) masked, I applied several coats of Krylon matte Poppy Red spray paint.

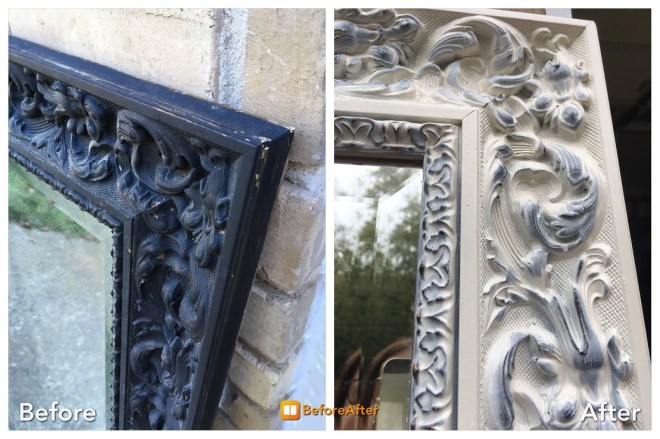
I finished by strengthening the flimsy frame with L-brackets at each corner and some additional staples to secure the cork inside the frame.

#14 Heritage “Cameo II” end table

Transformation cost: $17.82

When my friend Renate saw this piece roadside she instantly contacted me and I rushed to pick it up. At first glance I knew it was a beautiful, quality piece and, on further investigation I was validated. Made in May 1976 by Heritage furniture in Drexel, NC it was part of the Cameo II collection. The catalog boasts: “Superb fruit-wood finishes complement rich grafted and pin knotty walnut veneers and pecan solids”. The pieces in the collection were originally sold in either a wood or a custom (painted) finish. Knowing that made me less reluctant to apply some paint to the piece.

The table top had some nasty water/paint/crayon marks so I began by removing the finish on the top.

Next I gently sanded the top and wiped it with a damp cloth.
The rest of the table got a light sanding and a cleaning with a mild soap solution.

After meticulously masking certain areas, the piece was ready to paint.

Starting with the underside I applied 3-4 coats of Rust-Oleum 2X Ultra Cover in Heirloom White, satin finish.
Once upright the rest of the piece got the same treatment.

I then gently distressed the Heirloom White finish and sealed it with Rust Oleum Satin Clear Enamel

To finish the top I applied 3 coats of a clear gloss oil-based polyurethane. The grain of the walnut veneer came up beautifully!

#13 Sash window picture frame

Transformation cost: $30.62

This window was truly a labor of love. After 10 months in my gazebo it finally got the attention it deserved but it took a very long time to remove the panes of glass, scrape away old putty and sand the woodwork. On a positive note, the multiple layers of paint that had been applied over the years offered up a rich layering effect when it was heavily distressed.
Having recently paid $$$s for a couple of professional framing jobs this transformation was well worth the effort!

The first job was to painstakingly remove the hardware, metal stripping and all 6 panes of glass.
Only 4 of the panes survived!

With the wood frame stripped of all its accessories it was time for the first good scrub with a weak soap solution to remove months of build up.

Starting with 80 grit and finishing with 220 grit sandpaper I distressed the clean frame. I wanted to keep a rustic look to the piece and didn’t intend to apply any paint so I worked to expose all the different layers of paint and some of the wood. Once I had the look I was after I gave the piece a second, final clean before sealing it with a coat of
Rust-Oleum Satin Clear Enamel.

I bought a multi-pack of matte boards with 8 x 10 openings and cut them to fit the pane openings. Two panes of glass from Ace Hardware and 6 pieces of hardboard cut by my husband rounded out my supply list for this project. I was ready to put it all together.

In each opening I secured glass, photo, matte board and hardboard using glazier points. A couple of d-ring hangers were added to the frame for hanging.

#12 Bevelled mirror with ornate frame

Transformation cost: $7.93

When a friend was discarding this mirror I initially resisted the urge to bring it home. However, I couldn’t stop thinking about the potential of this piece. With a weakened resolve I went back the next day to lift it from her driveway. This mirror originally had a gilded frame that had been painted matte black, perfect for adding depth and layering to the finish!

After a thorough cleaning (a toothbrush was a real necessity for this piece) I protected the mirror glass with newspaper

Once clean the first coat I applied was Rust-Oleum Metallic Silver specialty metallic paint

Following the Metallic Silver I began adding coats of Rust-Oleum 2X Ultra Cover in Heirloom White satin finish.
After spraying each coat I used a rag to wipe the paint off the raised parts of the frame.

After 3 coats of Heirloom White (each one followed with wiping) I had the look I wanted: A varied, layered look that (in places) goes all the way down to the original gilded finish.
The finishing touch was to apply some clear wax which I then buffed with a clean, dry rag to give some sheen.

#11 Wrought iron garden chairs & footstools

Transformation cost: $23

These two chairs with footstools were curbside in a friend’s neighborhood when she texted me a photo. The conversation (which she started at 9:00 a.m.) went like this:

I justified my weak willpower by thinking I might keep these chairs for my own patio. However when I looked into buying cushions for them it looked cost prohibitive. Fortunately my dear friend Lori did a better job of finding affordable upholstery and claimed them for herself.

I began by having my husband assess the state of the furniture. A few swift kicks confirmed that, despite the rust spots, it was all still structurally sound. Using a chisel and various wire brushes I removed all the loose coating & rust.

After cleaning everything with a weak solution of soap and water I applied a coat of Rust-Oleum Rust Reformer to the spots where there had been rust.

Already the rust spots were starting to look a lot better. (Top right: original, bottom right: after being scraped and brushed, left: after painting with Rust Reformer).

The finishing touch was to add several coats of Rust-Oleum flat black enamel.

Catching the morning sun on a neighbor’s deck

#10 Oak end table

Transformation cost: $37.39

I was a chalk paint virgin, I admit it! I know, any self-respecting person who’s been DIYing (that is a verb, right?) as long as I have should have used chalk paint a gazillion times by now but, what can I say?,
I guess I’m just late to the party. Anyway, with this piece it was time to venture into chalk paint territory. It was quite a departure for me; I pride myself in being a meticulous painter, and I can lay off like the best of them. After watching numerous Annie Sloan tutorial videos I went to work. Applying chalk paint was like going back to preschool; with a cylindrical brush I slapped it on in every direction, stabbing at it to get into all the nooks and crannies, being careful not to apply too much or to have any drips or runs. After the first coat it looked like the paint and the table had got into a brawl but after the second coat a lovely, flat, uniform finish was achieved. Waxing over the paint is the finishing touch to give it protection and a more dimensional look. I’m very happy with how this piece turned out, I will definitely be using chalk paint again!

I began by stripping the finish off the top of the piece to expose the lovely wood grain. It came off so nicely!

Next I color washed the top of the piece with a 1:2 mix of chalk paint:water. I brushed the wash on then removed excess with a rag until I got the depth of color I was looking for.

I then applied 2 coats of chalk paint to the rest of the piece.
At this point I decided I didn’t like how the color washed top looked against the base so I changed tack.

To finish the piece I went over the top with 2 coats of MinWax PolyShades Honey in a satin finish, I applied a coat of clear wax followed by a coat of white wax to the body of the piece, and I installed a new drawer pull.

#9 Bamboo wicker chair with upholstered seat

Transformation cost: $42.64

This piece was being discarded by a friend of mine who was helping her parents move and clean house. Other than missing 3 casters and having a small split in one leg it was in great condition and is a good quality piece. At first I envisaged this piece with a pretty damask fabric and pastel paintwork but the price of the fabric sent me back to the drawing board. In the end the geometric pattern I found at my local craft store (where upholstery fabrics are permanently 30% off!) gave me the inspiration I needed to take a completely different tack!

Cleaning a piece before painting is arguably the most important part of any transformation, and this was no easy piece to clean. However, with my trusty toothbrush, some compressed air and patience the dirt disappeared!

Using the old fabric and foam as a guide I cut and sewed the new cover, carved out a new seat pad and covered it with batting followed by the new fabric cover. The final touches were to hot glue some ribbon trim to the edges of the fabric and re-create the original tufting using four fabric-covered buttons.

Meanwhile I treated the framework of the chair to 3 coats of Krylon ColorMaster paint & primer in gloss black .

And the finishing touch was to reunite frame & seatpad

#8 Book lover’s table

Transformation cost: $27.30

Even though the flat surfaces of this piece were ugly, beveled, veneered particle board, the tapered legs and upright pieces are solid wood with some attractive detailing. I instantly knew I could make it look elegant. A fortuitous accident with a paint finish resulted in exactly the look I was hoping for; a cracked, aged finish in elegant gold & heirloom white with (in places) touches of the almost black original color.

The first step was to remove one of the pieces of particle board; to be replaced later with something much more lovely.

I removed the legs and gave everything a good clean and a light sanding.

Next I applied a coat of Kilz Complete oil-based primer, followed by Rust-Oleum metallic gold paint, followed by Rust-Oleum 2X Ultra Cover in heirloom white satin finish.

When I applied the metallic gold paint it inexplicably wrinkled in random areas. I liked it so I left it and let it dry thoroughly before applying the top coat of heirloom white. When I went to age it with sandpaper, the wrinkling gave way to a beautiful cracked look.

To attach the new glass top to the rest of the table we would need screw holes. The glass supplier was going to charge $5 per hole so I enlisted my brilliant husband. With a spear-headed carbide drill bit, plenty of lubrication and patience he expertly made the four holes I needed.

The finishing touch was to install the new glass table top. The finished piece is a lovely, elegant table perfect for someone who wants to show off their reading collection!

#7 Sash window mirrored organizer

Transformation cost: $24.11

I’ve been dying to experiment with mirror paint so when a neighbor was discarding her old sash windows I knew this was my chance. I also chose this project to see if crackle medium works with spray paints.

First I removed hardware, metal stripping, and one of the two panes of glass. I then gave everything a good clean and, with the remaining glass protected, a light sanding.

I filled screw holes with wood putty and primed the exposed wood. When putty and primer had dried I applied a coat of Rust-Oleum Metallic gold paint to the front of the frame. I then added a piece of pegboard in the empty opening and secured it with some 1/4 square doweling.

Now for my crackle medium/spray paint experiment. I applied crackle medium over the gold paint and let it dry for 1.5 hours. When the top coat of Krylon Chalky Finish in Bonnet Pink went on – Nothing. Zip. Didn’t work. Note to self: Crackling doesn’t work when the top coat is a spray paint. Instead, after a couple of days, I lightly sanded the top coat to expose the gold paint underneath and give it a more aged look. I then gave everything a couple of coats of clear gloss enamel. I know some of you will be thinking “Why put gloss enamel over a chalky finish. Doesn’t that defeat the purpose?” Well, since my purpose was to use up this pink paint more than to have a chalky finish, it’s all good!

Now for my next experiment: My first encounter with mirror paint. Fortunately I read the can before starting or it could have been a disaster. The mirror paint is applied to the BACK of the piece of glass. In all honesty both sides ended up almost equally reflective but it’s obvious to me now that you don’t want the paint on the front where you’re going to clean!

I finished the piece with a sheet of hardboard on the back, to protect the mirror finish,
and a couple of multiple tool rack pegs.

#6 Gold frame

Transformation cost: $20

Sometimes the hardest thing to do is nothing but almost nothing is just what this piece needed. I had endless ideas for how to refinish this frame and what to put in it (chalkboard, cork-board, dry erase board, pegboard etc. etc.) but every time I went back to it I kept thinking the same thing: “It looks great the way it is and whatever I do to it might only make it worse”. In the end I came to the inevitable conclusion that all it needed was a good clean and some mirror glass.

More detail of the frame