#46 Ice Cream Parlor Set

A friend asked if I wanted to transform this table and three chairs she was getting rid of. I didn’t hesitate to accept. Even though they were in a bad way, they have a charm I couldn’t resist. I’ve always loved bistro-type sets; they conjure up visions of outdoor dining in romantic European cities. It was only when I started work on them that I discovered they are 130+ years old and are a true gem.

Materials used: Rust-Oleum American Walnut stain, Varathane Dark Walnut stain, Rust-Oleum Rust Reformer, 1/4″ plywood, 1″ x 6′ red oak board, Rust-Oleum Satin Protective Enamel, Shellac, Varathane oil-based polyurethane.

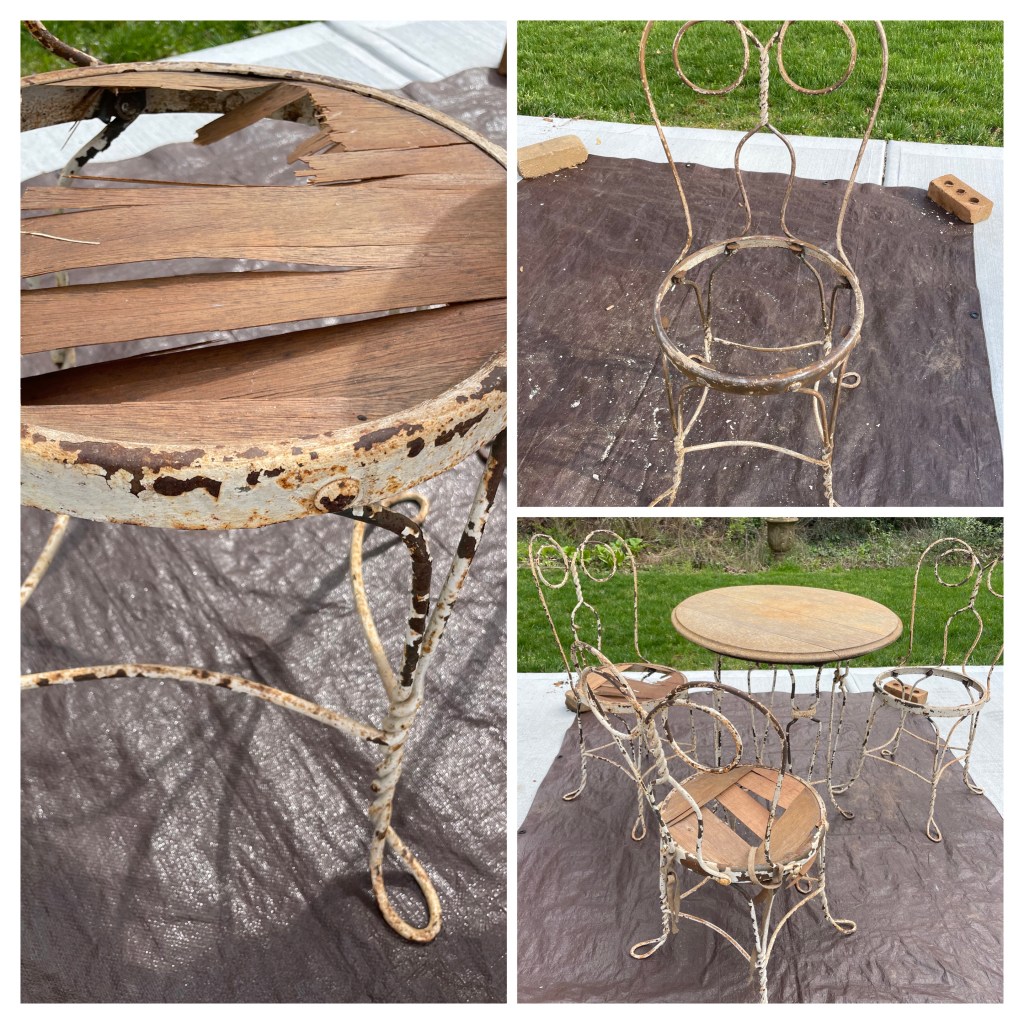
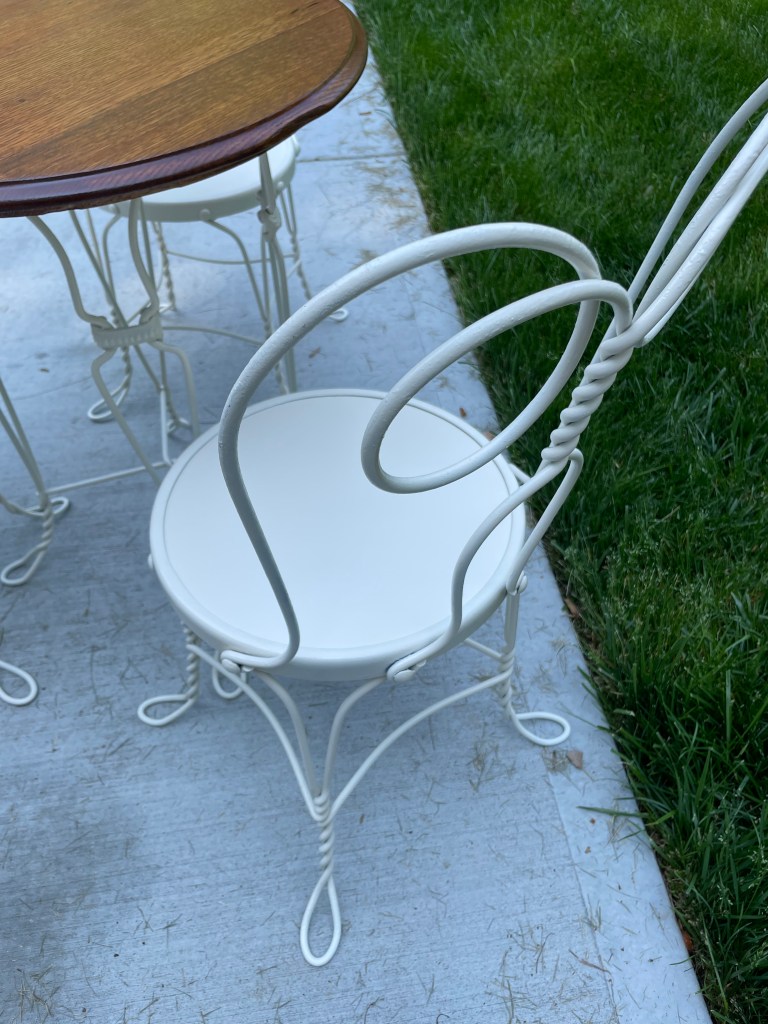
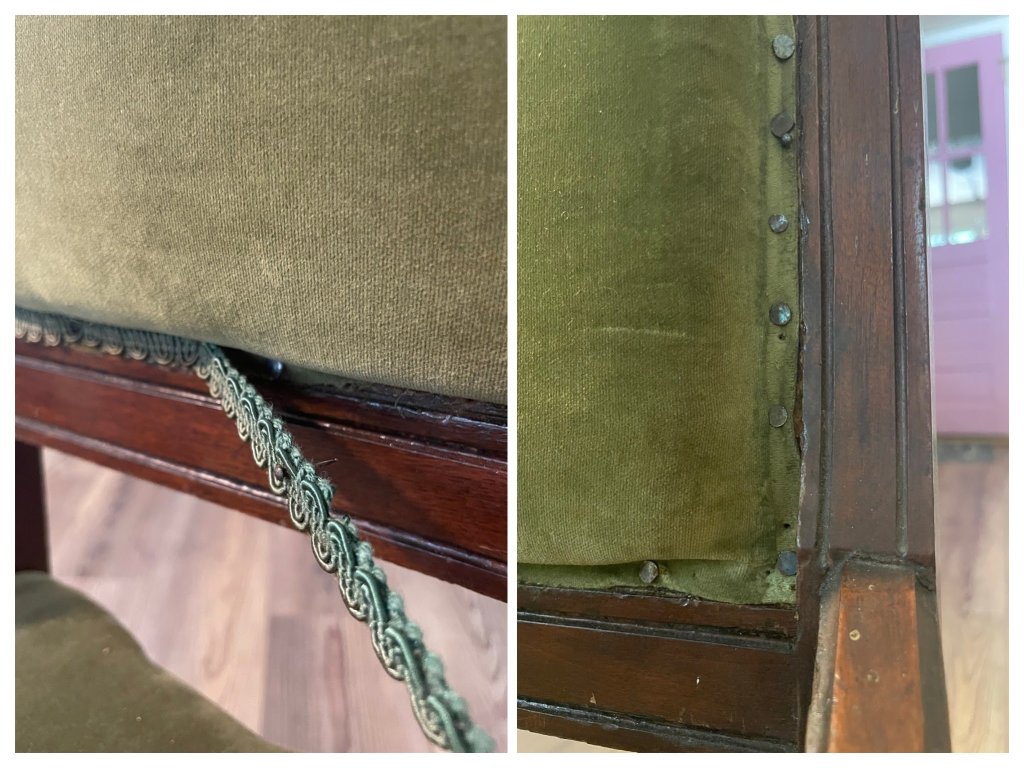
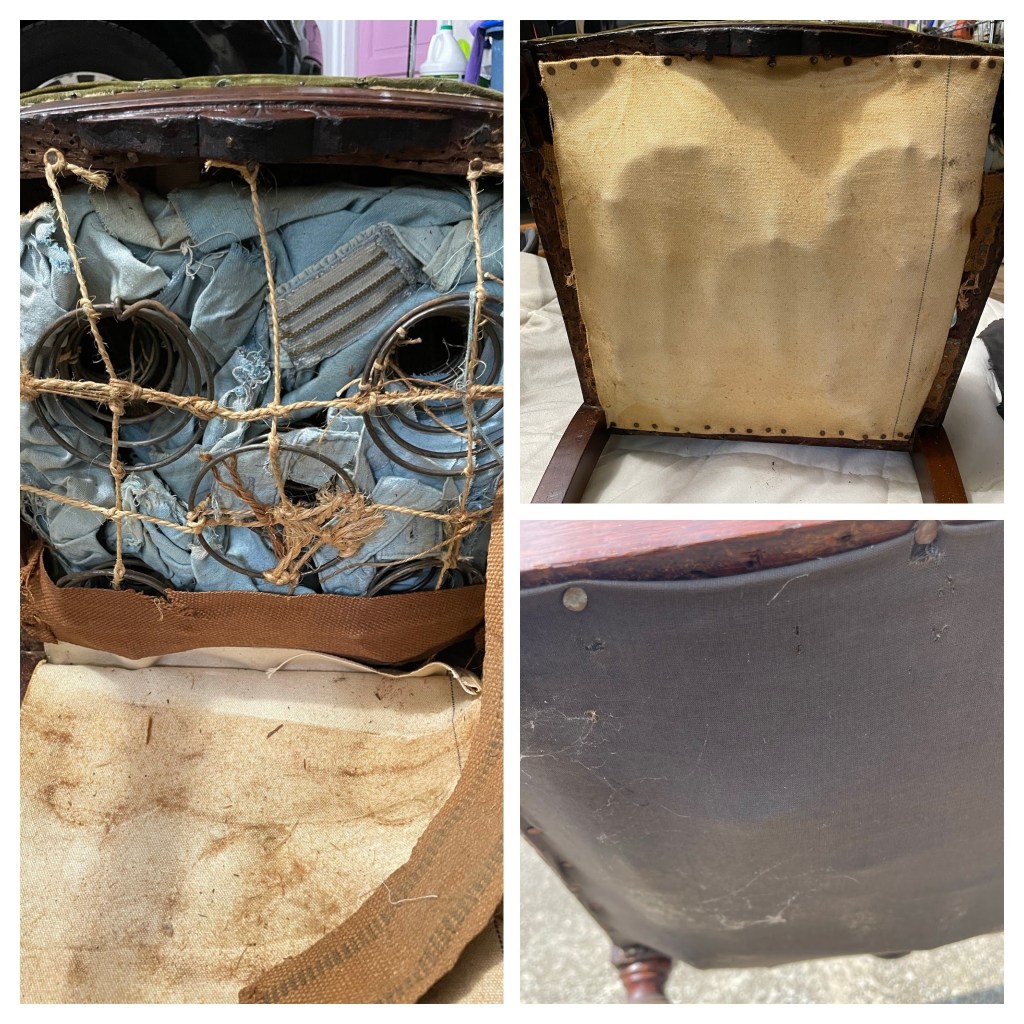
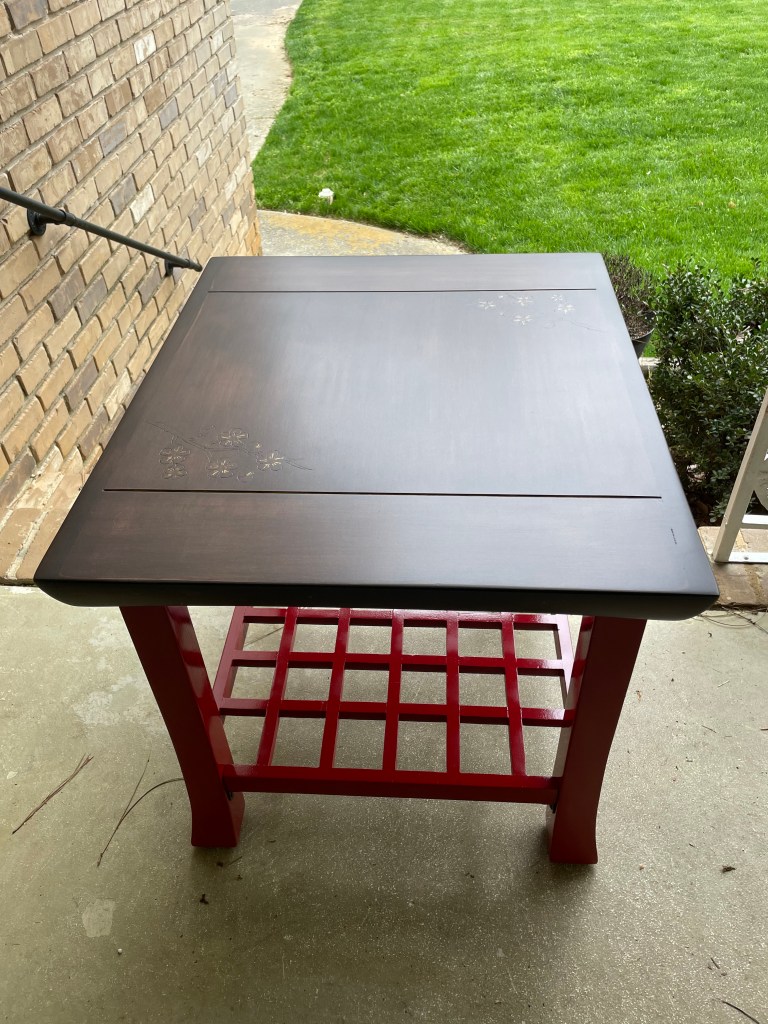
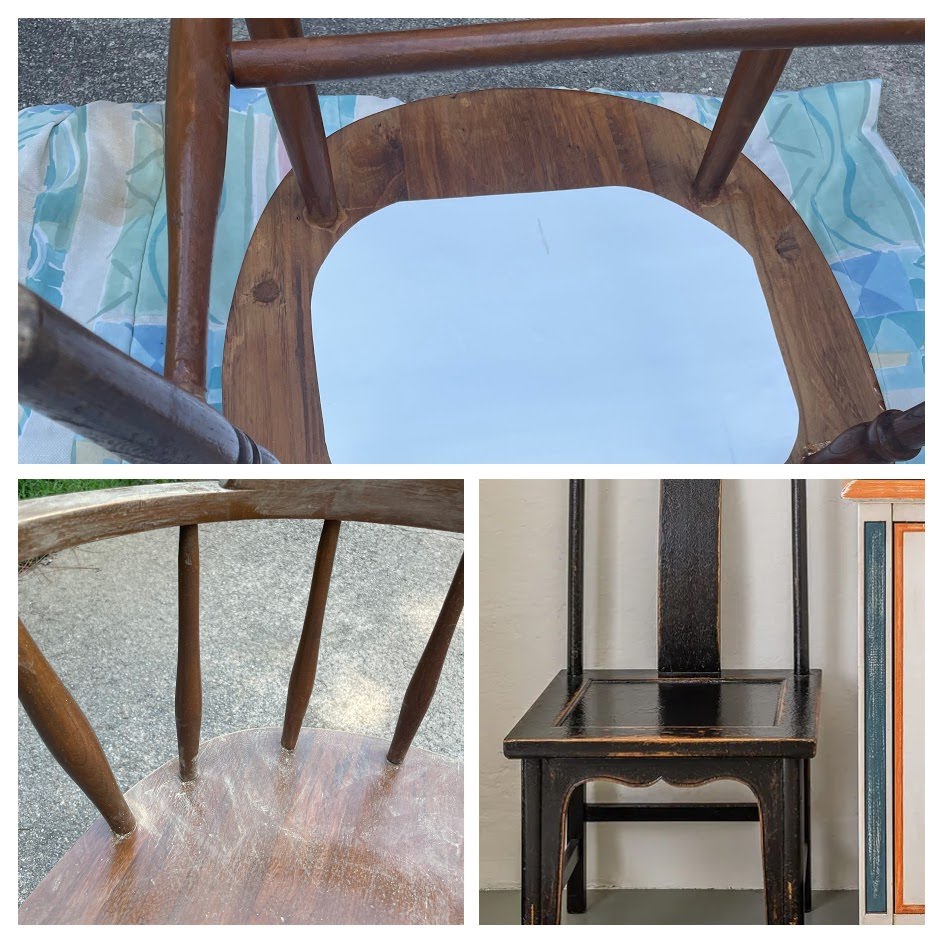
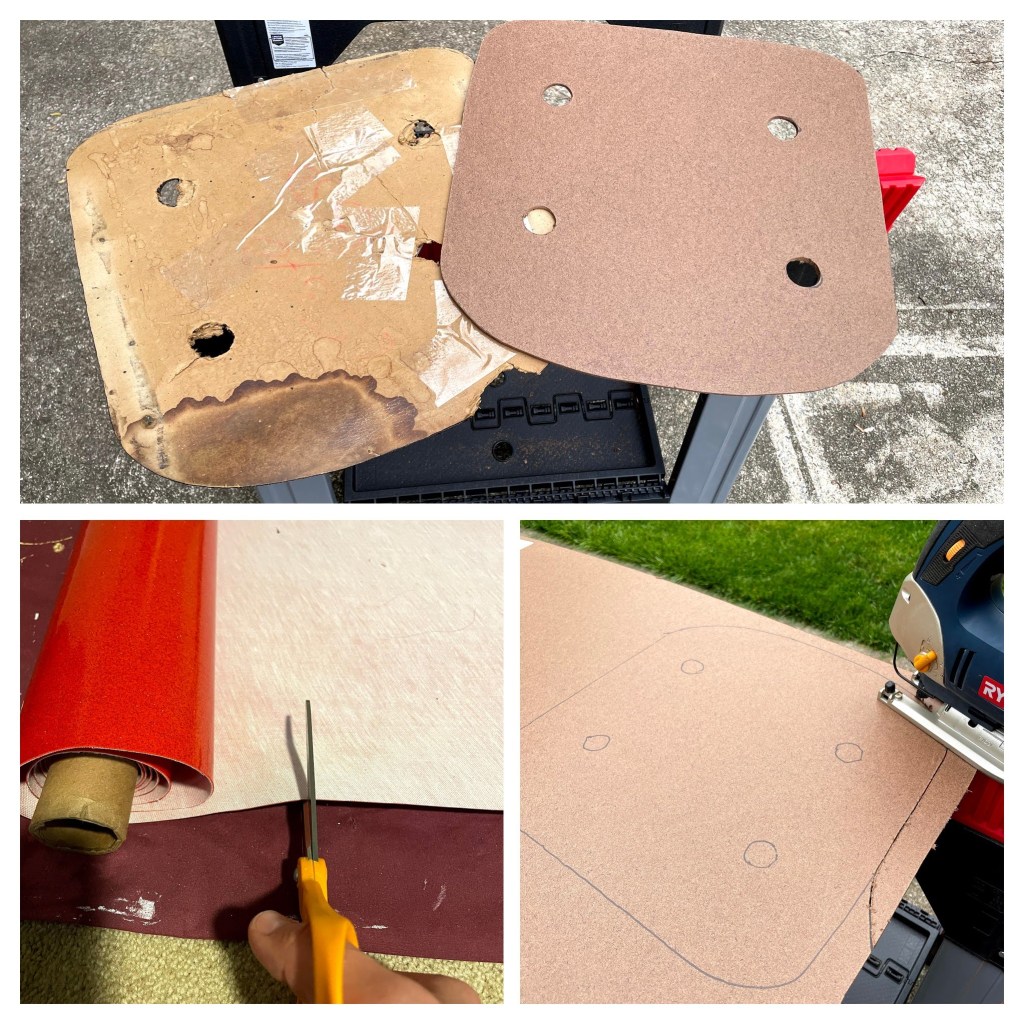
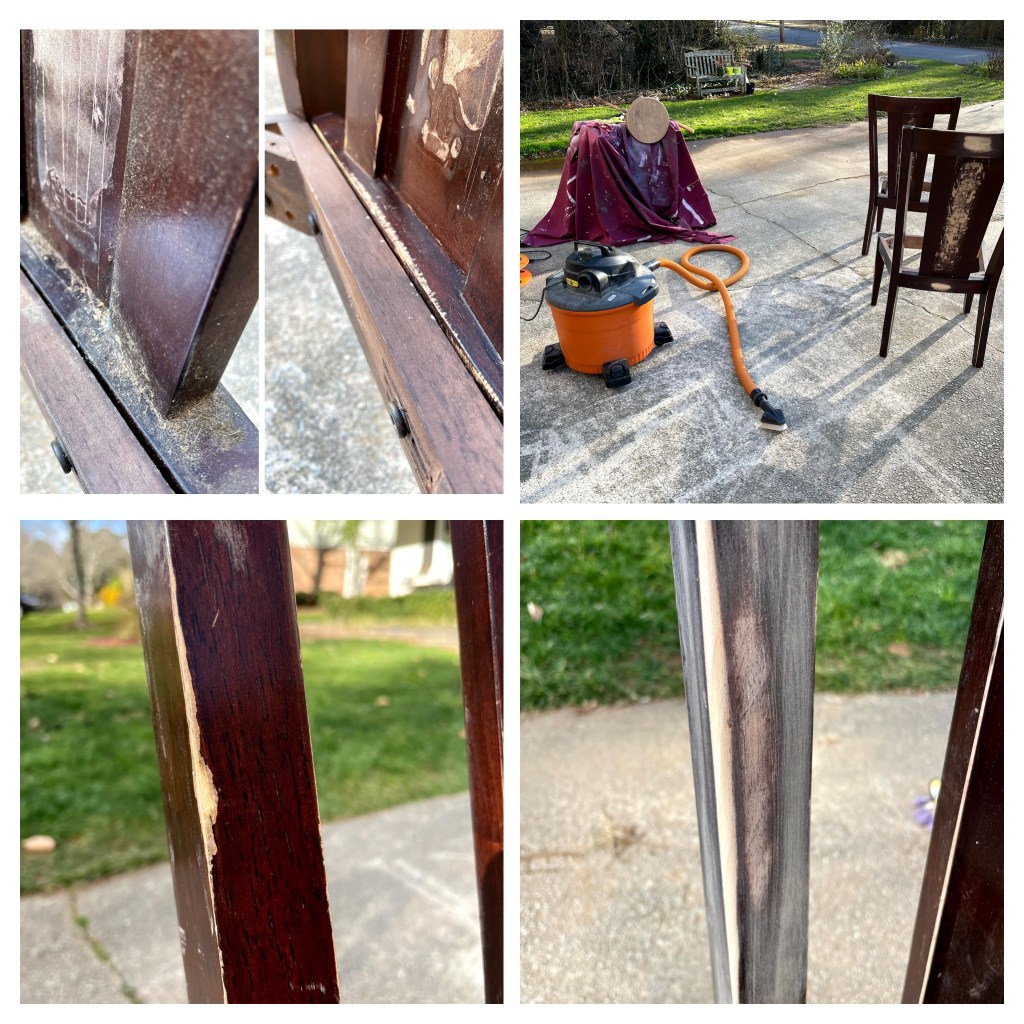
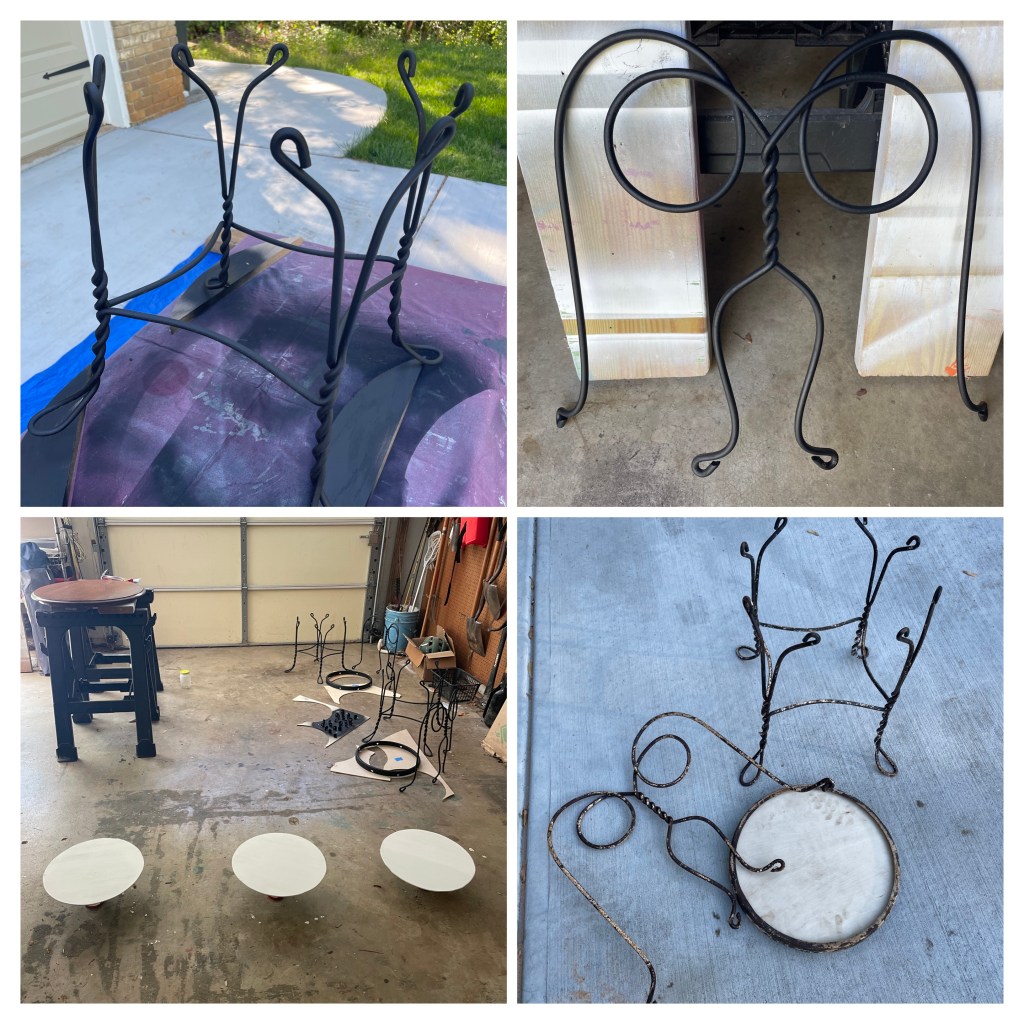
A bit of a mess: The original, laminated plywood seats were either missing completely or damaged beyond repair. The paintwork was flaking and rusted. The table top was only being held together by the leg brackets and a makeshift brace, and the finish had almost completely worn away.

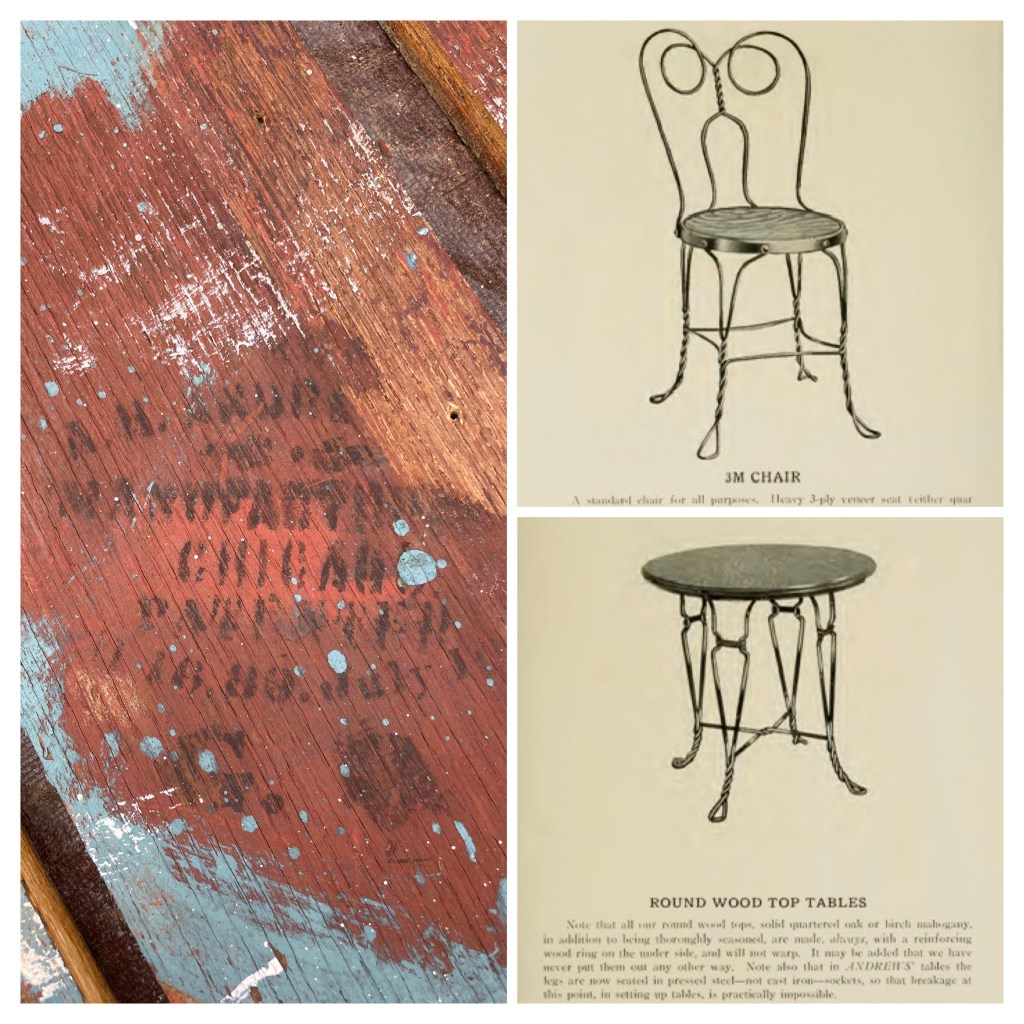
Researching the maker’s mark on the underside of the table revealed that this set was made in the late 19th-century by a company called A H Andrews of Chicago. In their catalog (where I found these images) they state that they made metal furniture for “Drug Stores, Confectioneries, Restaurants, Clubs, Billiard Parlors, Barber Shops, Shoe Stores, Offices and Reception Rooms”. This set is made of Bessemer steel and originally had a Japanese copper finish. The seats were laminated plywood and the table top was mahogany or quarter-sawn oak. When I read that another original finish option was white enamel, I knew I could paint with a clear conscience.

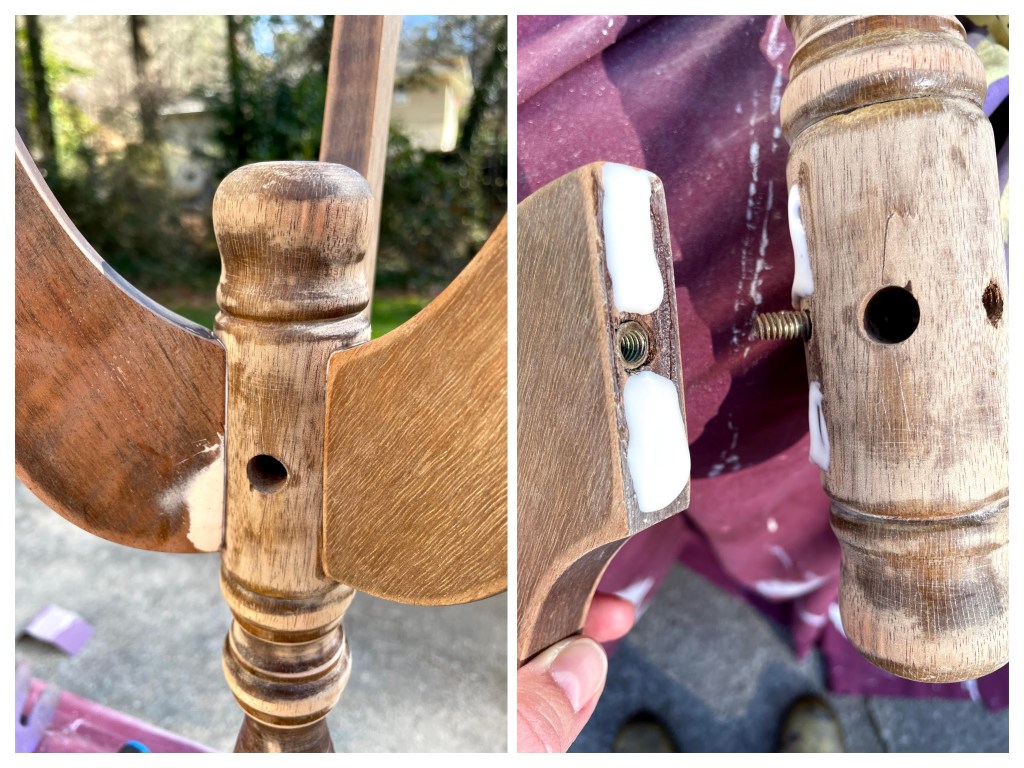
  1. Leg brackets and pine block holding the table top together.
  2. Separated table parts after removing the legs and block.
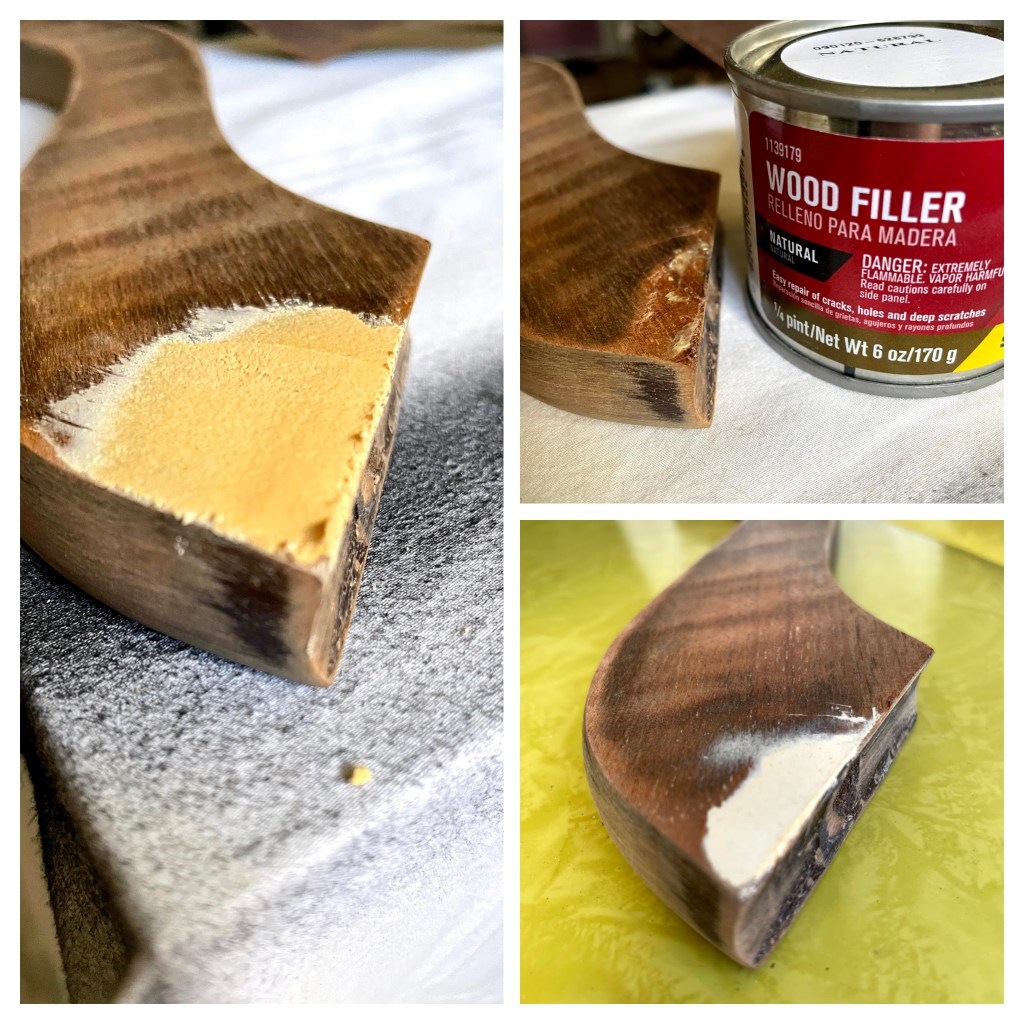
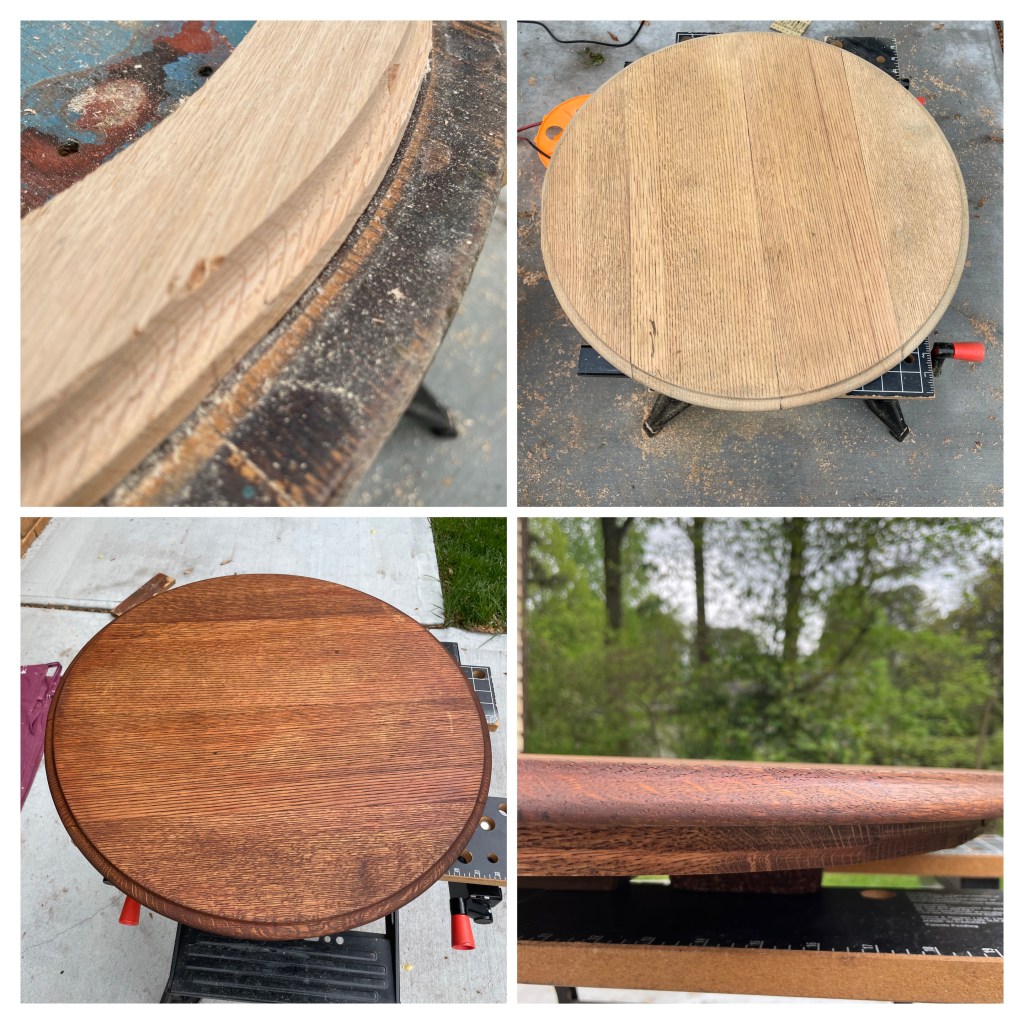
  3. Replacement reinforcing wood ring parts cut from new red oak.
  4. Glued, clamped and re-assembled table top.

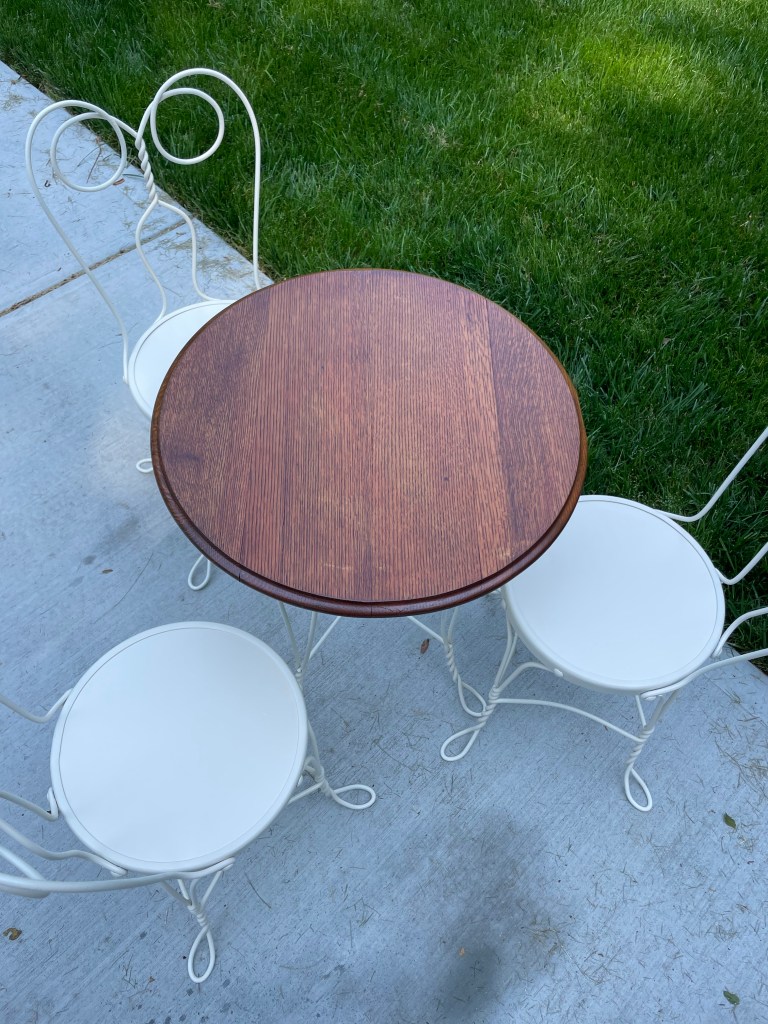
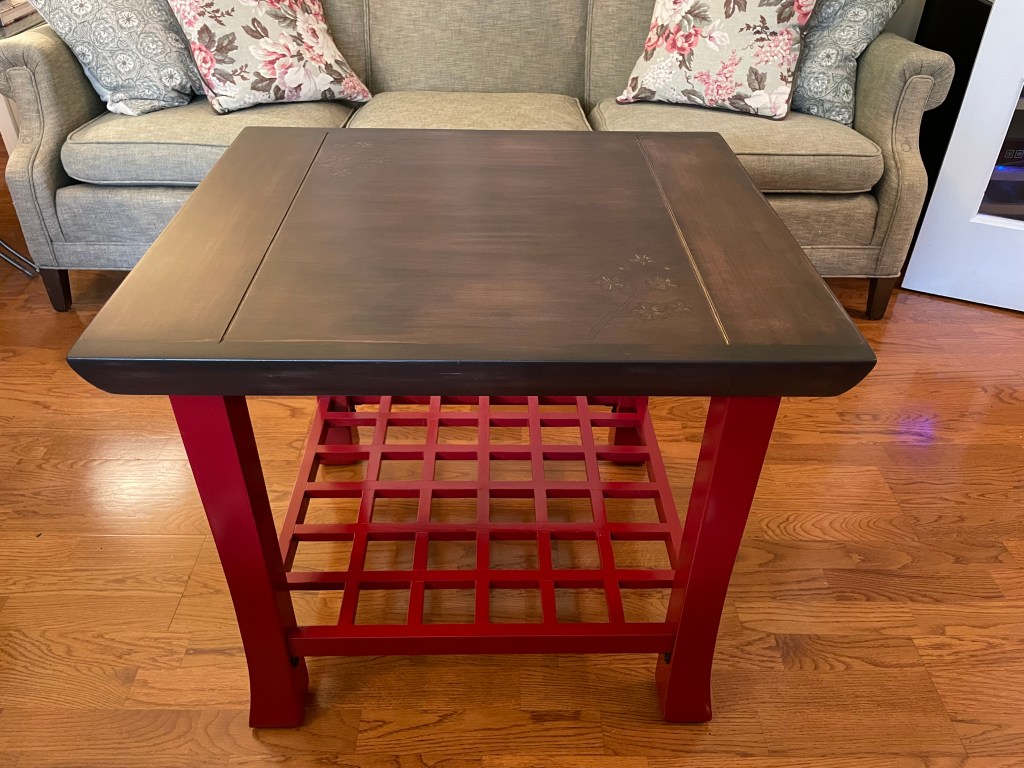
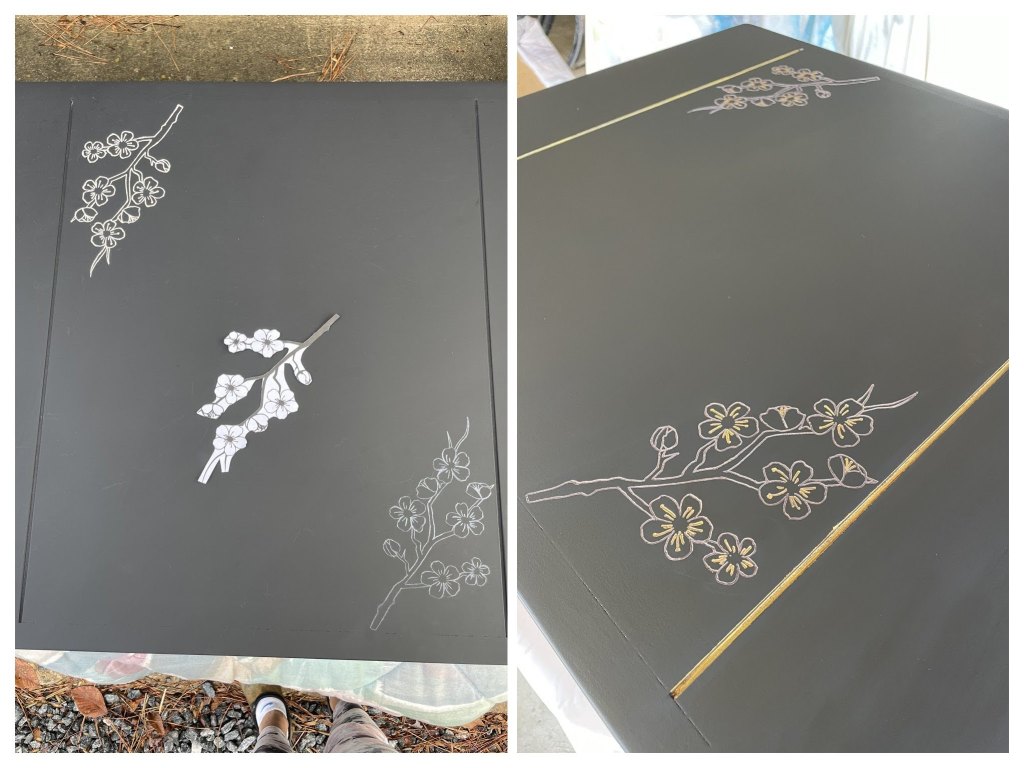
Once the table top had been repaired I routed the edge of the reinforcing wood ring, removed all the old finish and stained both the top and the new wood ring with Rust-Oleum American Walnut stain followed by Varathane Dark Walnut stain.

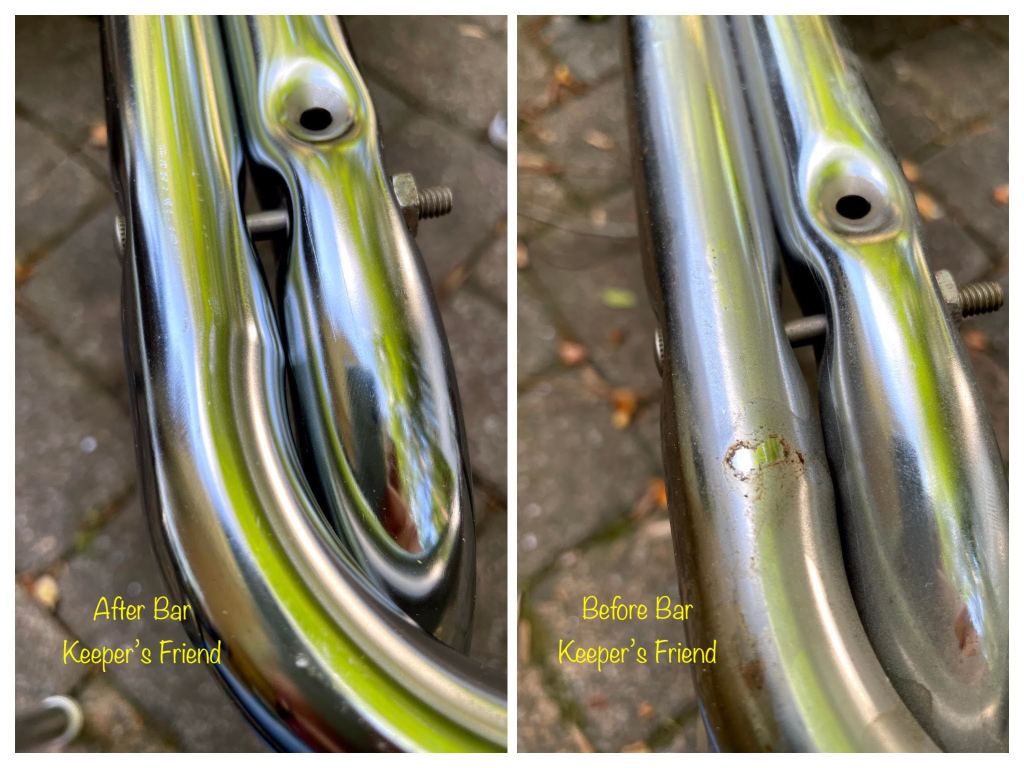
It was then time to prep the steelwork by first removing any loose paint. What was going to be the most effective way? I looked into sandblasting and chemical dipping but they were expensive. I tried wire brushes, sandpaper, and my Dremel but that was fiddly. Then I remembered our 173cc pressure washer and turbo nozzle which will take the skin off your bones if you’re not careful. It worked wonders.

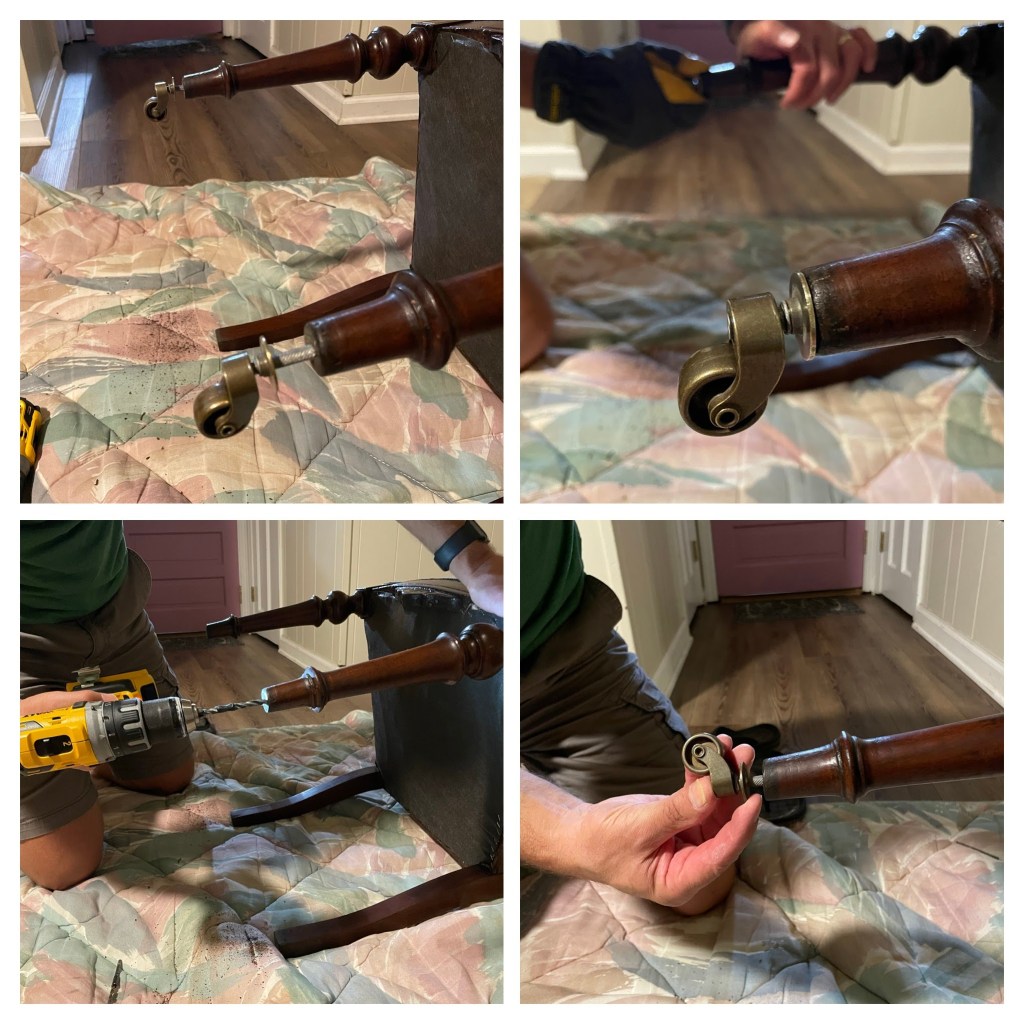
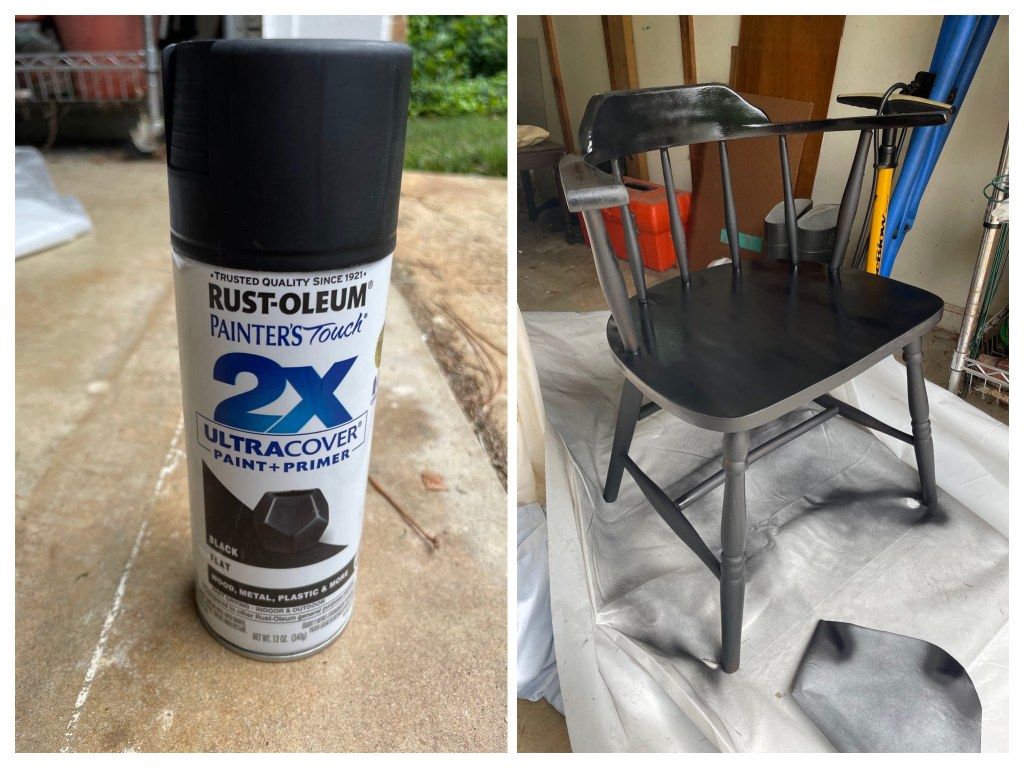
With a little help from Handy Hubby I took apart the pressure-washed chairs so I could cut, prime and install new plywood seats. Next I used a product I have used before on old metalwork that had signs of rust: Rust-Oleum Rust Reformer “instantly bonds with rust and transforms it to a non-rusting, flat-black paintable surface and prevents future rust.”

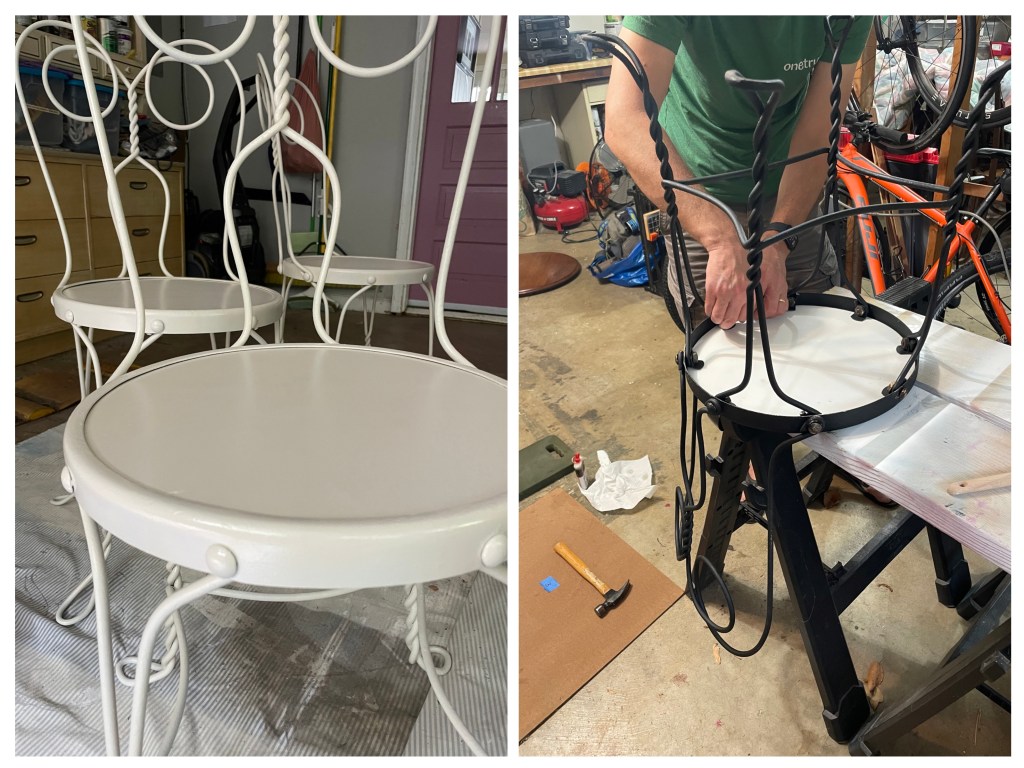
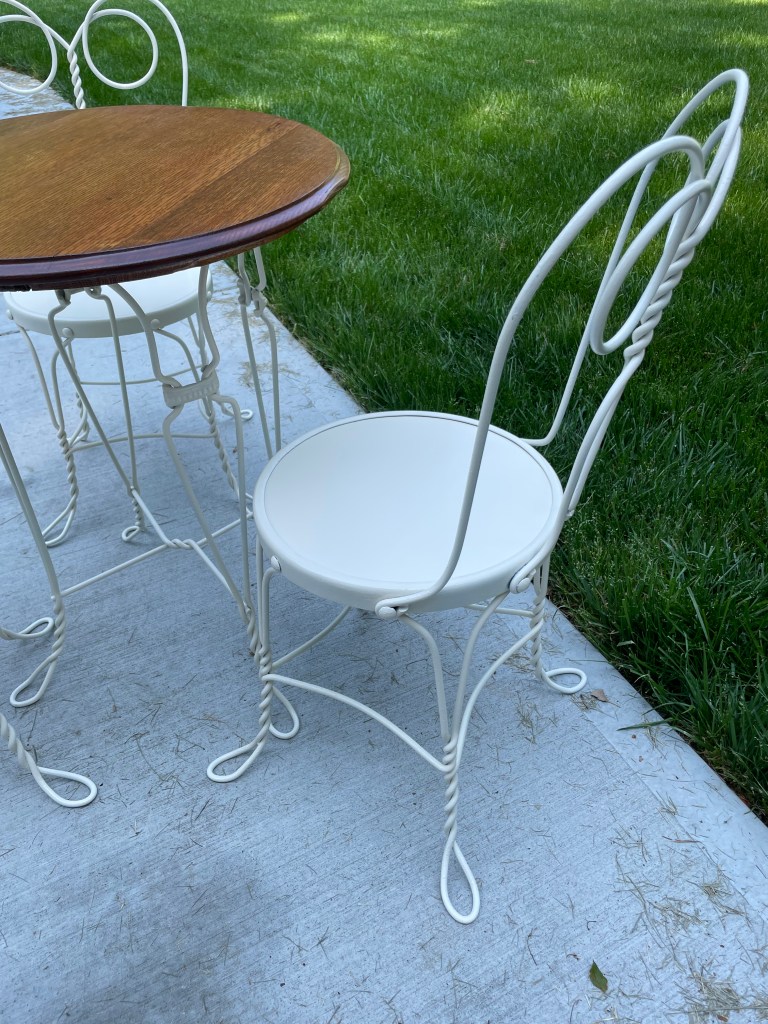
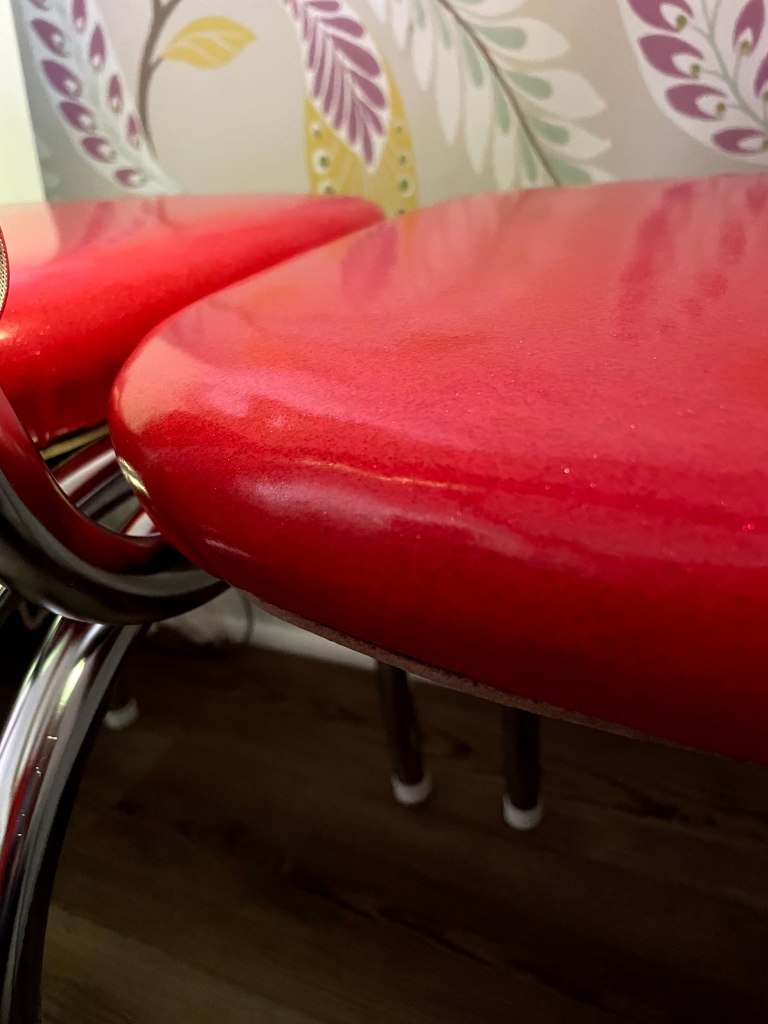
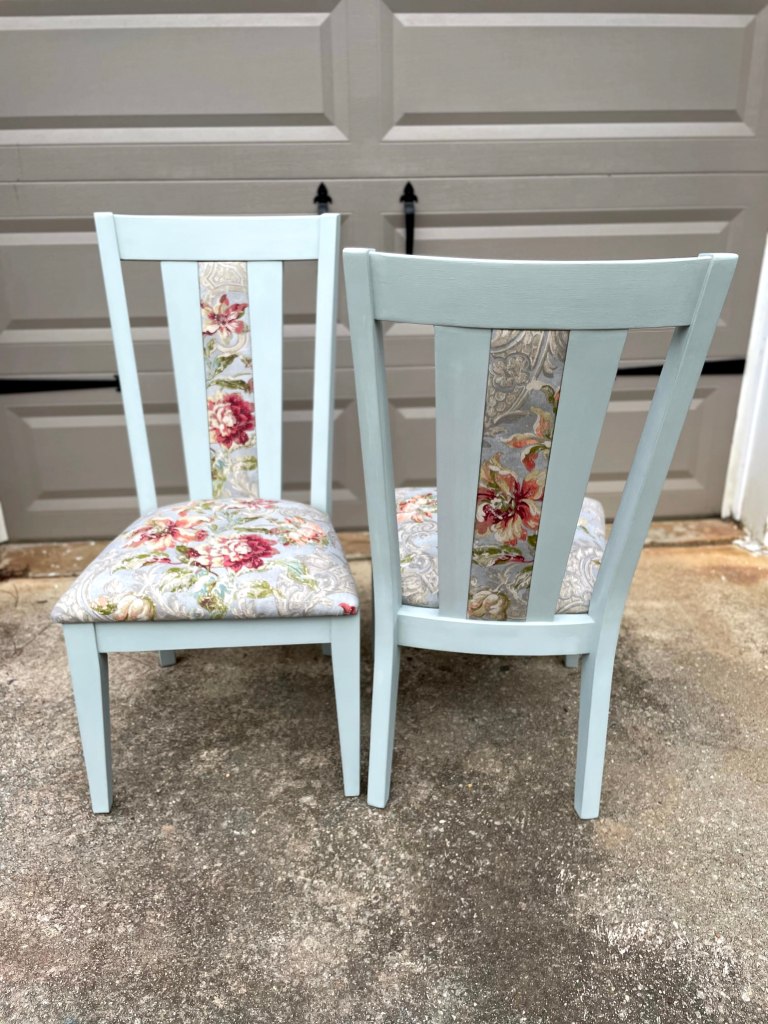
Once the chairs and table were re-assembled I applied 3 coats of Rust-Oleum Protective Enamel in shell white satin finish to all the metalwork.

Finally the stained tabletop was sealed with 2 coats of shellac and then finished with 2 coats of Varathane oil-based polyurethane in satin finish.

#45 Victorian Eastlake chair

Back in October 2022, a friend of a friend was wanting to clear some antiques from her basement and she decided to give me 1st dibs. Initially I sadly declined everything because I had neither the space to store them nor the time to work on them, but I couldn’t get this chair off my mind. It needed to be professionally reupholstered and, before I would commit, I wanted to find someone willing to invest in it. Fortunately I didn’t have to look far; a Transforming Trash regular stepped up to make this a companion piece to the Victorian sofa that was Transformation #34

Materials used: Howard Restor-A-Finish, Howard Feed ‘N’ Wax

The woodwork on this chair was dull, dirty and a little scratched but generally in good shape; there were no cracks, repairs or missing pieces. The upholstery, however, was very worn and needed to be professionally replaced. Before I started restoring the woodwork I removed the original trim.

To clean, brighten, and restore the wood, I turned to one of my favorite products: Howard Restor-A-Finish (mahogany). No matter how many times I use this product I am always surprised what a difference it makes. This picture compares before (right leg) and after (left leg) using Restor-A-Finish.

Per the instructions I always follow Restor-A-Finish with Howard Feed ‘N’ Wax. The results are spectacular!

Before going to the upholsterer I decided to snoop under the seat. Check out the old coil springs that were under a layer of cambric, a layer of canvas, and webbing.

When the chair came back from the upholsterer there was only one thing left to do to finish it: add antique brass stem casters to the front legs. I had my handy husband help because I was too afraid of making a mistake. He did a perfect job!

#44 Windsor chair #2

I got this chair off the curb across the street from my house. Something about it drew my attention so I felt very validated when I discovered it is a solid maple, mid-20th-century, Windsor desk chair, possibly made by Ethan Allen; definitely a piece worth rescuing. As usual the design evolved throughout the process and I think the final result is a perfect blend of several influences.

Materials used: Minwax Furniture Refinisher, Peel-Tek masking fluid, Designer Stencils bamboo lattice stencil (c328), Rust-Oleum 2X Ultra Cover in Coastal sage ultra matte, Varathane oil-based polyurethane in semi-gloss finish.

One of the first things that struck me about the chair is the bamboo-style legs, spindles, and stretchers. Since bamboo furniture often has a mid-century vibe to it, and because the existing finish was badly scuffed in places, I decided to first of all remove the dark brown glaze finish. At this point I was thinking I would maybe just restore it to its lighter, natural color.

After cleaning the chair with a weak solution of Simple Green, I removed the glaze finish using Minwax Furniture Refinisher. It came off nicely and I was happy to find beautiful maple wood underneath.

When I started sanding I quickly realized I wasn’t going to be able to prep every nook and cranny to a standard that would have merited a clear polyurethane finish. This was when I decided to go with a Hitchcock-inspired design which includes a stenciled top back rail, some paint, and some clear topcoat. When they were sufficiently sanded, I masked off the chair parts that would stay unpainted.

At this point I had decided to use a bamboo stencil and knew that I wanted the pattern to be in the natural, maple color. So I had to find a way for the pattern to be masked off while I painted the rest of the chair parts. I found Peel-Tek masking fluid on-line and applied it to the top back rail using the stencil and a stencil brush.

Now I was ready to apply 2 cans of Rust-Oleum 2X Ultra Cover in Coastal Sage ultra matte finish. I chose this color because it is in the mid-century color palette.

It took a long time to peel off the Peel-Tek masking fluid but it worked perfectly! Once all the masking tape was also removed, the chair just needed its finishing coats of Varathane polyurethane in semi-gloss finish. The semi-gloss finish really brings out the warm glow and the chatoyance of the maple.

#42 Klaussner end table

This project nearly made me hang up my paintbrush, and it will not make my top 10 list when I eventually reach my goal! It still fights me by refusing to be photogenic. Trust me when I tell you that the table top looks better in person than it does in any pics.

A friend of mine originally bought this end table as part of a living room set in the early 2000s. The matching coffee table had not withstood the rigors of raising four children; this table showed the scars, and had been put to the curb. It is a good quality Klaussner table that needed a complete makeover. The flare of the legs, the grid pattern of the lower shelf, and the upward curved edges of the top were what inspired the Japanese-style makeover.

Materials used: Rust-Oleum 2X Ultracover primer, Rust-Oleum 2X Ultracover gloss Colonial red, Varathane wood stain (Kona), Folk Art Treasure Gold 5535, Varathane oil-based polyurethane in satin.

A previous paint job desperately needed fixing.

After I dismantled the table, I used paint stripper to remove most of the finish on the top.

I then sanded the top down to bare wood and painted it matte black.

Meanwhile I sanded and primed the legs and lattice shelf (which was no mean feat). My Dremel 3000 with a sanding attachment was invaluable on the lattice work.

My vision really started to take form when I painted the legs and lattice with Rust-Oleum Colonial Red in a gloss finish.

Turning my attention back to the table top, I printed and cut out some cherry blossom clip art. I transferred the image to the matte black surface using a chalk pencil (part tracing the outline and part freehand). Next I used my Dremel Diamond Wheel Point engraving attachment to carve the image into the wood. A coat of Varathane wood stain in Kona darkened the carved wood, and then I picked out some details with Folk Art Treasure Gold 5535.

Everything was going perfectly (top right pic), until I applied the final coats of lacquer and it turned blotchy and cloudy.

The only way to remove the blotchy lacquer was to sand back to the bare wood again. Since I didn’t want to paint over the engraving, this time I decided to stain the surface. After three applications of Varathane wood stain in Kona, the top was a lovely rich brown color.

I liked the soft sheen so much I decided to apply wax instead of polyurethane at this point. However, the final coats of wax also looked blotchy, no matter how much I buffed it. It was back to the drawing board again as I removed the wax finish with mineral spirits and re-sanded the surface.

After removing the wax, I needed to stain the surface again and touch up the gold details. When I was satisfied with how it looked, I went with finish #3: Varathane oil-based polyurethane in a satin finish. Finally I had success.

#40 Windsor chair

If a chair could look like a hug then I think it would be this chair. As usual I hesitated when I first saw it because I already had a garage full of projects. I just couldn’t resist its charm.

Materials used: Rust-Oleum 2X spray paint (black, flat), Varathane oil-based polyurethane (satin).

In my research I learned a lot about Windsor chairs, but I never found out the provenance of this particular one. I only know it is a low-back Windsor chair with a shield seat and front legs that are turned and tapered. At the same time as learning that Windsor chairs were often painted dark green, brown, or black (to disguise mixed use of woods) I saw a chair in House & Garden that became my inspiration piece (bottom right). After cleaning, I sanded the chair a little to smooth out a few lumps and bumps. I didn’t want to paint over the markings so I covered them with a piece of contact paper.

One can of Rust-Oleum 2X Ultra Cover in flat black formed the base coat.

When the base coat was dry I used 220 then 400 grit sandpaper to give it the distressed look I wanted.

I finished the piece with three coats of Varathane oil-based polyurethane in a satin finish, lightly sanding the whole chair before the third and final coat. I could also have finished it with some clear wax but… spindles! Spraying spindles is a lot easier than brushing them.

#38 Diner chairs

Materials used: Vinyl sparkle red upholstery fabric, hardboard, cardboard.

When these diner chairs were offered up on our neighborhood Facebook page, I didn’t hesitate. It looked like an upholstery project I could handle, and it’s not every day you get to work on something so quintessentially American. A friend who also expressed an interest immediately became the bespoke recipient and picked out the new vinyl.

At first glance the finished chairs don’t look that different from the original ones, other than the color of the vinyl. On closer inspection, though, you can see that the old vinyl was scuffed, damaged, and grubby. Also the cardboard under the seats was stained and torn.

I started by removing the upholstered seats and backs from the frame, and taking off all the old vinyl. Thankfully all of the structure beneath the vinyl was in good shape and could be re-used.

I then took apart the frame, cleaned the chrome with Bar Keeper’s Friend, and re-assembled it.

Using the old card as a template I cut new seat bases out of hardboard. I then began re-upholstering the seats and backs with the gorgeous red sparkle vinyl.

Along the way I learned the technique of using a hairdryer to warm the vinyl so it can be stretched more neatly over the corners. I thought the seats turned out really well, but I was not satisfied with the back pads; where the two pieces joined together it was too lumpy and bumpy.

After putting them aside for several months I came back to the drawing board with a new approach. My friends at Daniel’s Southern Decorators gave me some of the upholstery card that I hadn’t been able to find anywhere else. Now I was able to replace the old, crumbling card. Using the dressmaking technique of notching, I cut the vinyl to reduce as much bulk as possible. I then “wrapped” the card with the vinyl, attaching it with hot glue and leaving the top, long edge loose. I attached the loose vinyl to the other back panel by stapling through some cardboard tape to protect the fabric. Finally I could flip the wrapped card into place and secure it with the original upholstery pins.

This new technique yielded much better results.

#37 Tufted cow print ottoman/stool

Materials used: Upholstery fabric, fabric-covered buttons, weed barrier, stuffing, 8″ furniture legs.

Back in February 2019 I picked up a second-rate occasional table made of a plywood top on what looked like a bar stool. I separated the top from the bottom and, in April 2019, transformed the bar stool bottom into a Bistro Table. More than two years later the second part of this 2-part transformation is finally complete! Initially I envisaged transforming this plywood circle into a large, framed mirror but I love it as an ottoman/stool instead.

I began by re-purposing another freebie found on our local Buy Nothing Facebook page: A very large Urban Outfitters floor pillow which yielded four trash bags of upholstery stuffing and enough heavy duty fabric to make a liner.

To get the legs and tufting buttons in the right places, I made a newspaper template.

Once I had cut and sewn the liner and outer cover I inverted them both and stuffed them with the upholstery filling.

I compacted the stuffing by sitting on the plywood while pulling the fabric taut and stapling it. When everything was secured in place I set about doing the tufting armed with some very large upholstery needles and band-aids. The fabric-covered buttons are secured on the back side by tying the thread through a regular button.

The finishing touches were felt pads on the legs and a fitted piece of weed barrier to cover the upholstering and the leg hardware. Who knew that stretchable weed barrier would be as good an alternative to cambric, if not better?

#36 French country-style chairs

Materials used: Primer, chalk paint, clear wax, hardboard, upholstery fabric.

What attracted me to these chairs was the inlaid panels in the backrests. I knew if I could remove them it was an opportunity to have a little fun with some fabric I wanted to use.

First I had to make sure I could remove the “wooden tile”, inlaid panels. There were four all together: one in the front and back of each chair’s backrest. Sure enough they came out easily, as you can see in this 9-second video.

I then gave the frames a good clean, and sanded out a few dings.

After a couple of coats of primer, I applied three coats of chalk paint. I call this color Vintage Paris Grey; it’s a blend of leftover paints with those names. The paintwork was finished with two coats of Behr clear wax.

When the frames were done, it was time to tackle the upholstery. I started with the backrest panels. My handy husband cut four pieces of hardboard to fit the spaces. With spray glue I attached a thin piece of batting to each, then wrapped them in the upholstery fabric.

I re-attached the newly upholstered panels to the frames using Loctite mirror, marble and granite adhesive.

Under the old fabric the original seat pads were in such great shape I could re-use the foam and batting. I was even able to recycle the black cambric. With the old fabric as my pattern, I cut the new material, making sure to match the patterns on the two seats. I then covered the seat pads with the new fabric, and re-attached the black cambric. Then it was just a matter of attaching the new seat pads to the frames.

#35 Pedestal table

Materials used: Wood filler, spray paint, transfer, ceiling paint, wood stain, polyurethane.

This pedestal table was one of several abandoned furniture pieces in a fixer-upper homestead my friend bought. Rather than discard it, she offered it to me to transform. Now that it’s finished, I find myself in need of a table about this size and shape, but with a different look. I’m hoping something similar comes my way soon so I can try out another design.

Before I could do anything with this table I needed to be able to fix a wobbly foot that was preventing it from standing stably. It turns out that removing the feet from the pedestal was a lot easier than I thought. You can see a how-to video here.

Once the feet were removed from the pedestal I cleaned and sanded all the woodwork and repaired the damaged foot with wood filler.

I then reassembled the base using plenty of wood glue to make sure the feet are now really secure.

I had planned to leave the tabletop bare, but when I sanded it I found that the veneer was too thin. Plan B was to paint the entire table with several coats of Rust-Oleum 2X Ultra Cover in Canyon Black satin finish.

I used the same stencil I used on the Sophia desk to apply a perfectly sized pattern to the tabletop. I used ceiling paint because its flat finish would take up color from a stain.

A quick application of some Varathane wood stain in Kona took the edge off the brightness of the white ceiling paint. And a few coats of Varathane oil-based polyurethane in a satin finish give the tabletop the protection it needs.