#39 MCM bentwood armchair a.k.a. “The Ballerina”

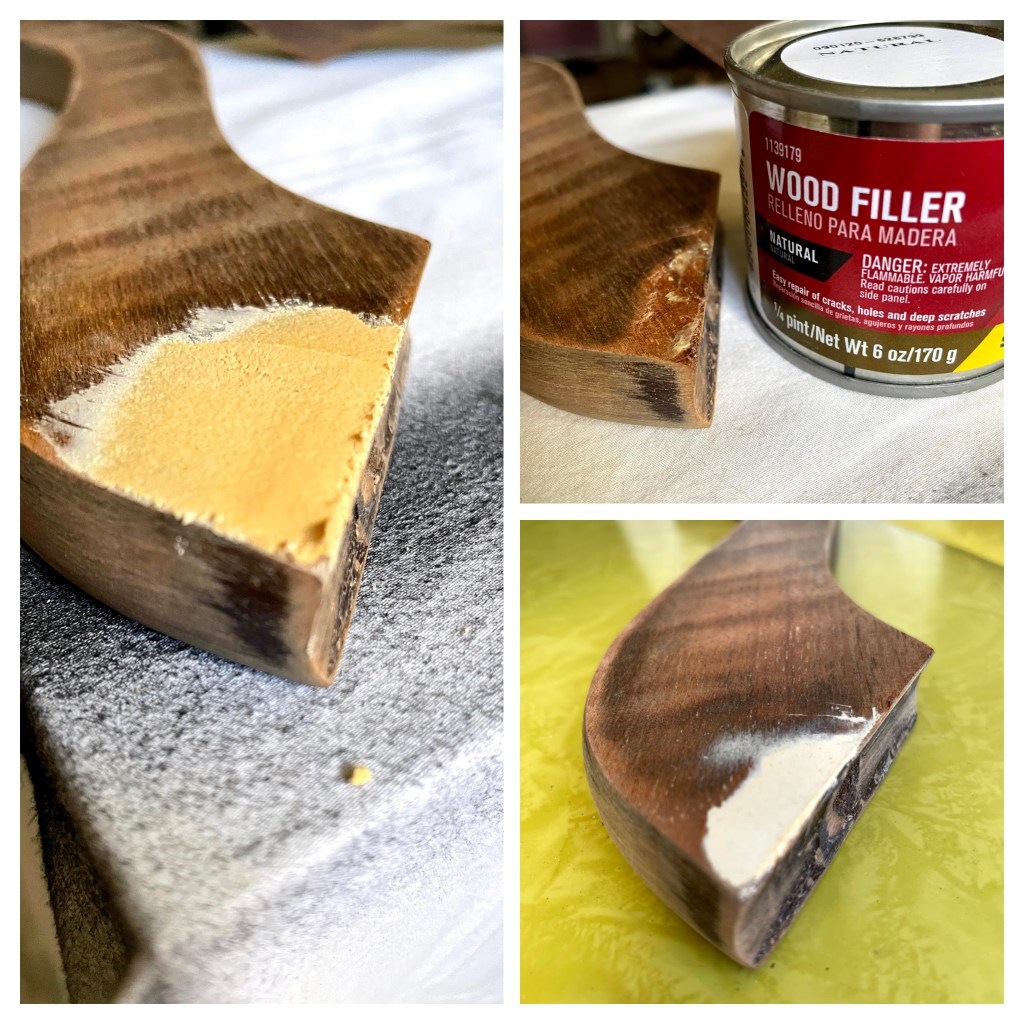
Materials used: Minwax Antique Furniture Refinisher, shellac, polyurethane, Krylon spray paint, foam, batting, upholstery fabric, weed barrier.

On May 28, 2020 I got a surprise call. My friend’s father, Jim, knew about my mission and was calling to see if I would make this chair one of my transformations. It had been his son-in-law’s work chair and Jim had saved it from being thrown away years before. How lucky am I to have friends and followers who bring me gifts like these?! I’m ashamed to say it then spent two years in my garage—a victim of other projects and life’s distractions, but never forgotten. It’s had to wait a long time for its moment in the spotlight, but I hope you will agree it was worth the wait.

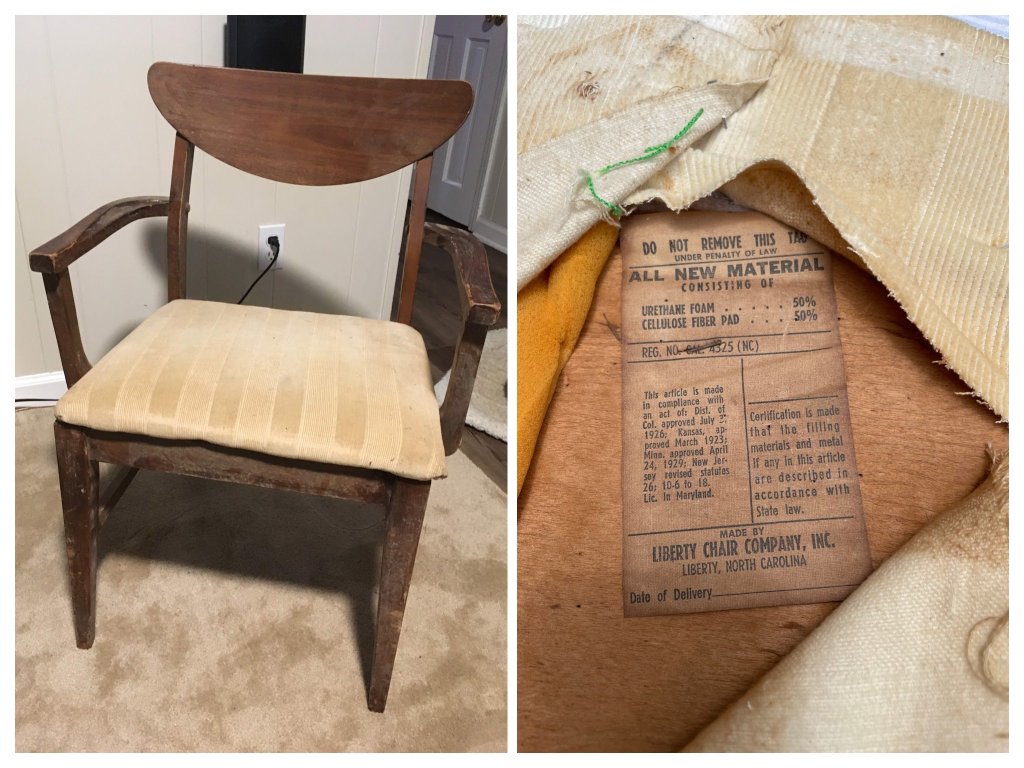
Jim Wright knew good workmanship when he saw it, so I was not surprised to find a Liberty Chair Company tag under the seat. Several messages, emails, and phone calls later I found out it had been made in Liberty, NC in the late 60s/early 70s. At that time it was model 700 and was named “Contemporary Chair”. Members of an online woodworking community think the wood is cherry, and in 1969 its wholesale price was $10.45.

Although the bones of this chair were sound, it was dirty and had been stained and upholstered badly. It was not a difficult decision to strip it down to the bare wood and refinish.

I removed the existing finish using Minwax Antique Furniture Refinisher, then sanded the frame with 150, 220, and finally 400 grit sandpaper. The final prep step was to remove all dust with an air compressor and wipe with a slightly damp cloth.

Refinishing began with a full aerosol can of shellac to seal the wood, accentuate the grain, and give it a lovely honey color.

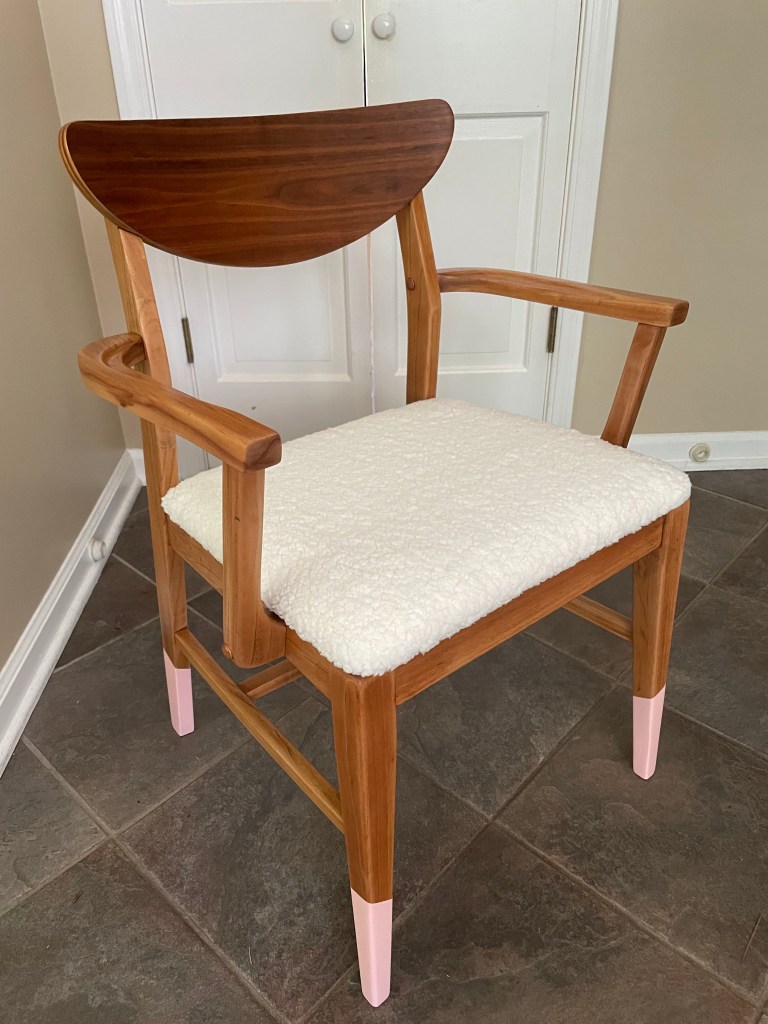
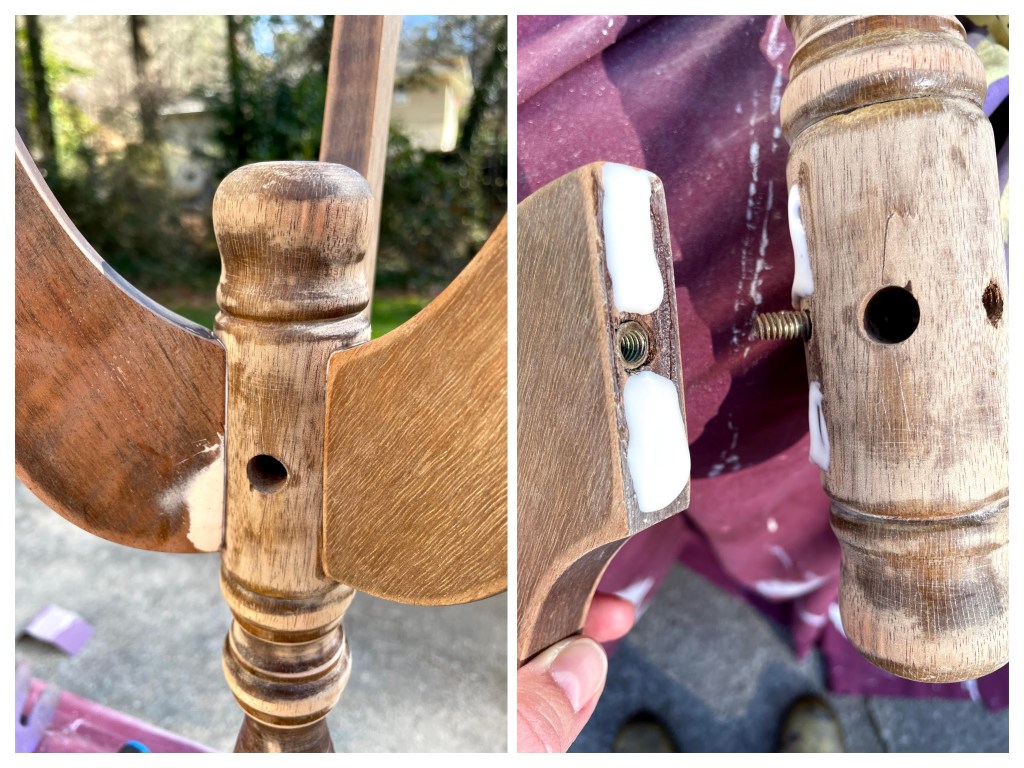
Now it was time to elevate this chair from the ordinary. After some minor repairs I slippered the feet in Krylon “Ballet Slipper” gloss spray paint. Hence the chair’s nickname “The Ballerina”, because now it looks like it’s on points.

To finish the framework I applied 3 coats of clear, Varathane, oil-based polyurethane in a satin finish. As always I lightly sanded everything before the final coats.

Finally I re-upholstered the seat with a boucle-style fabric. It was a little stretchy in one direction so, to prevent over-stretch, I first attached it to some cotton lining fabric. Fully re-assembled this chair deserves to be in the spotlight.

#35 Pedestal table

Materials used: Wood filler, spray paint, transfer, ceiling paint, wood stain, polyurethane.

This pedestal table was one of several abandoned furniture pieces in a fixer-upper homestead my friend bought. Rather than discard it, she offered it to me to transform. Now that it’s finished, I find myself in need of a table about this size and shape, but with a different look. I’m hoping something similar comes my way soon so I can try out another design.

Before I could do anything with this table I needed to be able to fix a wobbly foot that was preventing it from standing stably. It turns out that removing the feet from the pedestal was a lot easier than I thought. You can see a how-to video here.

Once the feet were removed from the pedestal I cleaned and sanded all the woodwork and repaired the damaged foot with wood filler.

I then reassembled the base using plenty of wood glue to make sure the feet are now really secure.

I had planned to leave the tabletop bare, but when I sanded it I found that the veneer was too thin. Plan B was to paint the entire table with several coats of Rust-Oleum 2X Ultra Cover in Canyon Black satin finish.

I used the same stencil I used on the Sophia desk to apply a perfectly sized pattern to the tabletop. I used ceiling paint because its flat finish would take up color from a stain.

A quick application of some Varathane wood stain in Kona took the edge off the brightness of the white ceiling paint. And a few coats of Varathane oil-based polyurethane in a satin finish give the tabletop the protection it needs.

#16 Lyrical bar stools

Transformation cost: $19.47

I love it when a piece is commissioned; it brings about an outcome that often is not my first vision. These stool are a case in point. I initially envisaged these with a sports theme but when my client wanted musical instruments, and a nod to her husband’s Irish heritage, the idea of wood-burning was born. Beyond just a few characters I had never done wood-burning before but now I’m hooked!

I began by removing the finish from the tops of the stools to create
clean backdrops for the wood-burned images

Next I cleaned and sanded the legs. A previous sloppy paint job had left patches of white paint on the underside of the seat. Rather than try to remove them and then refinish the wood I decided to paint over them. I used painters tape to mark out geometric shapes then sanded those areas too. After several coats of Krylon Gloss Emerald Green spray paint (what better color for someone whose ancestors are from the “Emerald Isle”?) the legs were almost finished.

As a finishing touch (to make the stools more hard-wearing) I used vinyl tubing to cover the lower stretchers. I simply cut pieces the length of the stretcher, made a slit the full length of the piece then wrapped it around the painted wood.

Now I turned my attention to the seats. I created transfers by tracing printed images (embellished with some of my own artwork) onto parchment paper. Another nod to Ireland was adding the shamrock to the drum set image and the Celtic symbol for family to the guitar. Once the reverse side was also traced (so I wouldn’t transfer a mirror image) I transferred the designs onto the stool tops.

To finish the seats I applied 3 coats of oil-based, clear, gloss polyurethane for maximum protection.